Microsoft Azure
Deploy a Tillered node on Microsoft Azure from the marketplace
Azure is Microsoft's cloud computing platform allowing users to create and run Virtual Machines. We have a Tillered VM Image hosted in the Azure Marketplace allowing for a easy cloud node setup.
This setup is intended for use as a CEN (Cloud Exit Node).
Prerequisites
- Have an Microsoft Azure account and access to the Azure Console.
- Create an account on the Tillered Hub.
Setting Up a Tillered Node
- Log into Azure and navigate to Virtual Machines.
- Click Create and select Azure virtual machine.
- In the Image field, click See all images to open the marketplace and search for
Tillered. Select the Tillered Virtual Machine image.

- Select a VM size with at least 2 vCPUs and 4 GB RAM. The
Standard B2sis a good starting point. - Configure your authentication (SSH public key or password) and any other settings, then review the summary and click Create.
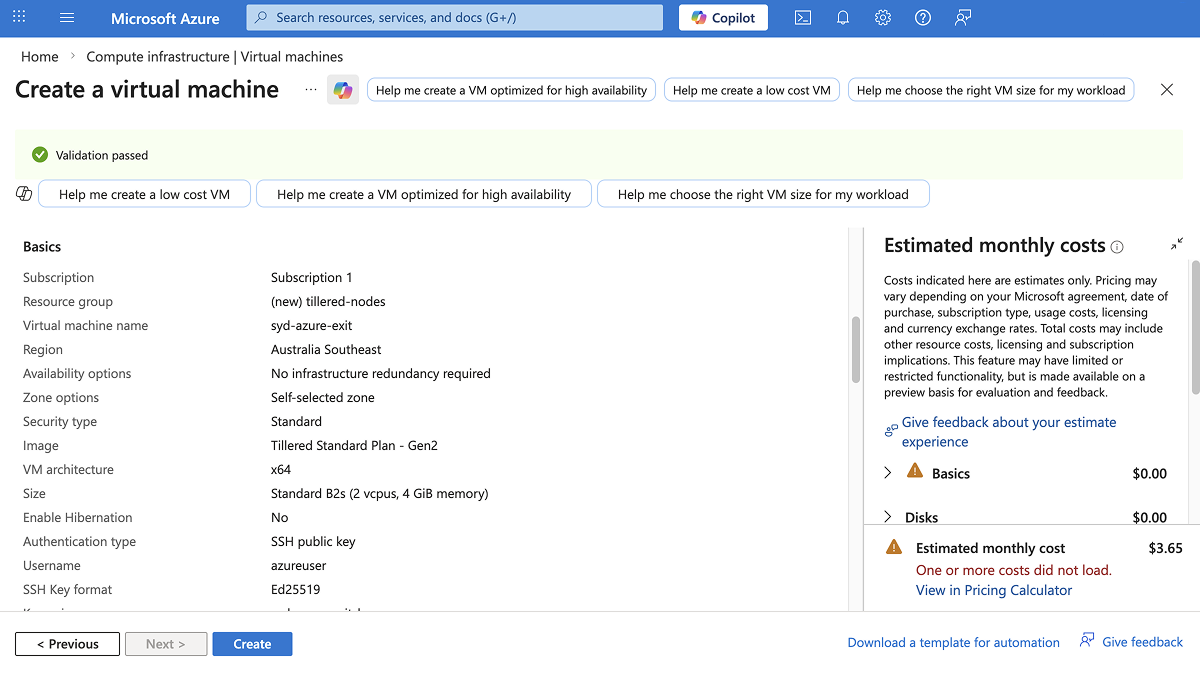
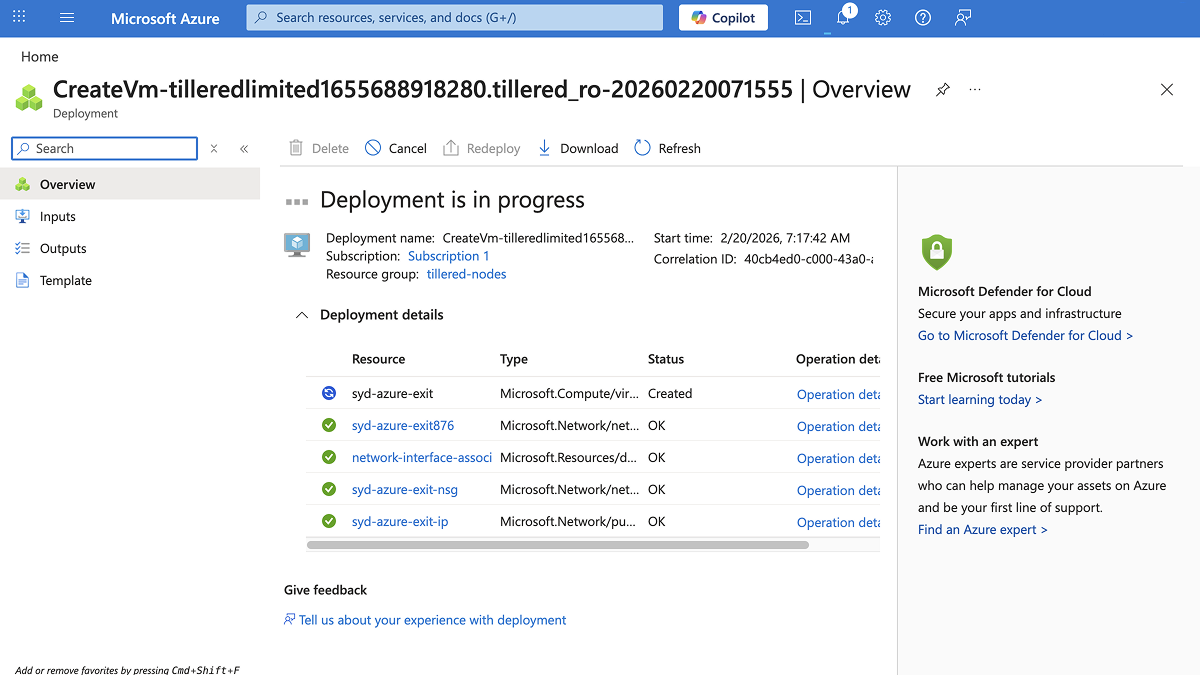
- The deployment may take 10-12 minutes. Azure will show the progress on the deployment overview page.
- Once the deployment completes, go to the VM overview page and note the Computer name and Private IP address. You will need both when registering the node.
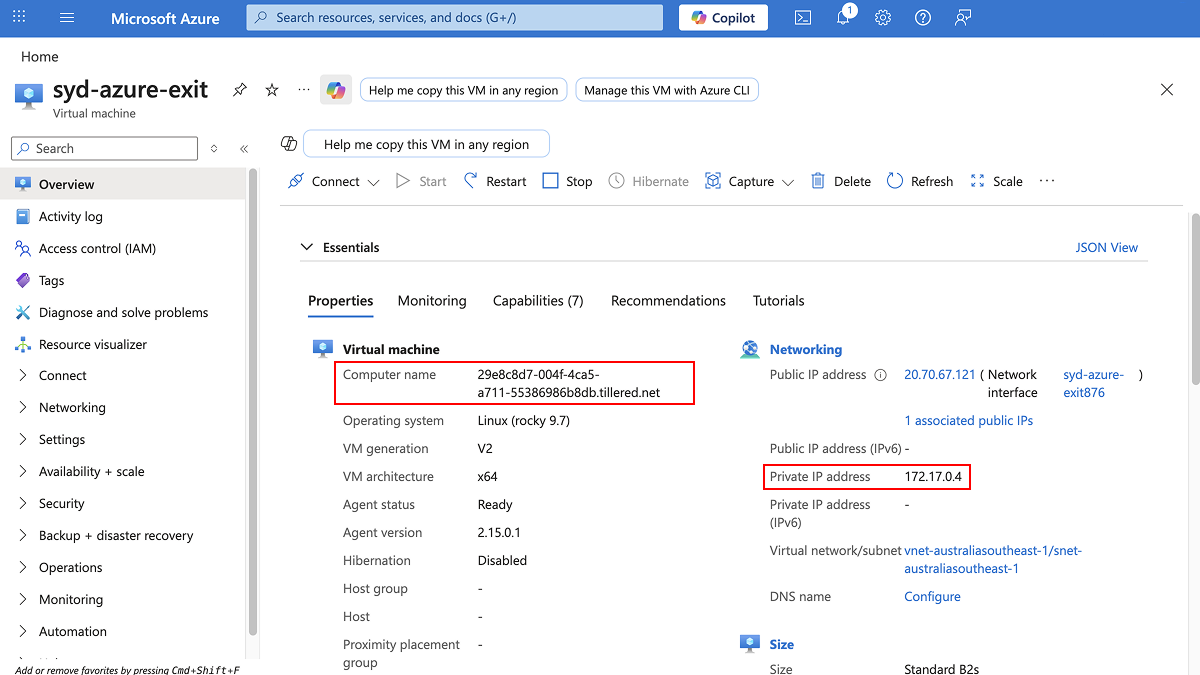
The VM computer name will change after it has successfully deployed. This new value will be used when adding the node to your Tillered account.
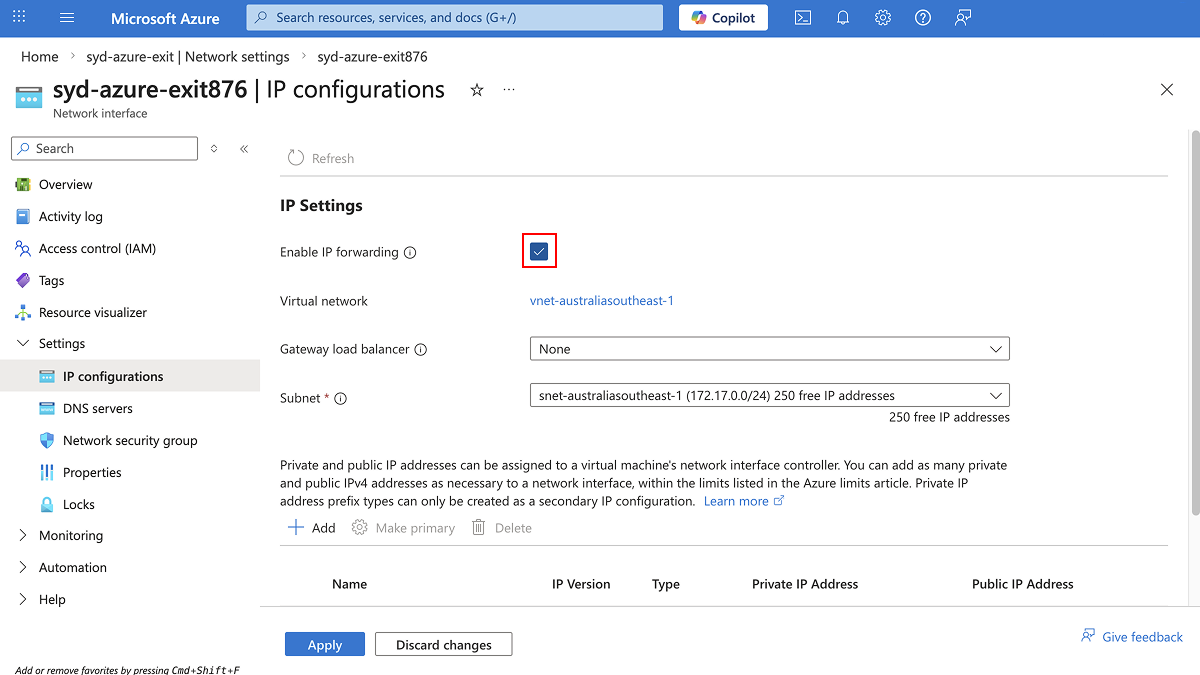
Enable IP Forwarding
Tillered CEN nodes forward network traffic that is not addressed to the VM itself. By default, Azure drops any traffic where the VM is not the source or destination. You must enable IP forwarding on the VM's network interface so tunneled traffic is not silently dropped.
Using the Portal
- Go to your Tillered VM, select Networking > Network settings, and click the network interface name.
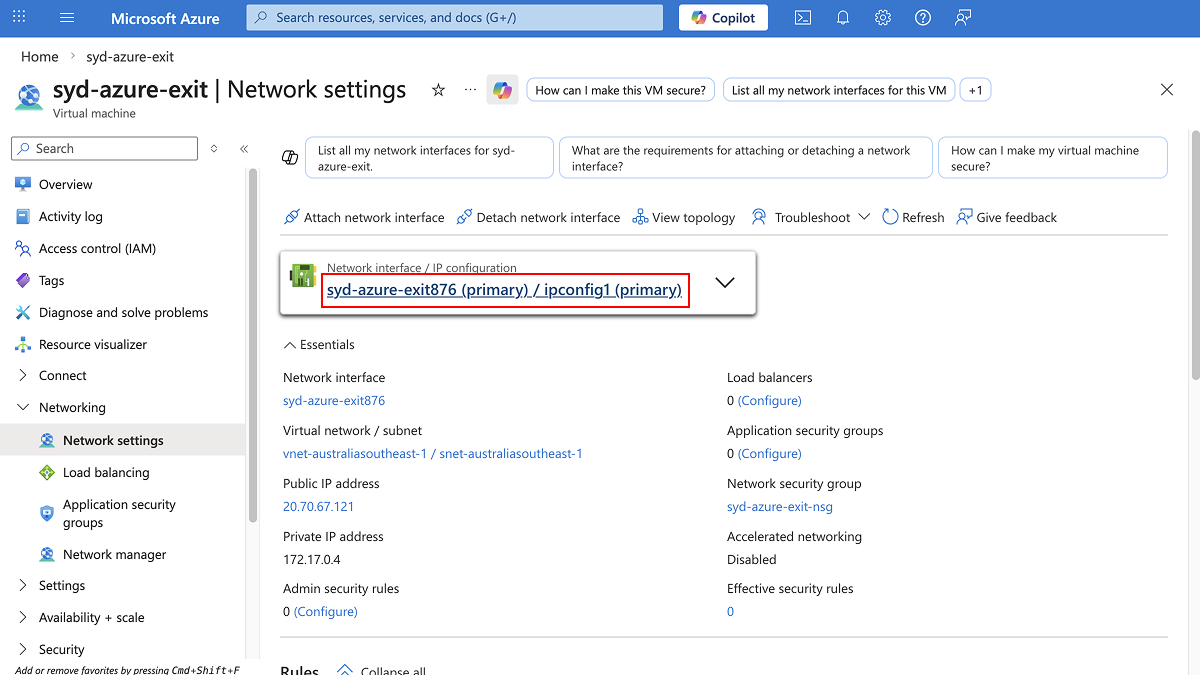
- Under Settings, select IP configurations.
- Set Enable IP forwarding to Enabled and click Apply.
Using the CLI
az network nic update \
    --name <nic-name> \
    --resource-group <resource-group> \
    --ip-forwarding true
Replace <nic-name> and <resource-group> with the NIC name and resource group of your deployed VM.
Register Your Node
After deploying the VM and enabling IP forwarding, register the node with your Tillered account. You will need the Computer name and Private IP address from the VM overview page.
The node will configure itself to the virtual Tillered network. It may reboot during this phase, but it will be ready to use when the Tillered Hub node page shows the node as Provisioned.