Amazon AWS
Deploy a Tillered node on Amazon AWS using the official AMI
AWS is Amazon's cloud computing platform allowing users to create and run server instances and other services. We have a Tillered VM Image hosted as a Community AMI which allows for easy cloud node setup, where you can select your instance type of choice depending on your use case.
This setup is intended for use as a CEN (Cloud Exit Node).
Prerequisites
- Have an AWS account and access to the AWS Management Console.
- Create an account on the Tillered Hub.
Setting Up a Tillered Node
- Log into the AWS Management Console.
- Navigate to EC2 and click Launch Instance.
- Provide a name for the instance.
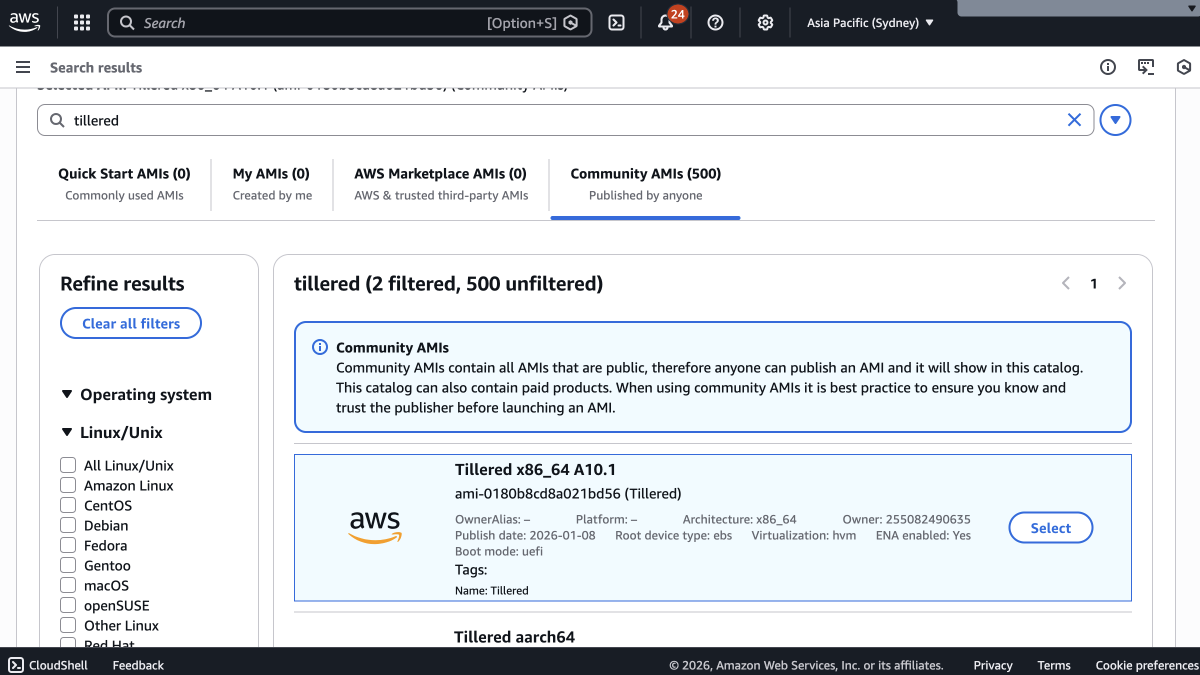
- In the Application and OS Images (AMI) section, select the Community AMIs tab and search for
tillered. Select the Tillered x86_64 AMI.
- Select an instance type with at minimum 4 GB of RAM. The
c6in.large,c6in.xlarge, andc6in.2xlargevariants have been found to be the most performant for Tillered workloads.
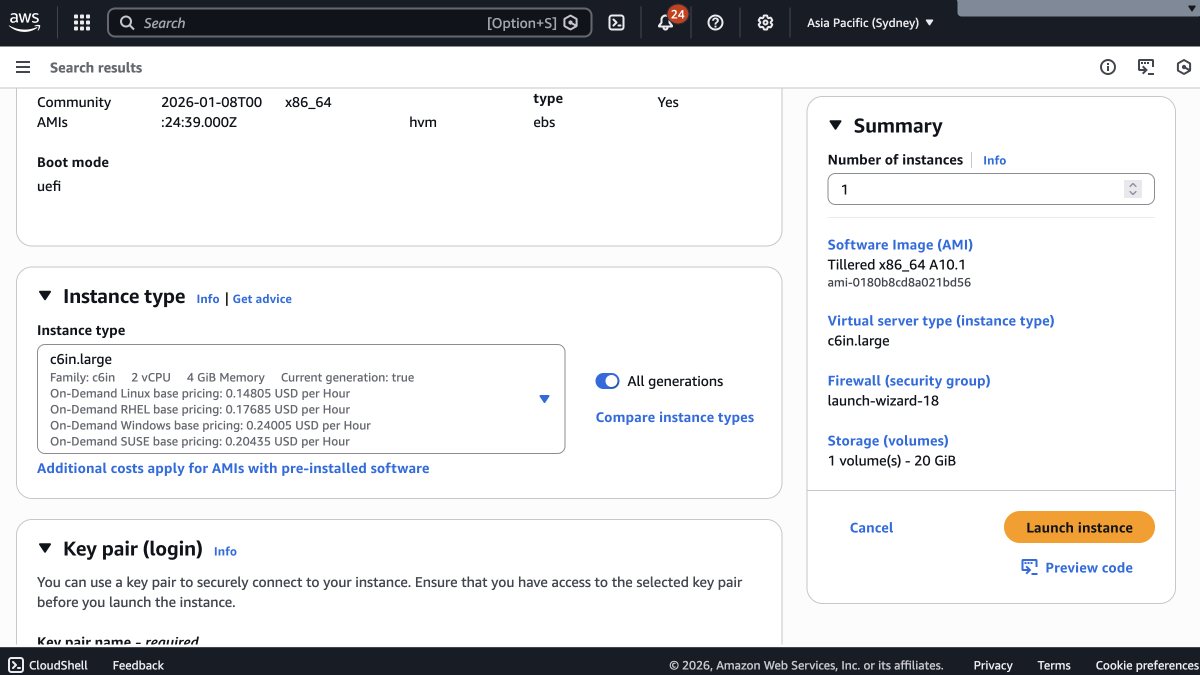
Recommended instances:
| Speed Upper Bound | Instance Type |
|---|---|
10 Gbit | c6in.xlarge or c6in.2xlarge |
5 Gbit | c6in.large |
- Configure your key pair (or proceed without one if not needed).
- Review the configuration and click Launch Instance.
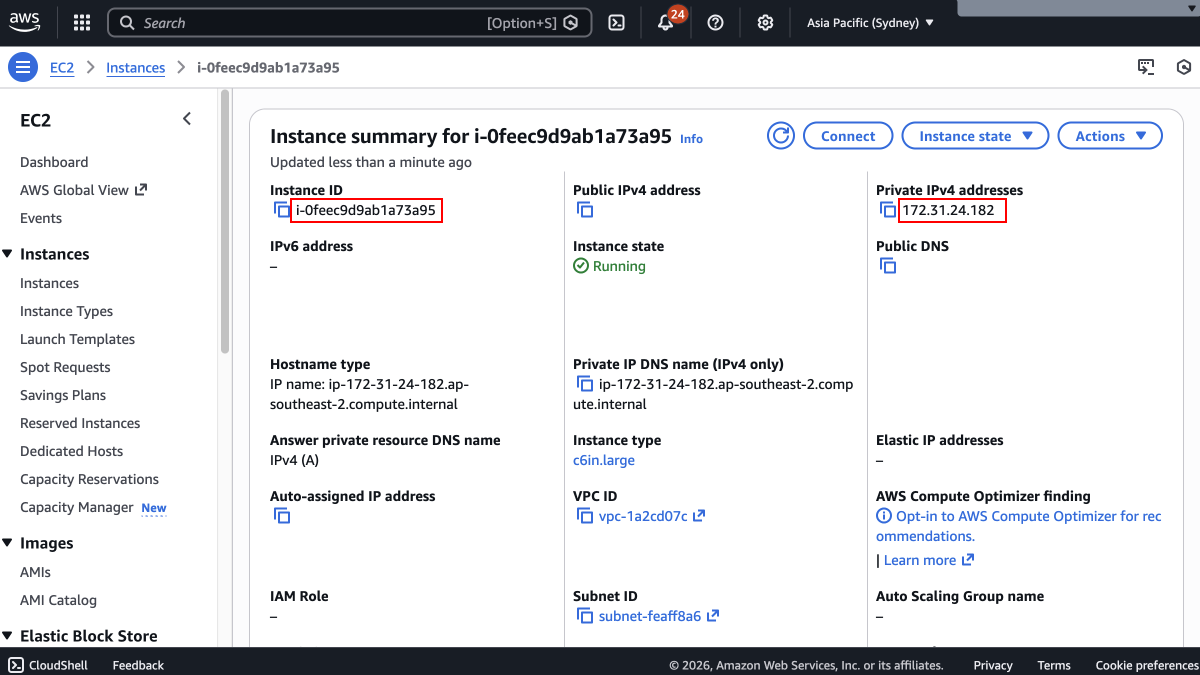
- From the instance summary page, note the Instance ID and Private IPv4 address. You will need both when registering the node in the Tillered Hub.
AMI IDs by region (for CLI users)
| Region | AMI ID |
|---|---|
| ap-south-2 | ami-0cf3d60cab9afb684 |
| ap-south-1 | ami-07ae407797358ddc5 |
| ap-east-1 | ami-02fc7aafb931816b1 |
| ap-northeast-1 | ami-0bd2f8f9482d52568 |
| ap-northeast-2 | ami-0faa1b4fc2c7c4845 |
| ap-northeast-3 | ami-00cd8b37daf4d85dc |
| ap-southeast-1 | ami-015c084a04ab30c05 |
| ap-southeast-2 | ami-0bace007632e62752 |
| ap-southeast-6 | ami-0a889543f26cb5a6d |
| ca-central-1 | ami-05deadb6cadda7fdd |
| eu-central-1 | ami-0e0d2c2a5afbab88f |
| eu-north-1 | ami-007e7040abf4ef6d8 |
| eu-west-1 | ami-040f6180ab5367856 |
| eu-west-2 | ami-06493a24c7415fff4 |
| eu-west-3 | ami-0485eea320a827691 |
| me-central-1 | ami-06471a1da614579f4 |
| me-south-1 | ami-02d6d5b54c1f03da9 |
| sa-east-1 | ami-0ddca0a3d5c1f7525 |
| us-east-1 | ami-07af27f07baa993a4 |
| us-east-2 | ami-098467e898f1fe252 |
| us-west-1 | ami-0732bc47c39082c5c |
| us-west-2 | ami-025d674645d042f5a |
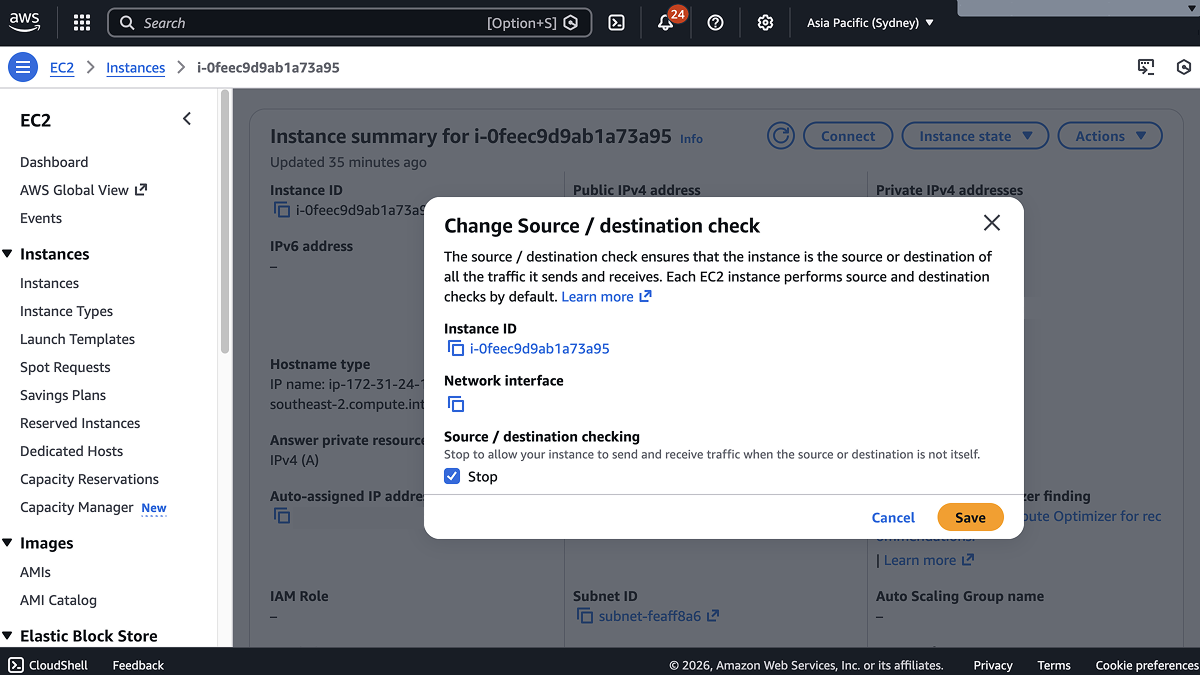
Disable Source/Destination Check
Tillered CEN nodes forward network traffic that is not addressed to the instance itself. By default, AWS drops any traffic where the EC2 instance is not the source or destination. You must disable this check so tunneled traffic is not silently dropped.
Using the Console
- Go to EC2 > Instances and select your Tillered instance.
- Choose Actions > Networking > Change source/destination check.
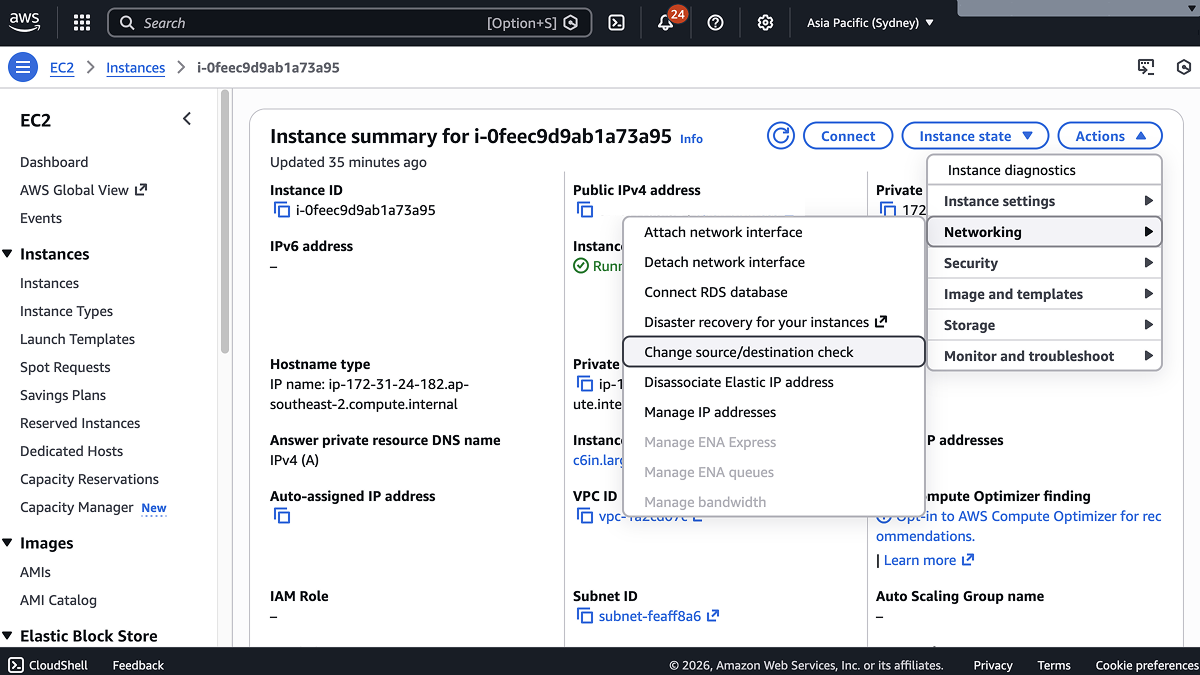
- In the modal, select Stop and click Save.
Using the CLI
aws ec2 modify-instance-attribute \
    --instance-id i-0123456789abcdef0 \
    --no-source-dest-check
Replace i-0123456789abcdef0 with your instance ID.
This setting can only be changed after the instance has been launched. It cannot be configured at instance creation time.
Register Your Node
After deploying the instance and disabling source/destination check, register the node with your Tillered account. You will need the Instance ID and Private IPv4 address from the instance summary page.
The node will configure itself to the virtual Tillered network. It may reboot during this phase, but it will be ready to use when the Tillered Hub node page shows the node as Provisioned.