Appearance
Get Started with Tillered
This guide will walk you through setting up Tillered for a specific network configuration: using a Tillered Entry Node (TEN) on Proxmox, a pfSense firewall, and an Azure Cloud Exit Node. While this guide uses these platforms as an example, the routing and Tillered Hub setup steps are applicable to any platform.
Overview
This example setup includes:
- Tillered Entry Node (TEN): Hosted on Proxmox
- Cloud Exit Node (CEN): Deployed on Microsoft Azure
- Firewall: Managed by a pfSense VM
The guide covers account creation, network setup, node configuration, and routing rules. If you're using different platforms, you can still follow the Tillered Hub parts of the guide.
Step 1: Create a Tillered Hub Account
Sign Up: Visit Tillered Hub and create an account.
Verify your Email: Depending on the authentication system, your account might already be verified. If not, check your email for a verification link.
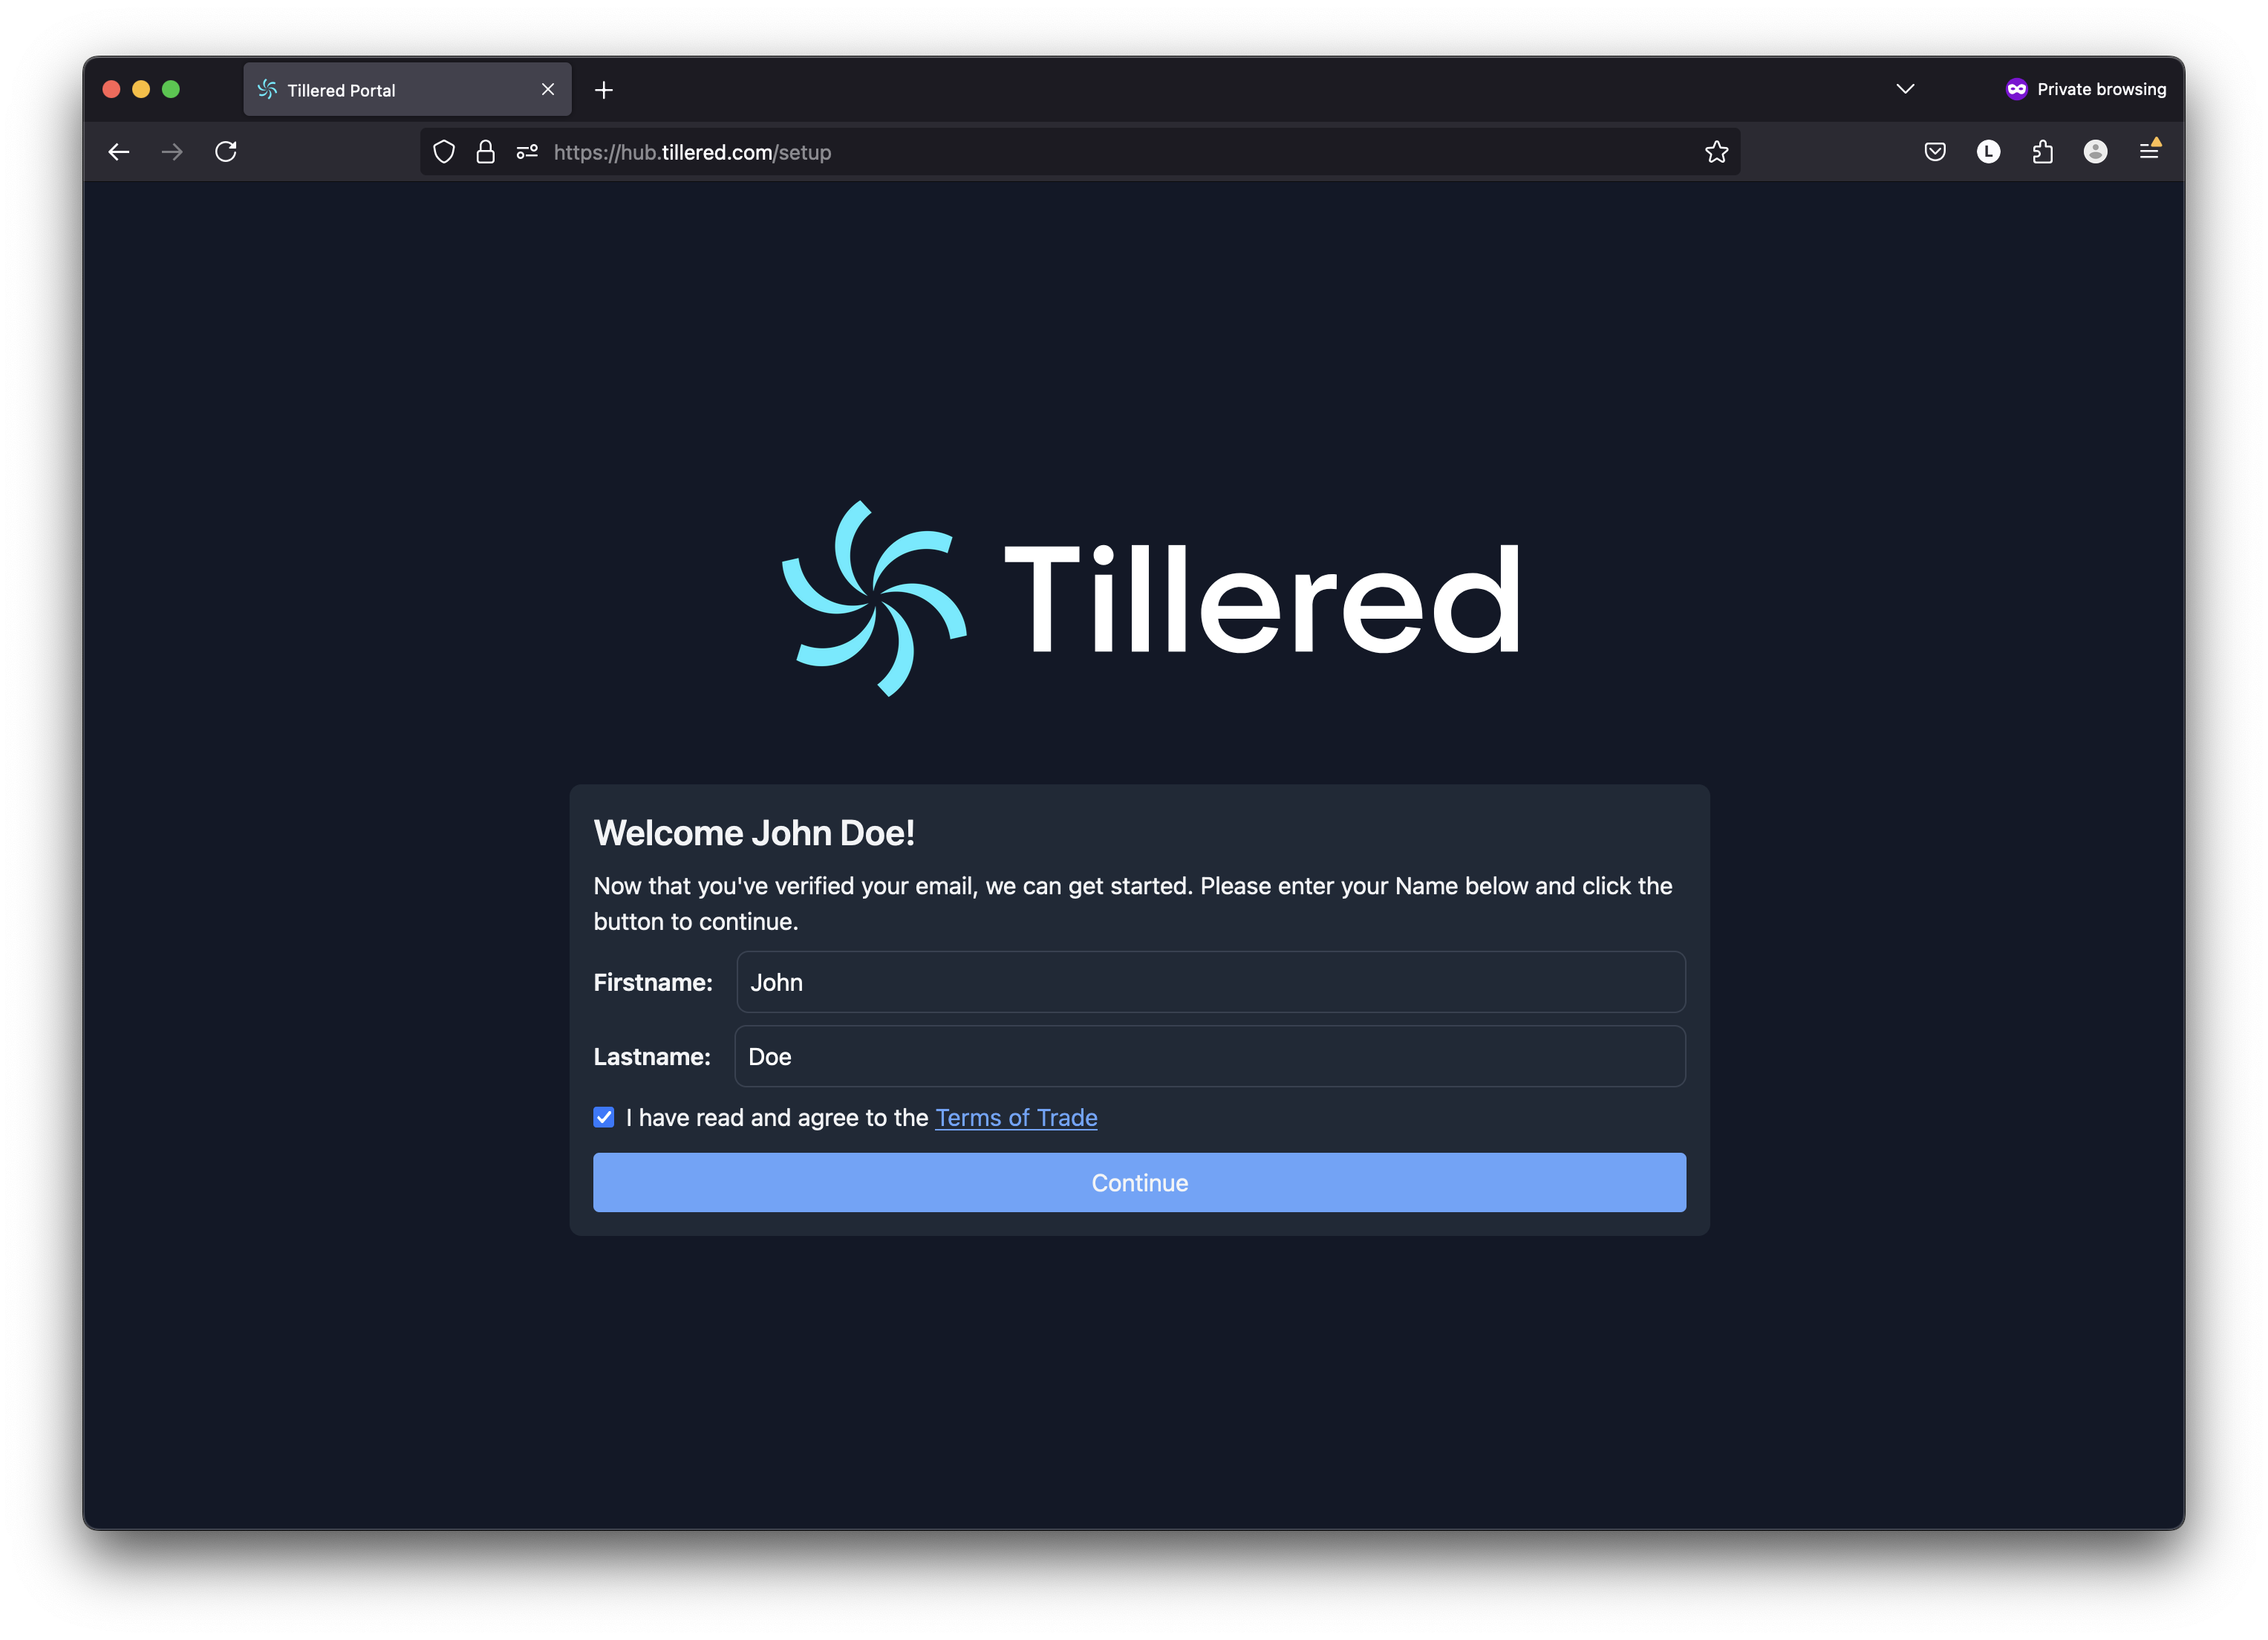
Set your Name: After verification, you will be prompted to set your name. This is for personalisation and can help with support identification.
Create an Organisation:
- Go to the Organisation tab.
- Click
+ Add Orgto open a modal.
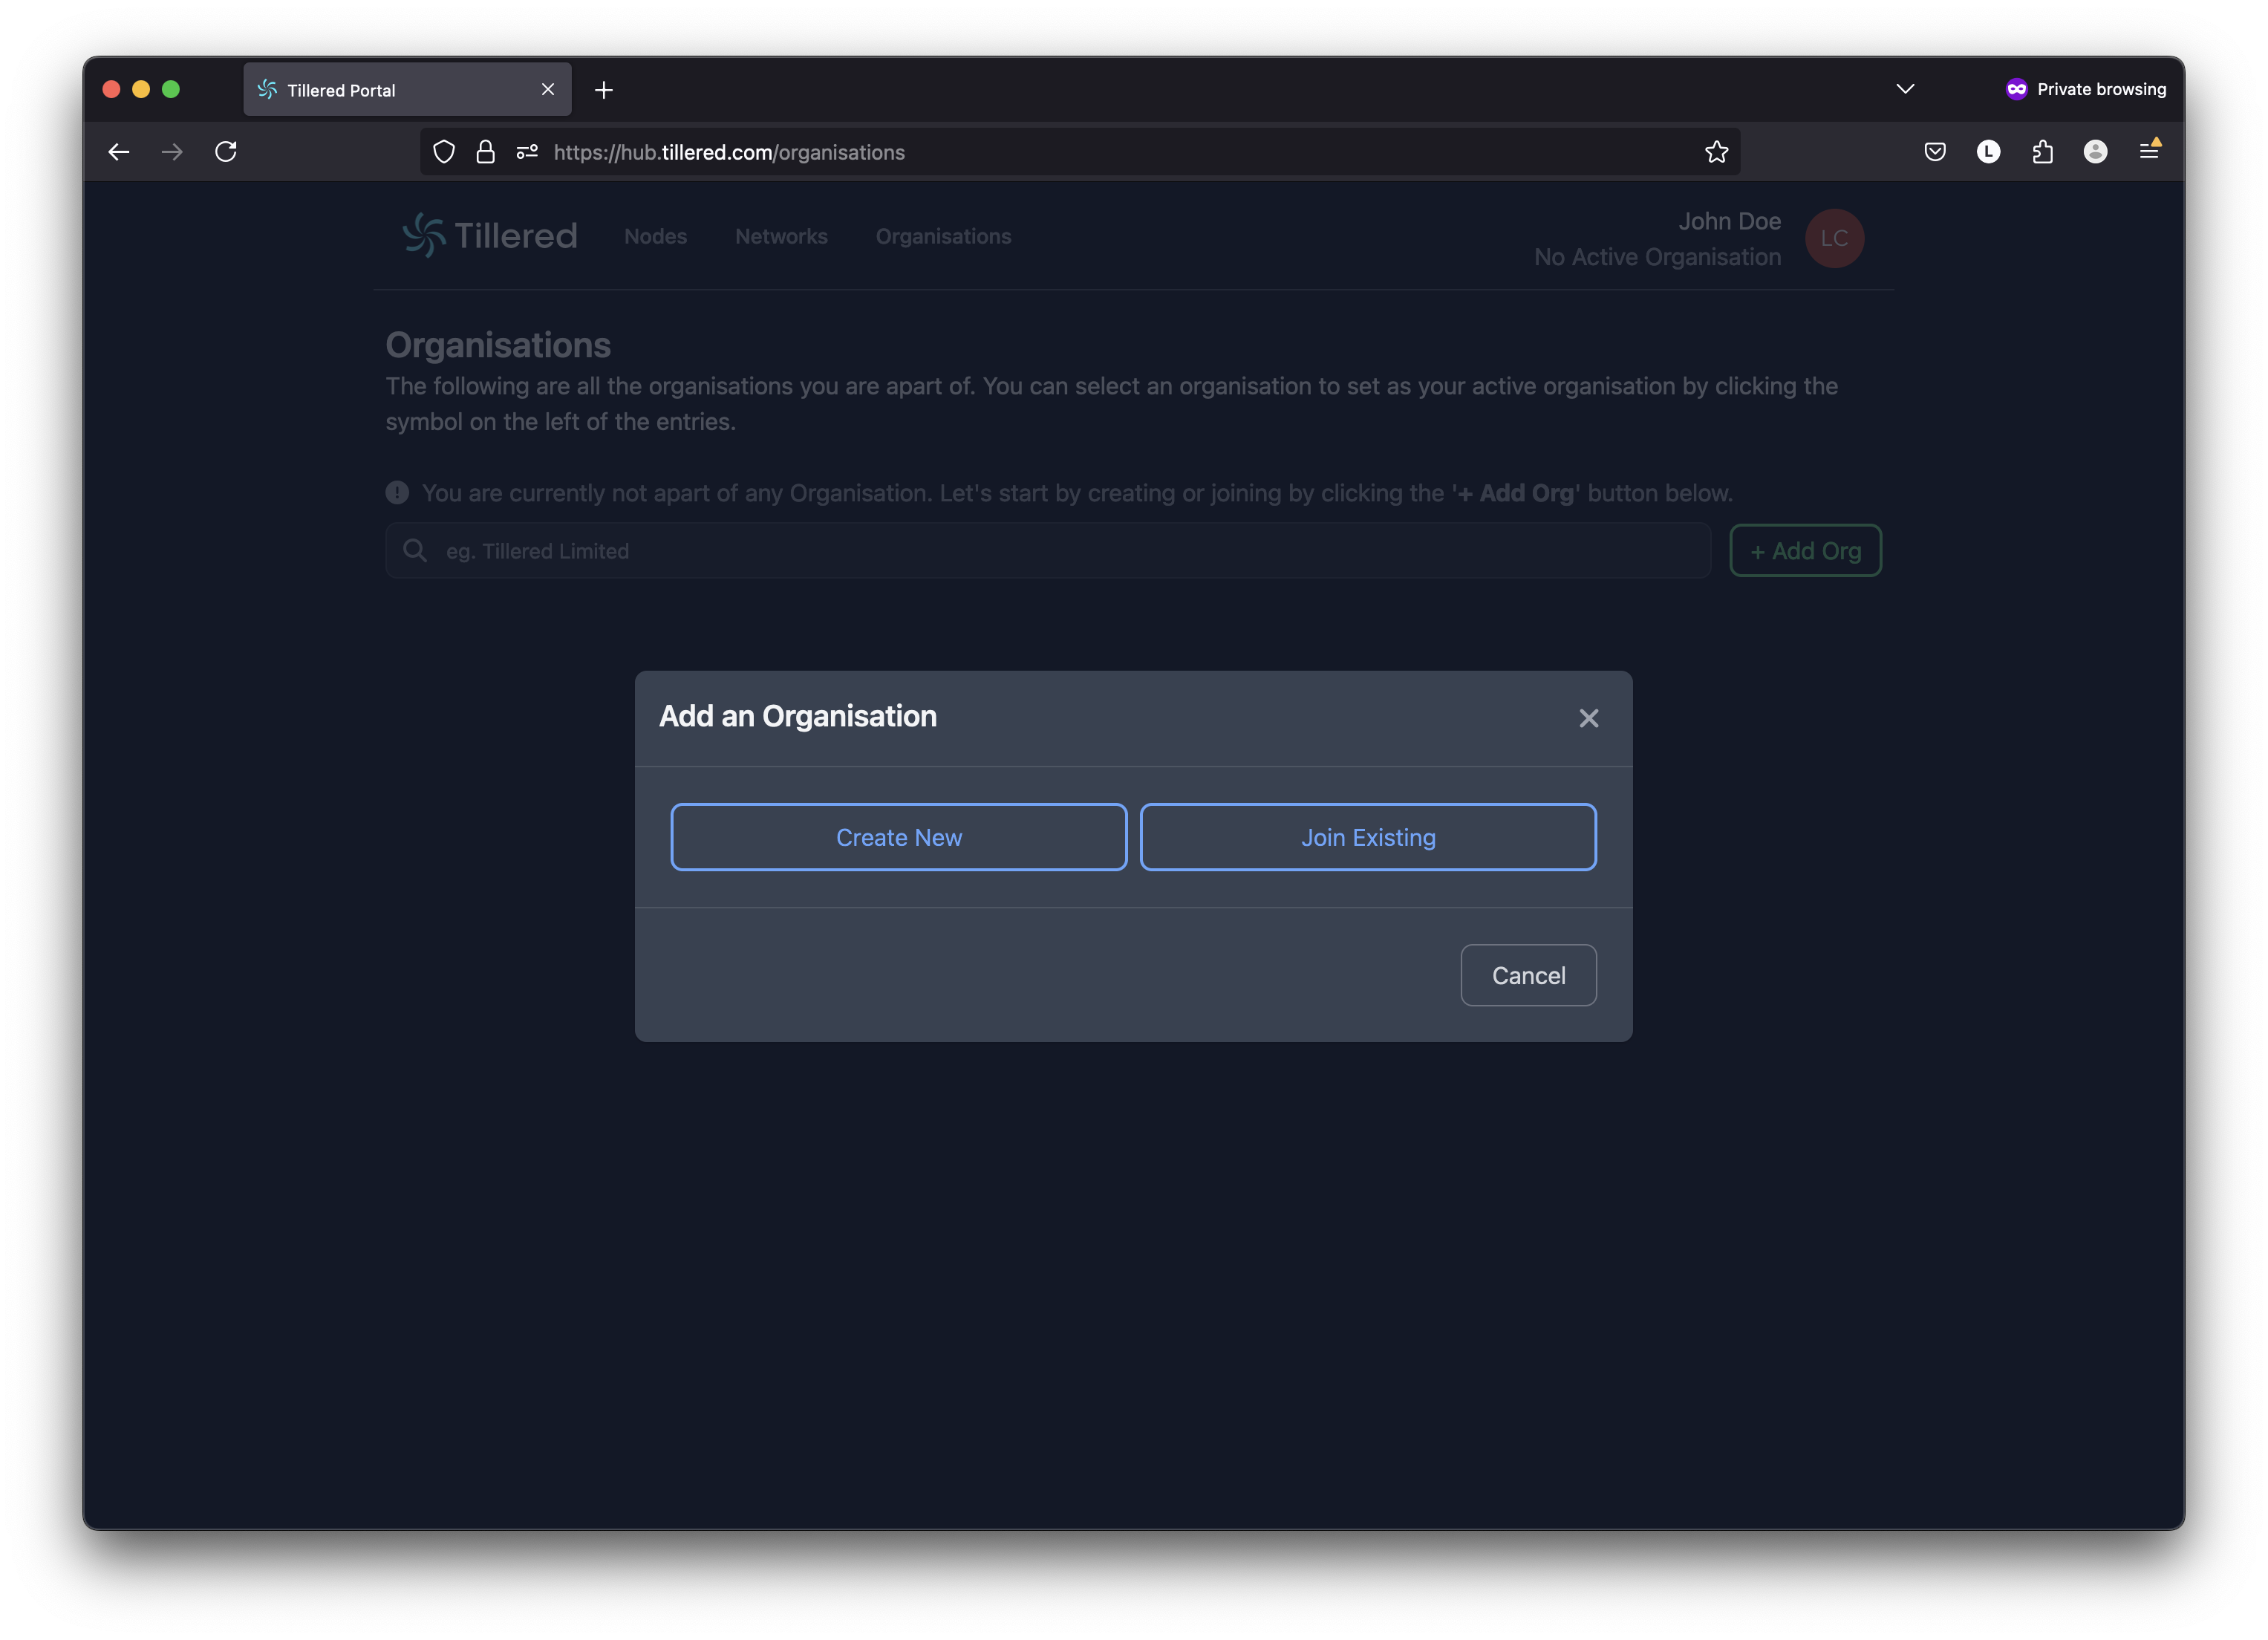
- Click
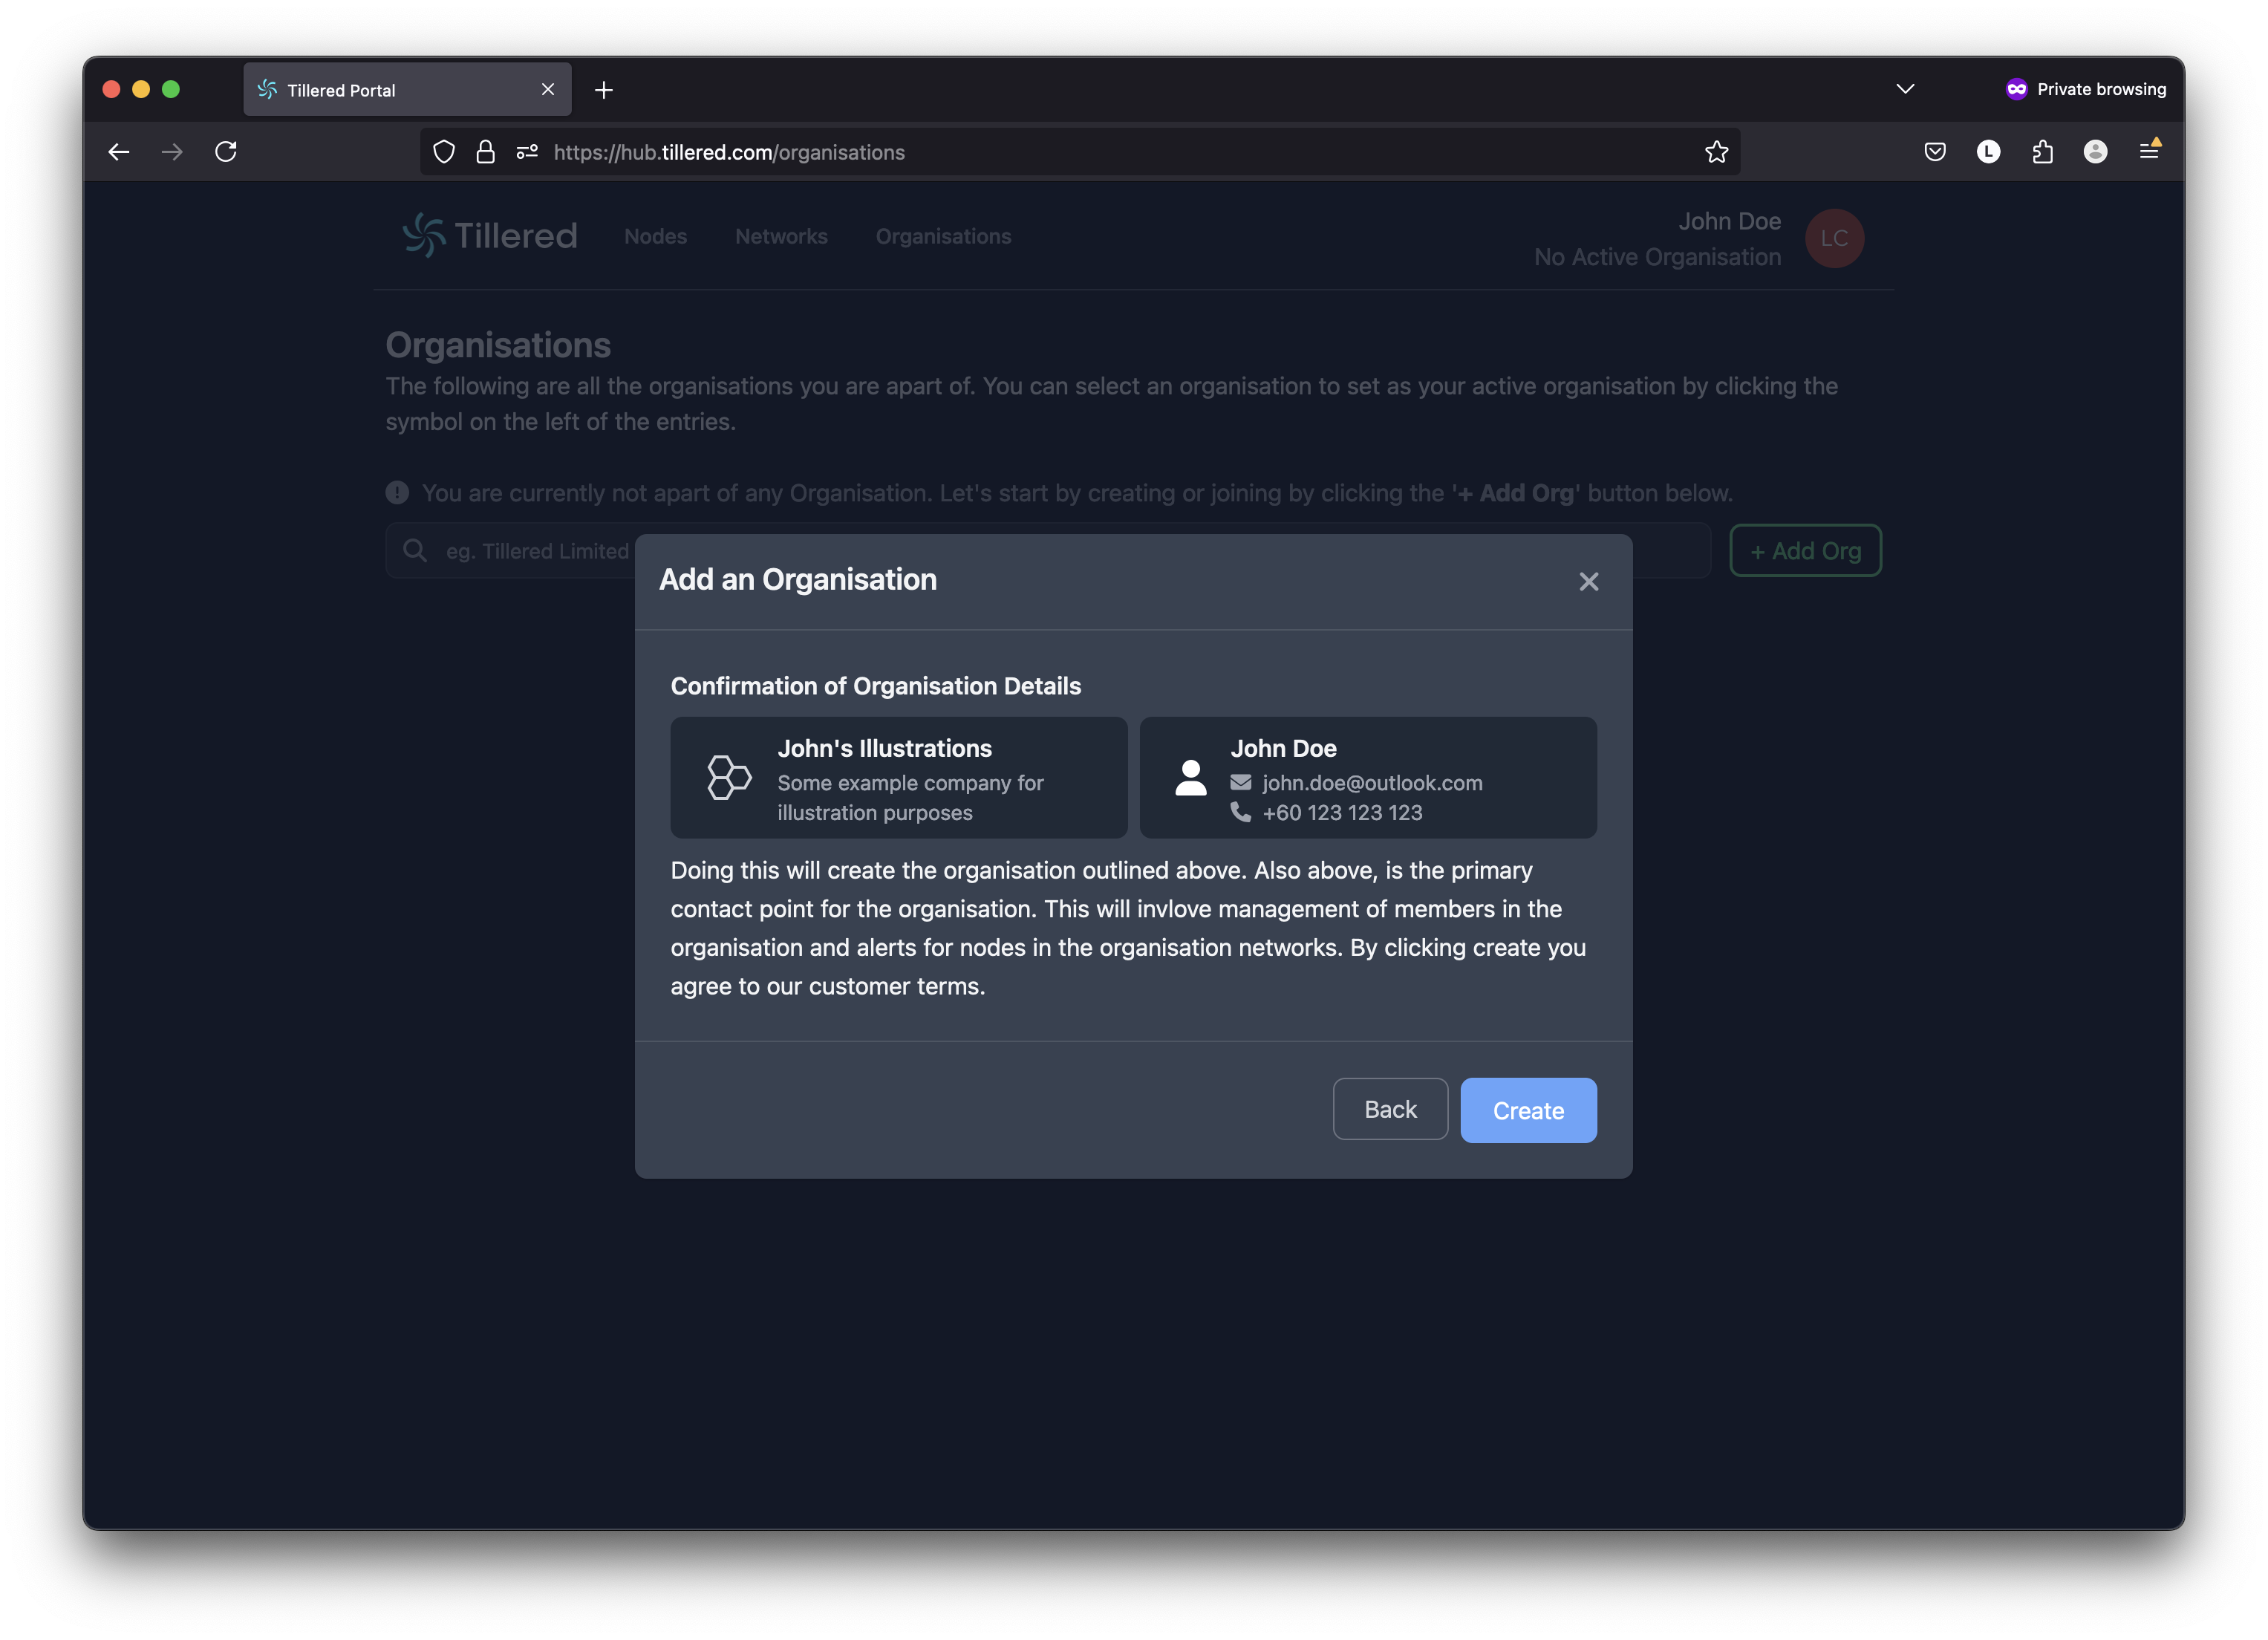
Create Newand complete the 4-step process to create your organisation. - Confirm your details and click
Create.
INFO
Your account is now fully set up. You can invite others to join your organisation or give them the organisation UUID to request to join via the Join Existing option in the + Add Org modal.
Step 2: Create a Tillered Entry Node
We'll create a Tillered Entry Node (TEN) using the Proxmox platform. You can follow theProxmox Node Setup Documentation or the steps below.
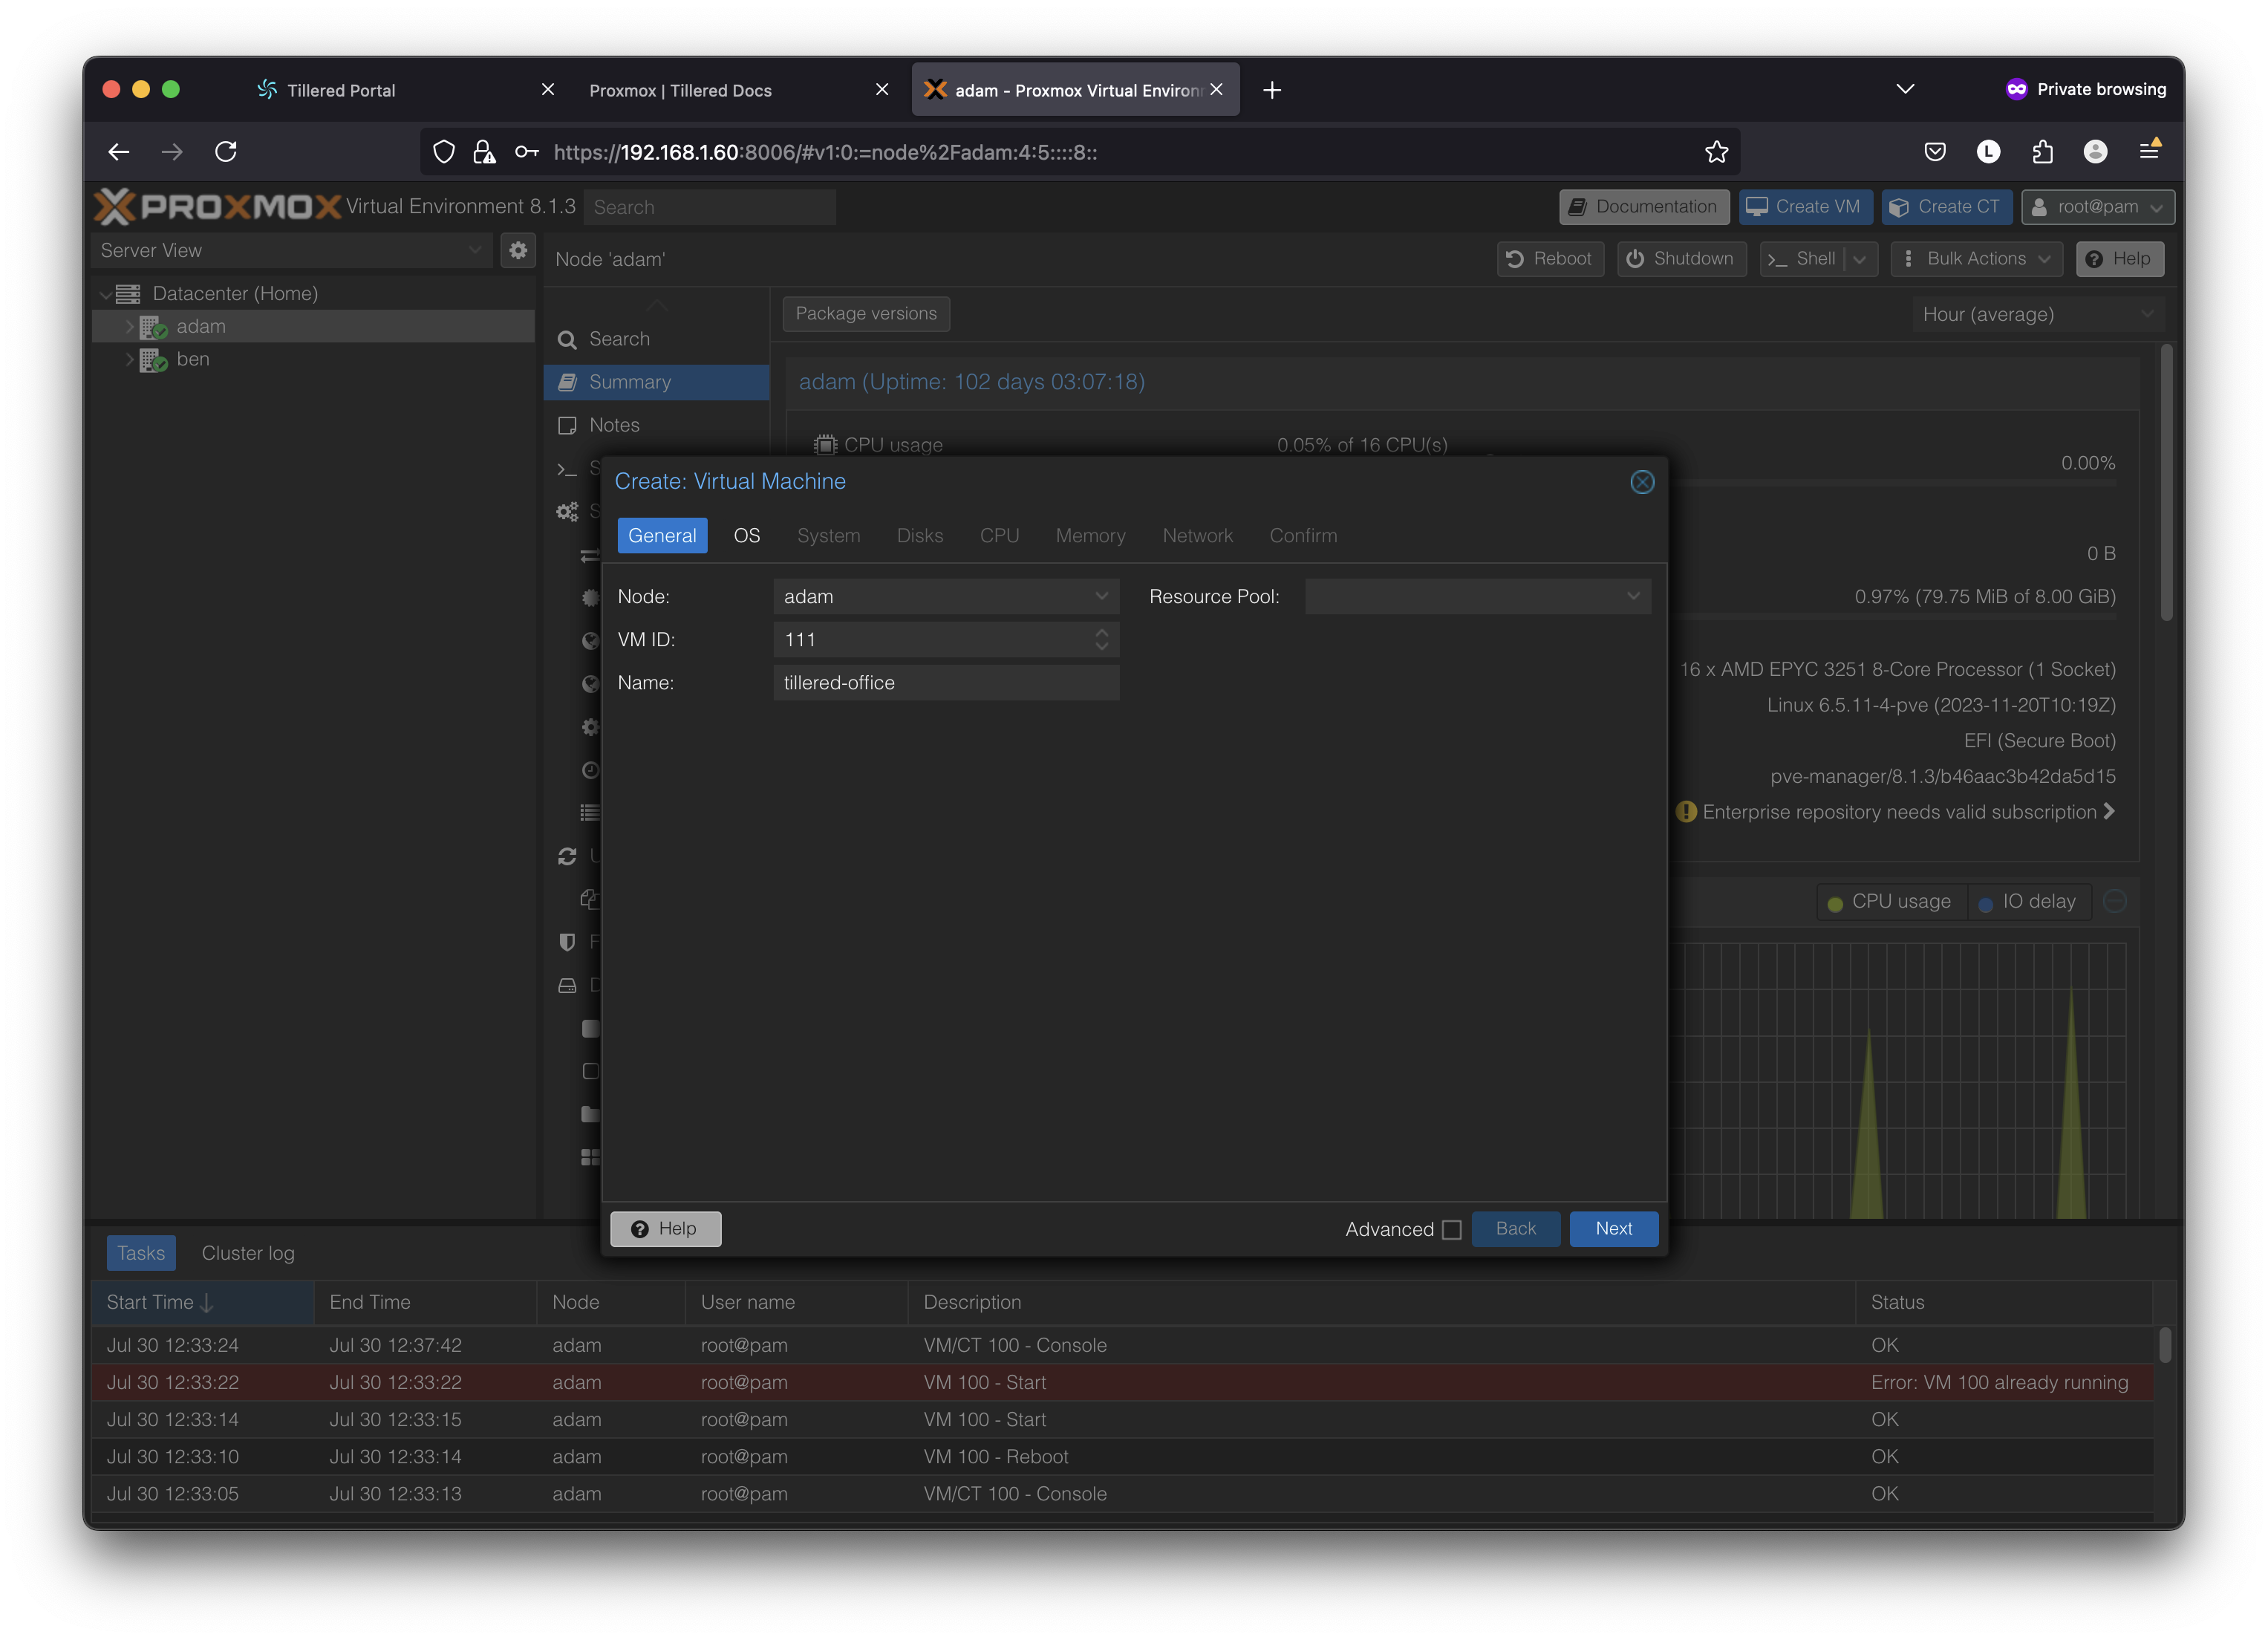
Create a New VM in Proxmox:
- Open the Proxmox web interface and create a new VM.
- Configure the VM:
- OS Tab: Select
Do not use any media(as you will import a disk).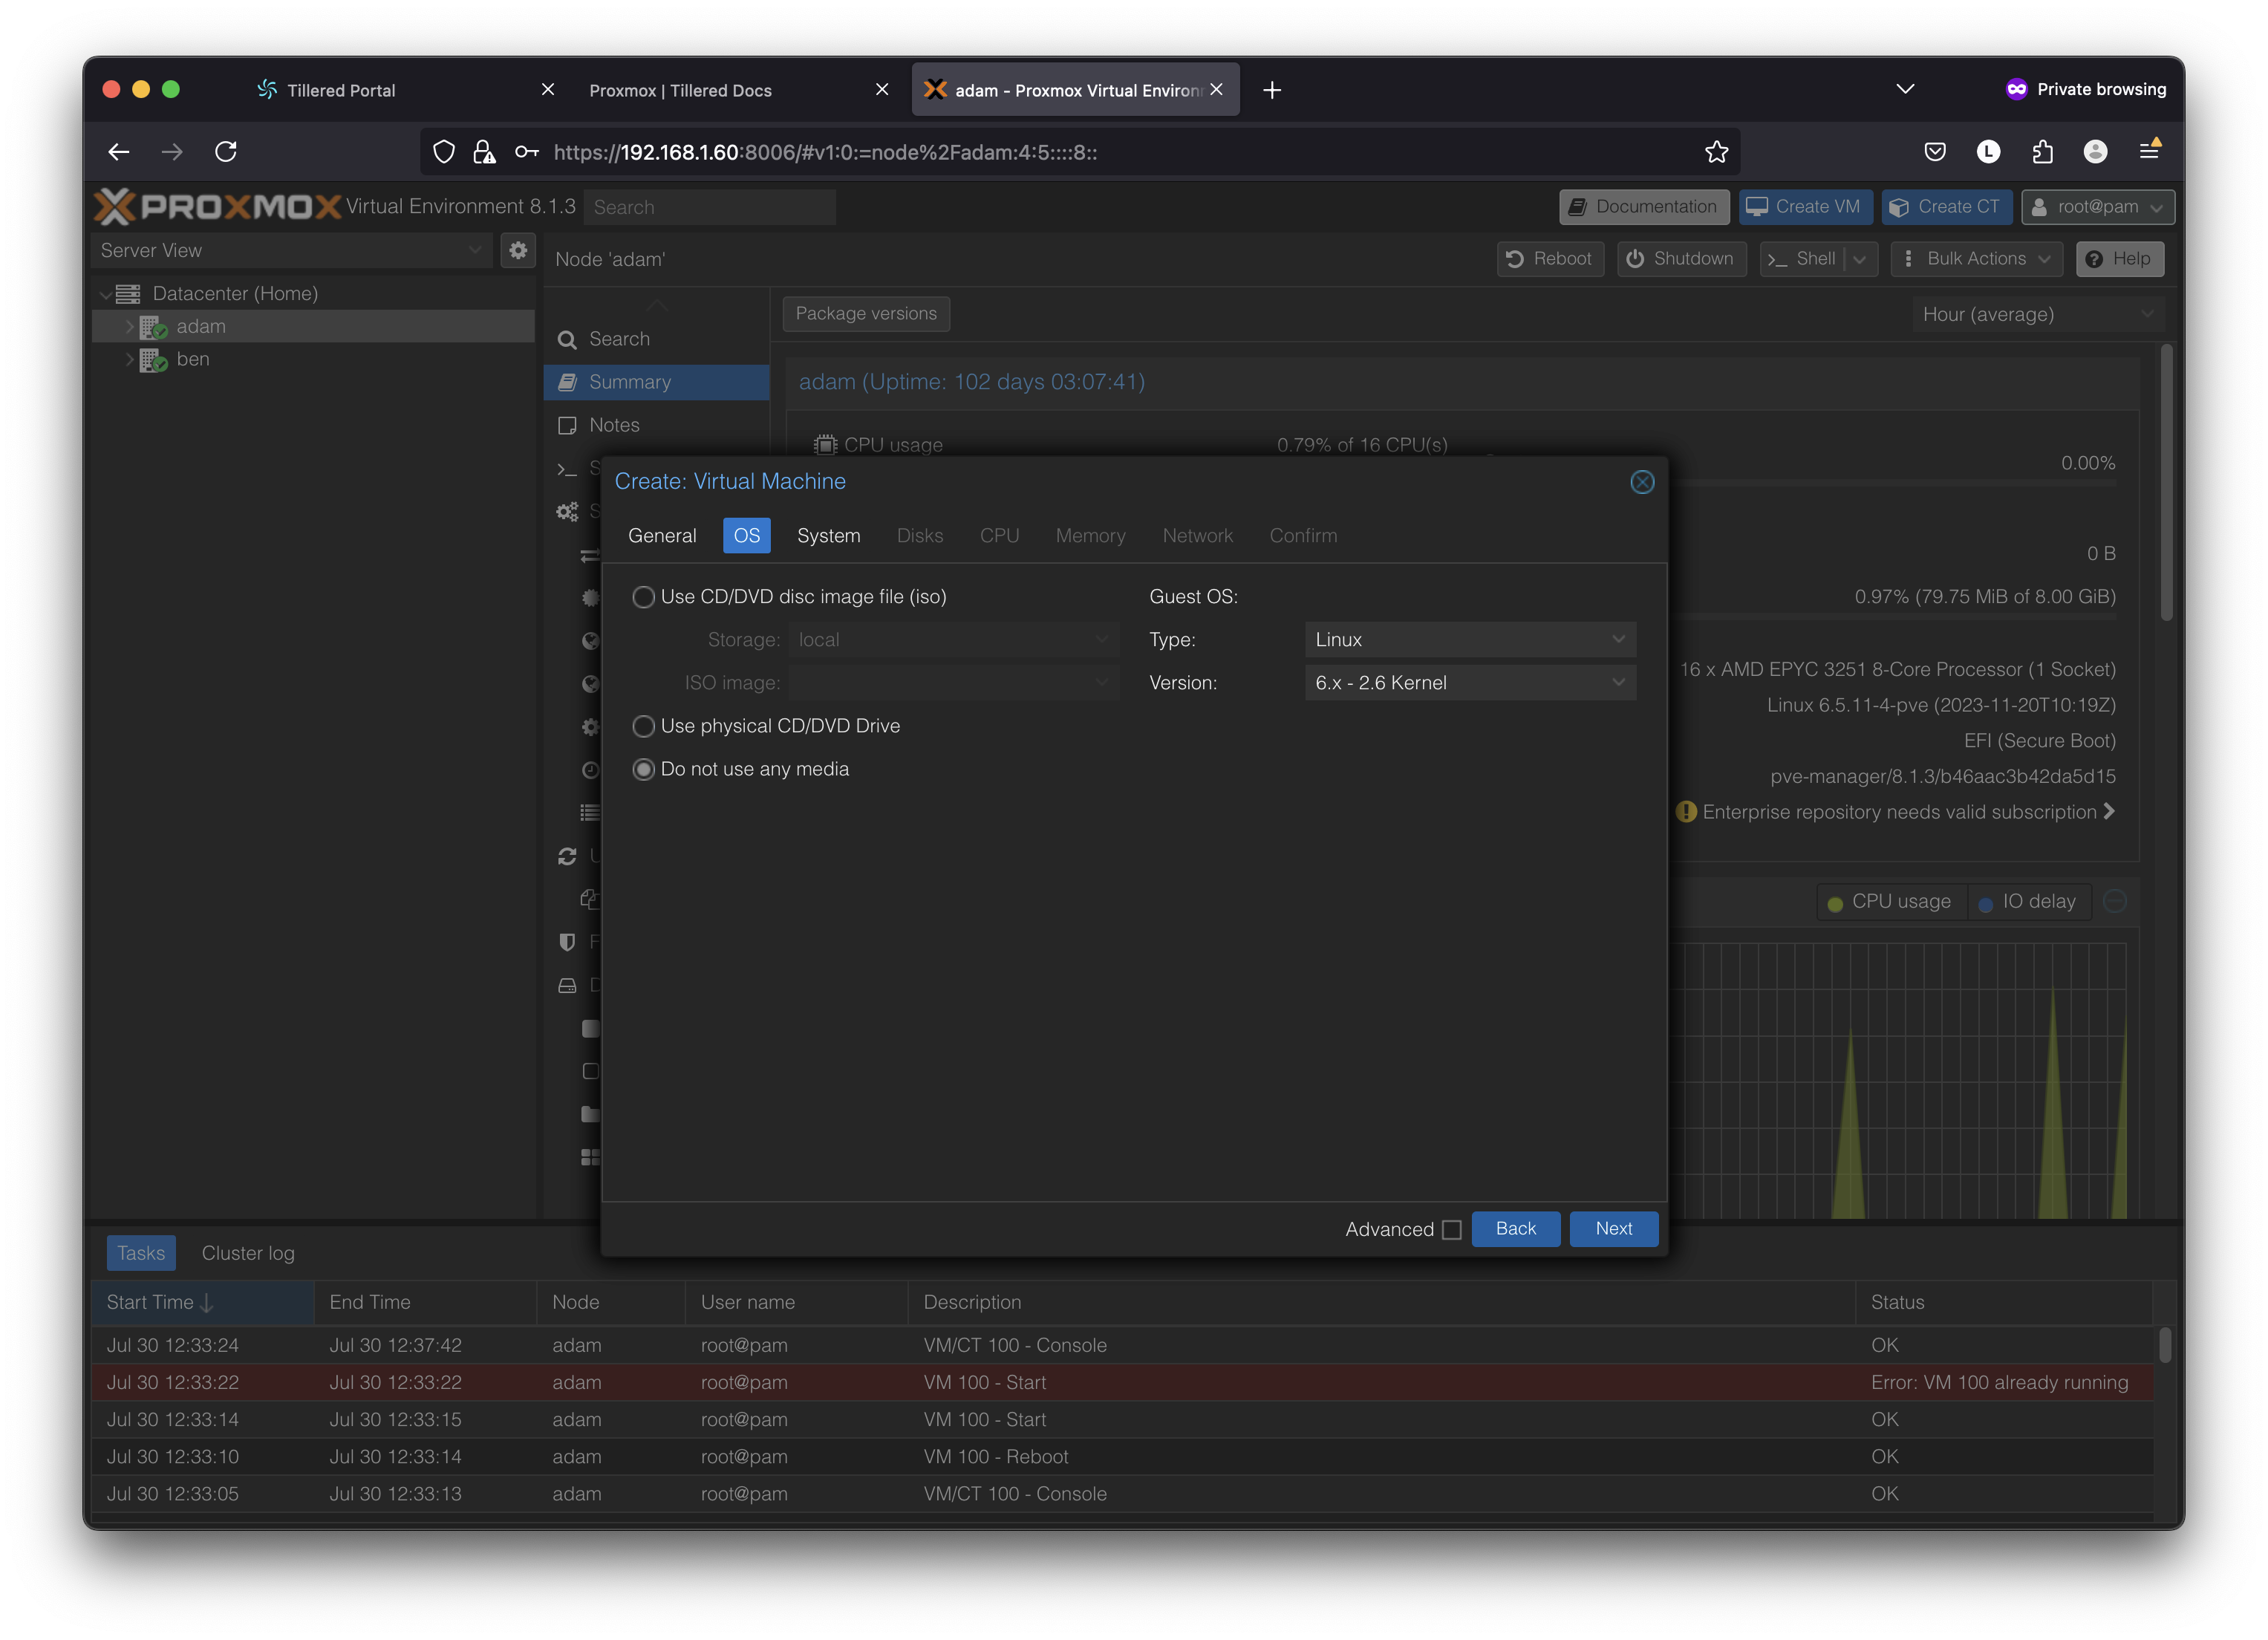
- System Tab: Set Machine to
q35, BIOS toOVMF (UEFI), and enable Add TPM withlocal-lvm.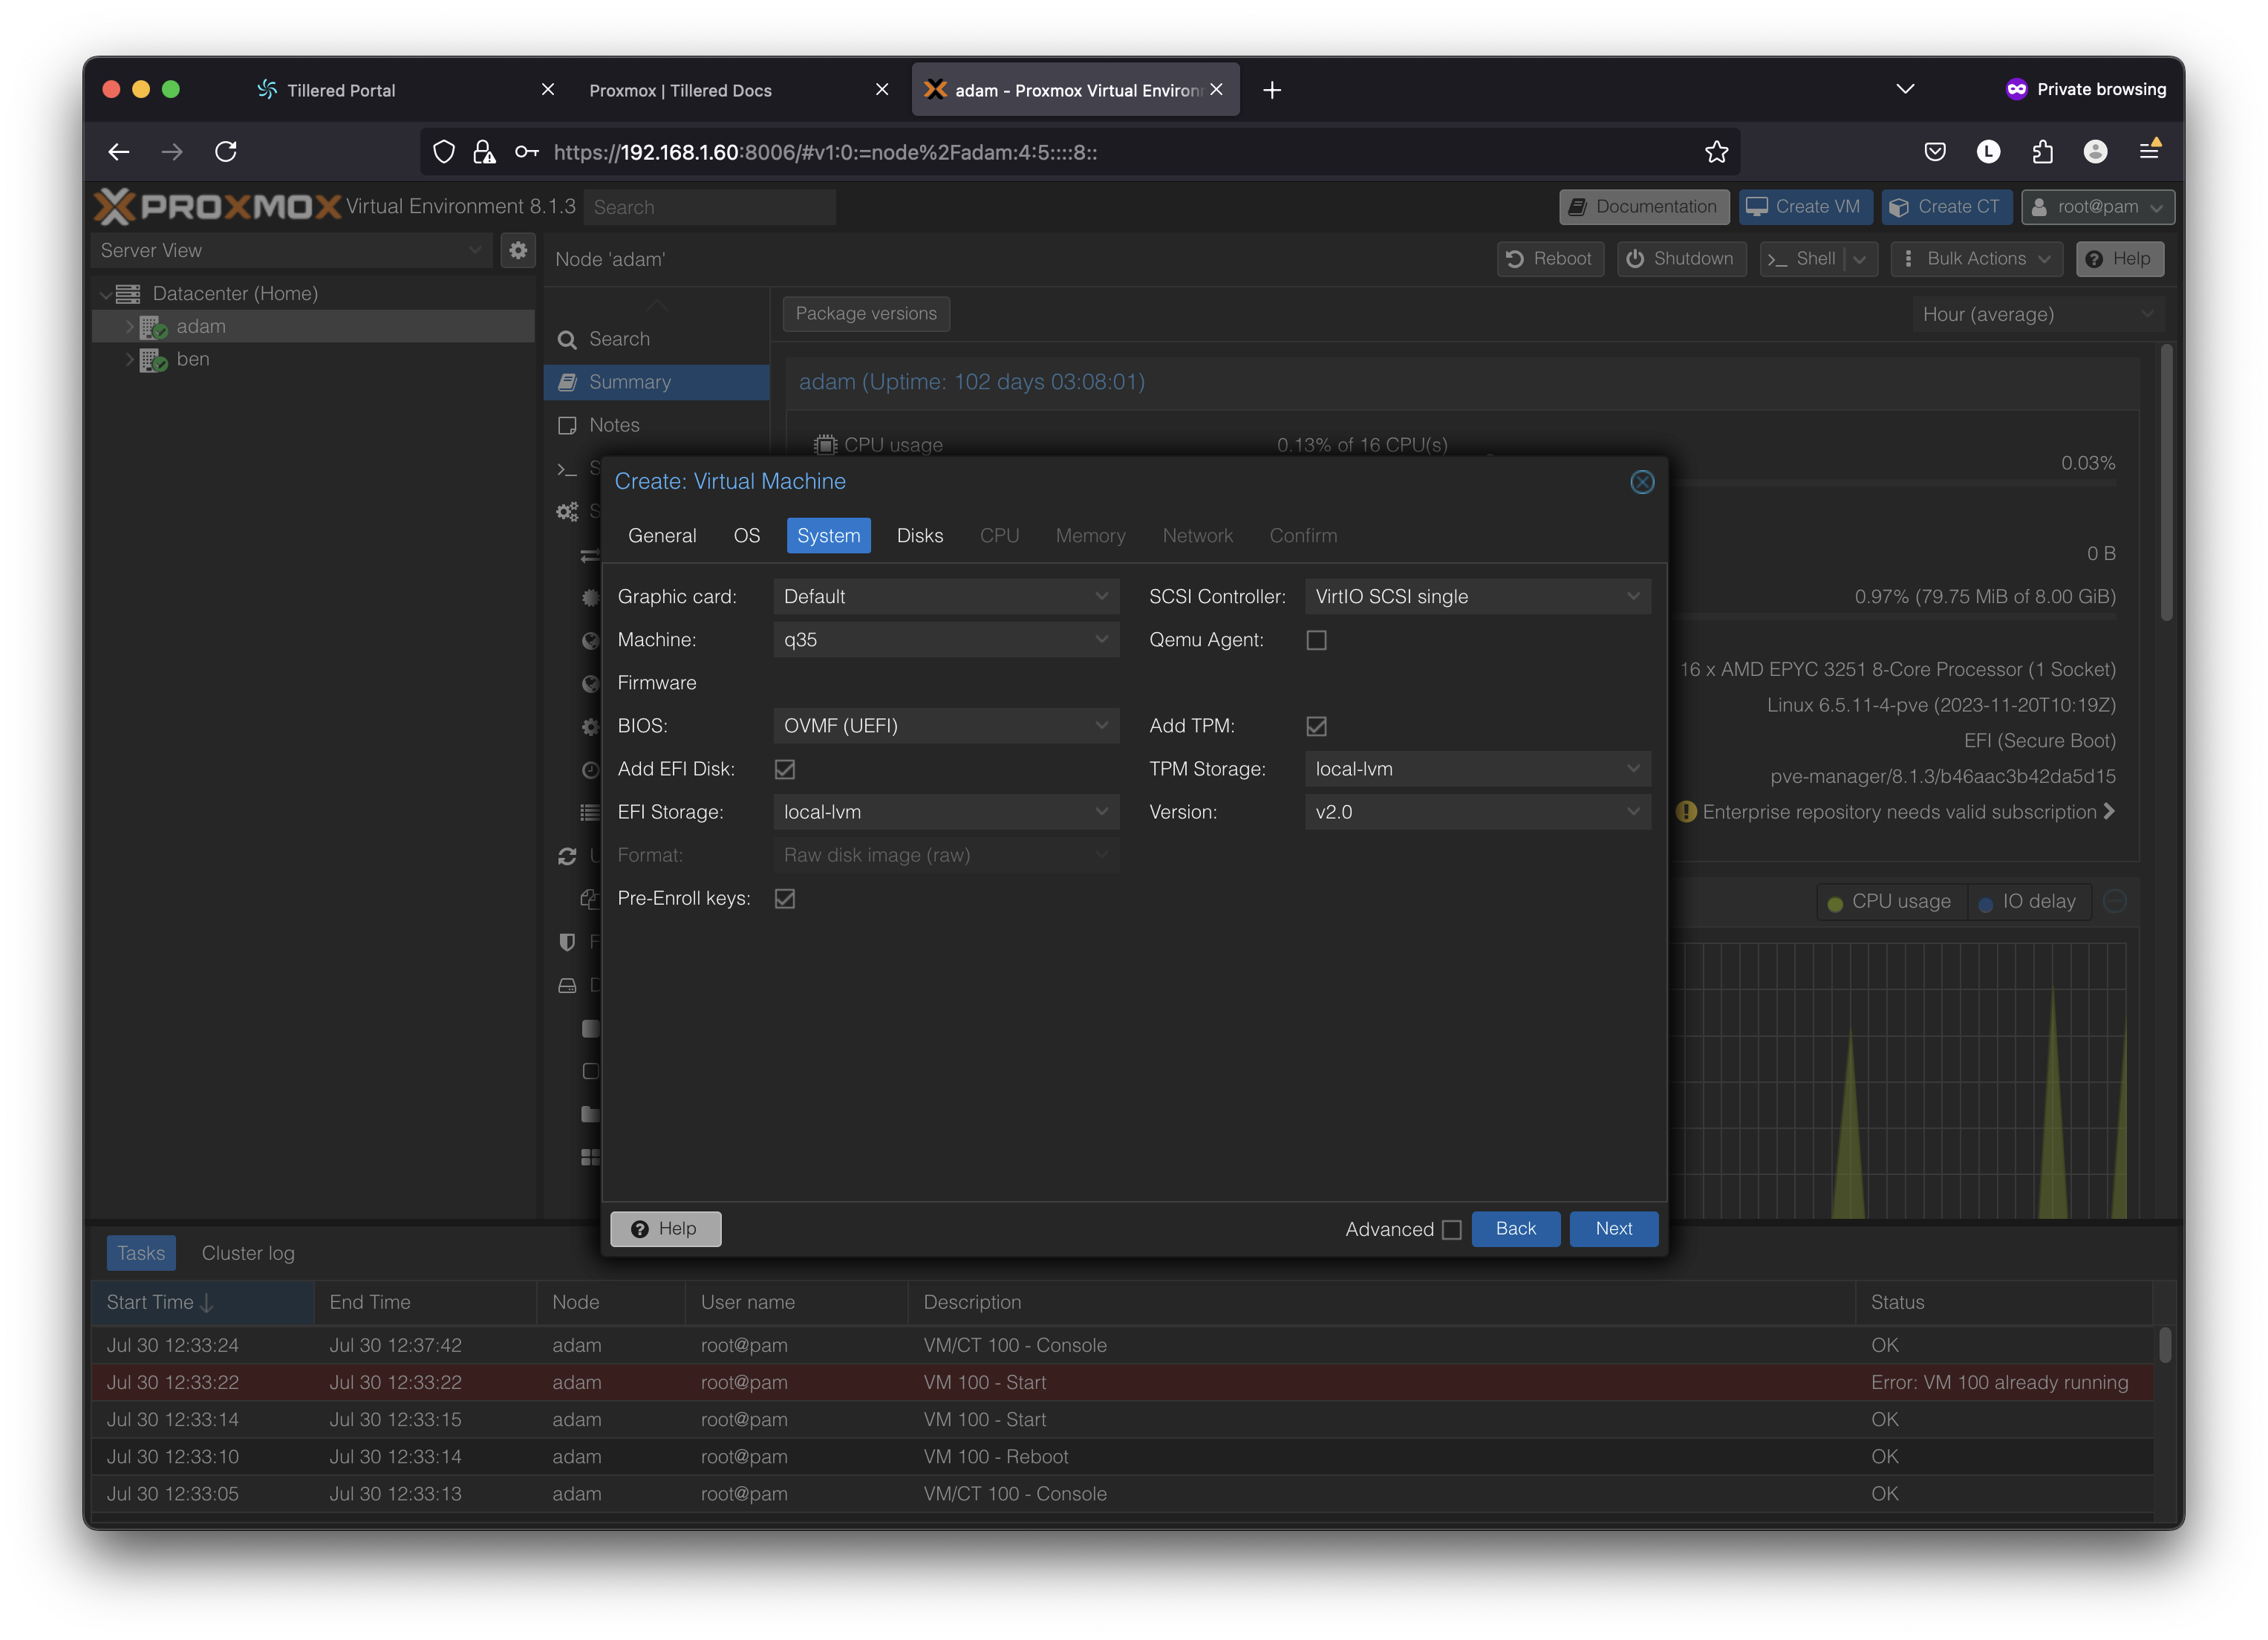
- Disks Tab: Delete the
scsi0disk.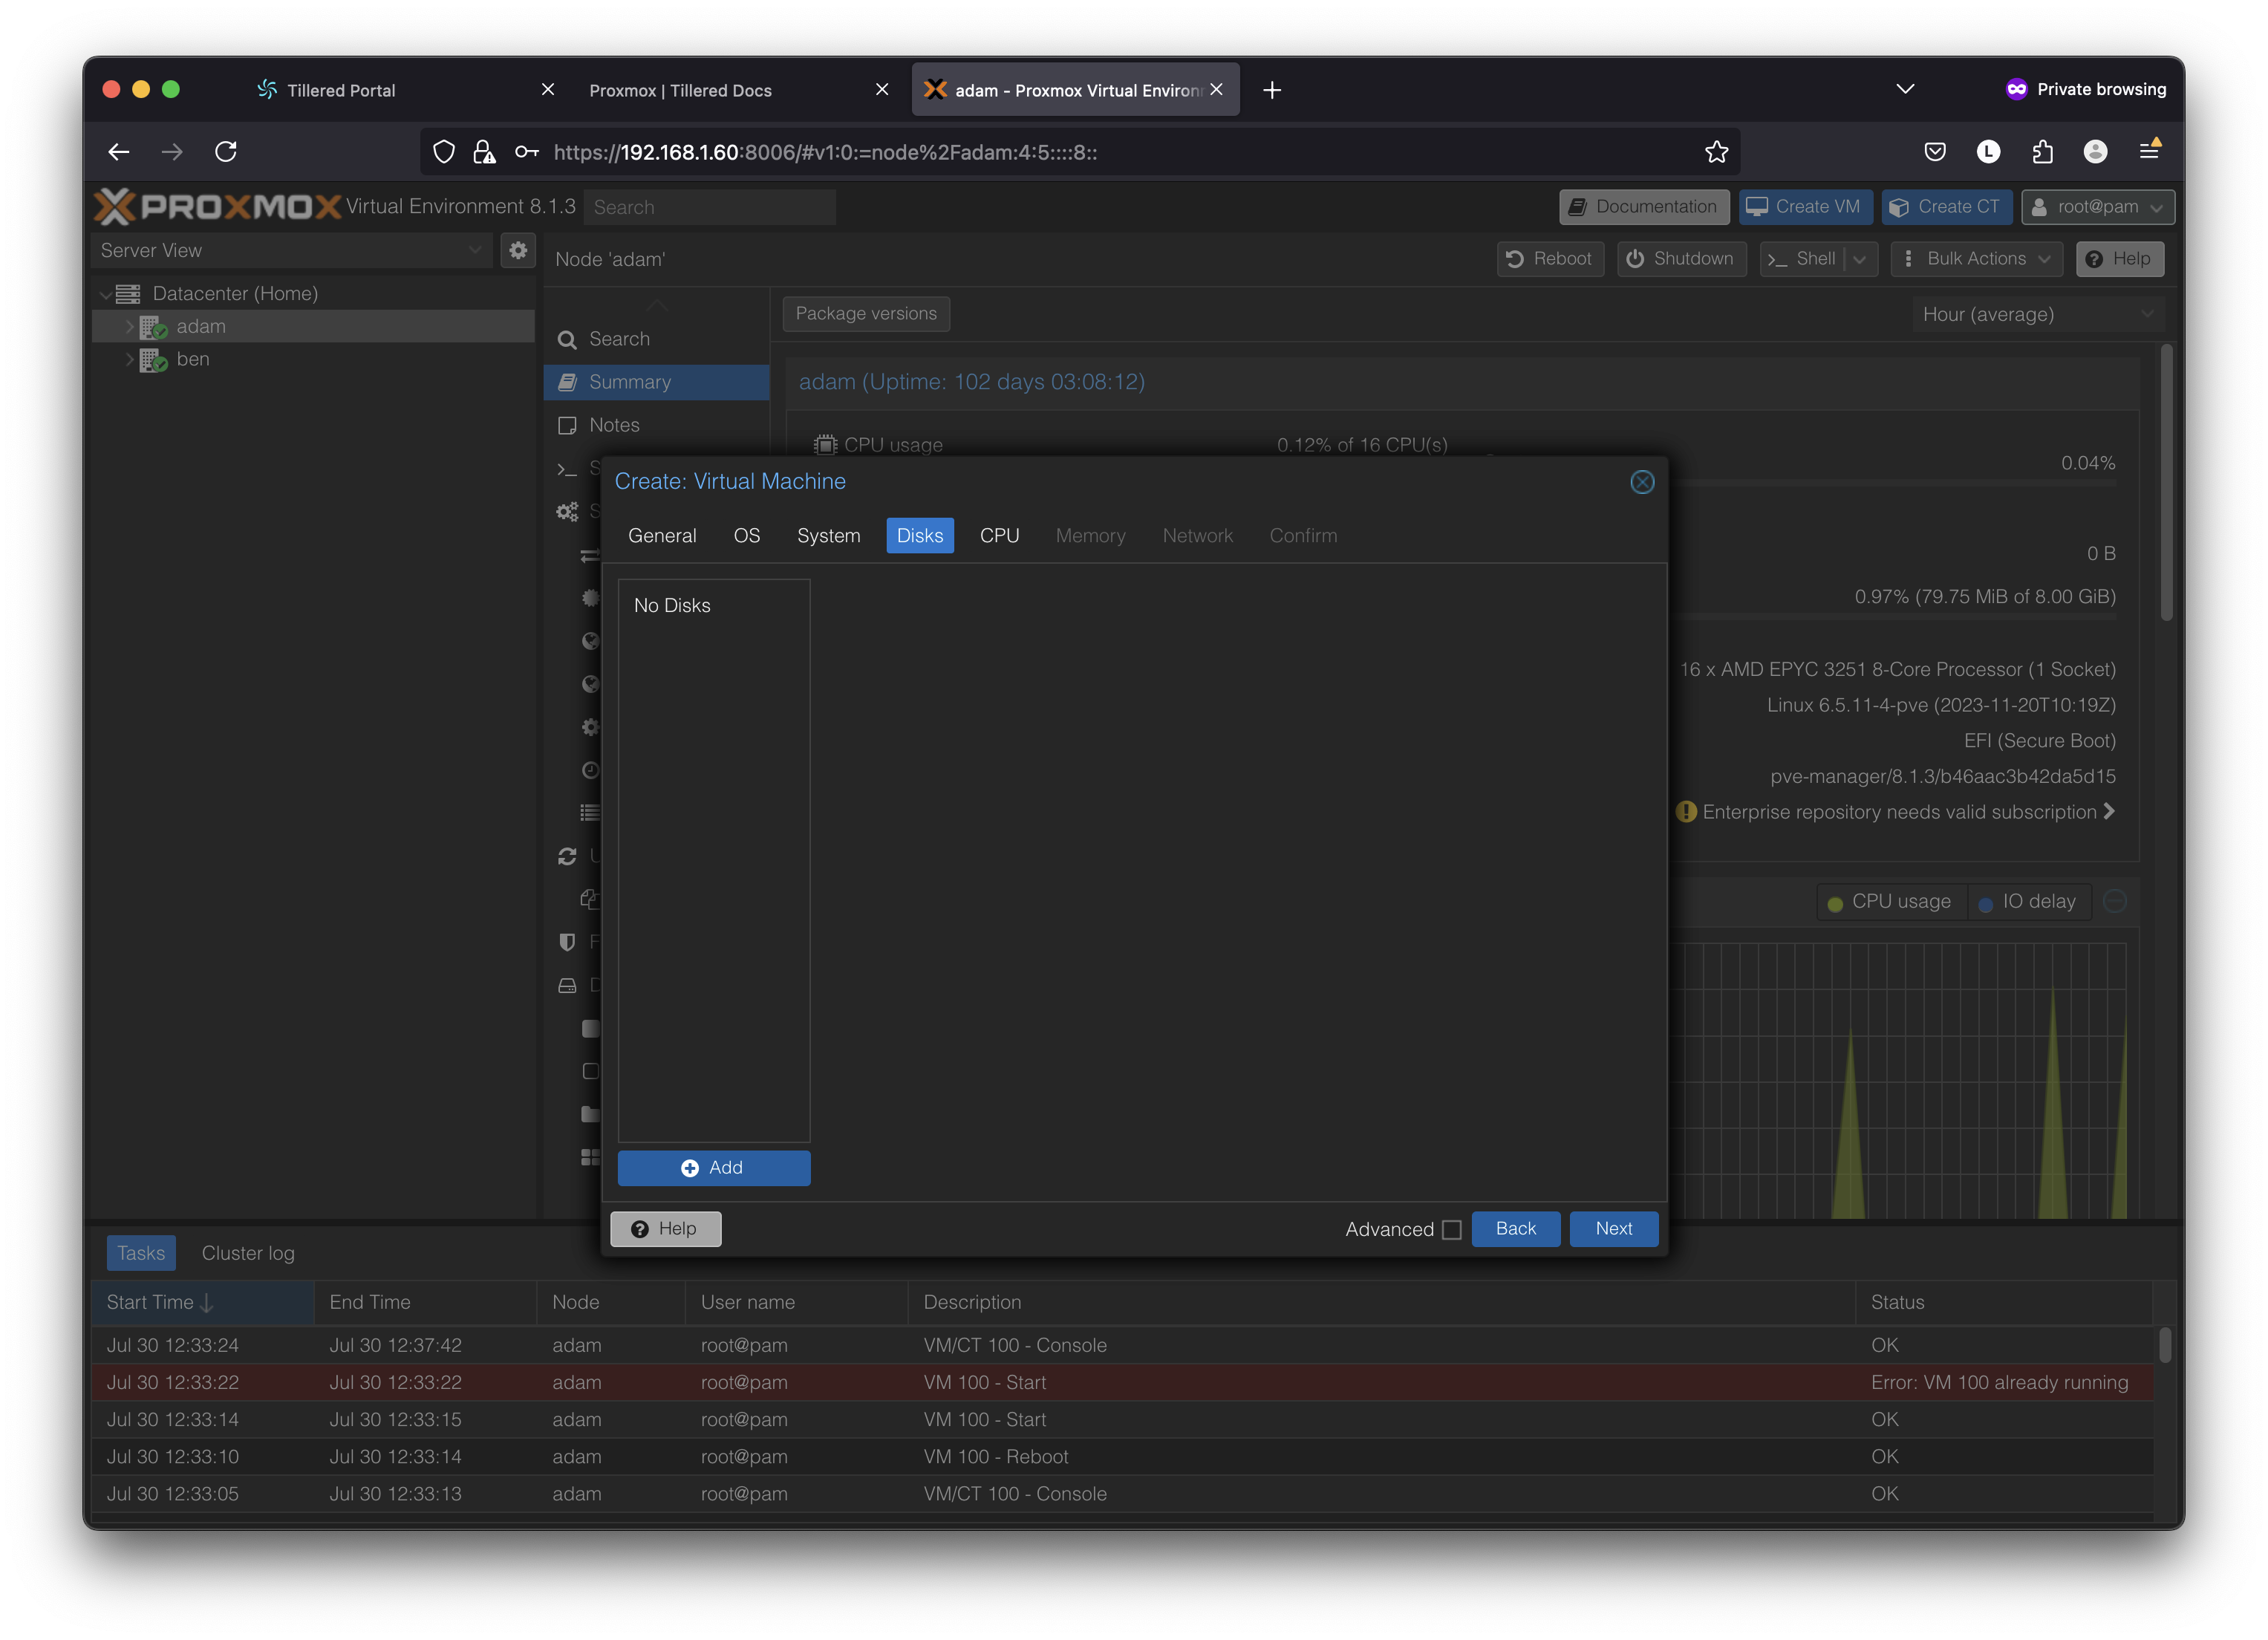
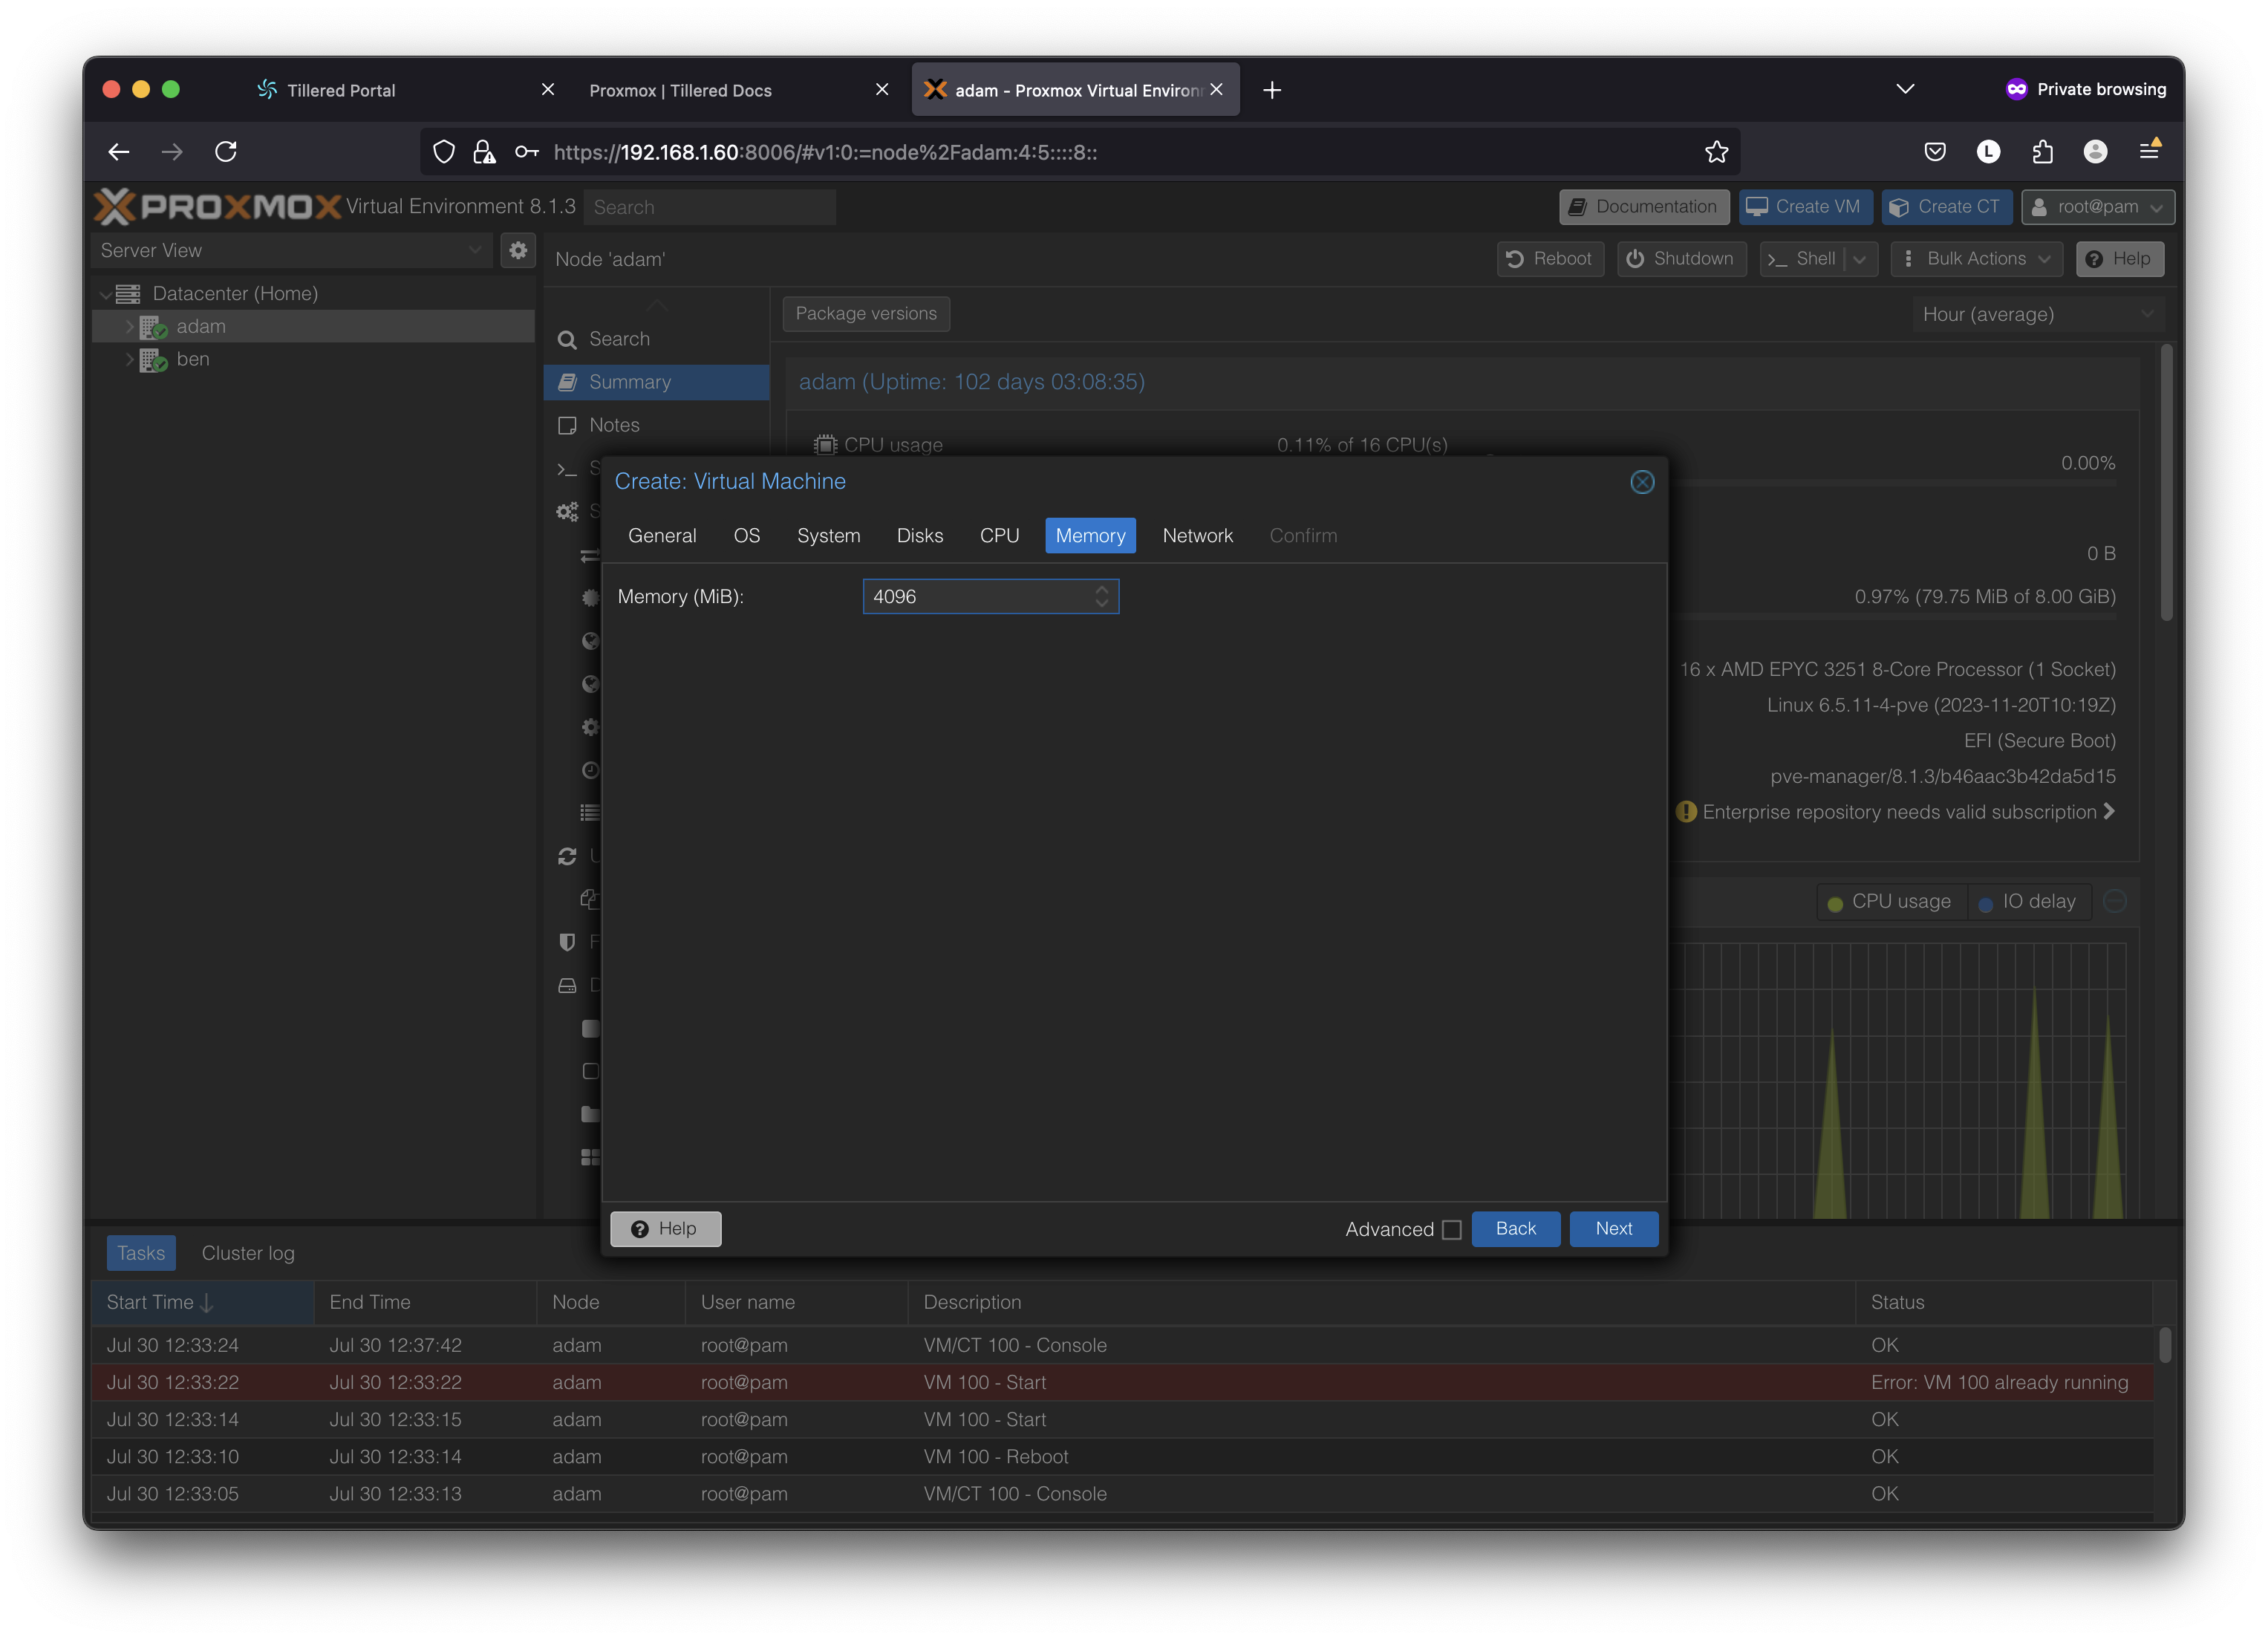
- CPU and Memory Tabs: Configure according to your performance needs (e.g.,
2 Sockets,4 GB RAM).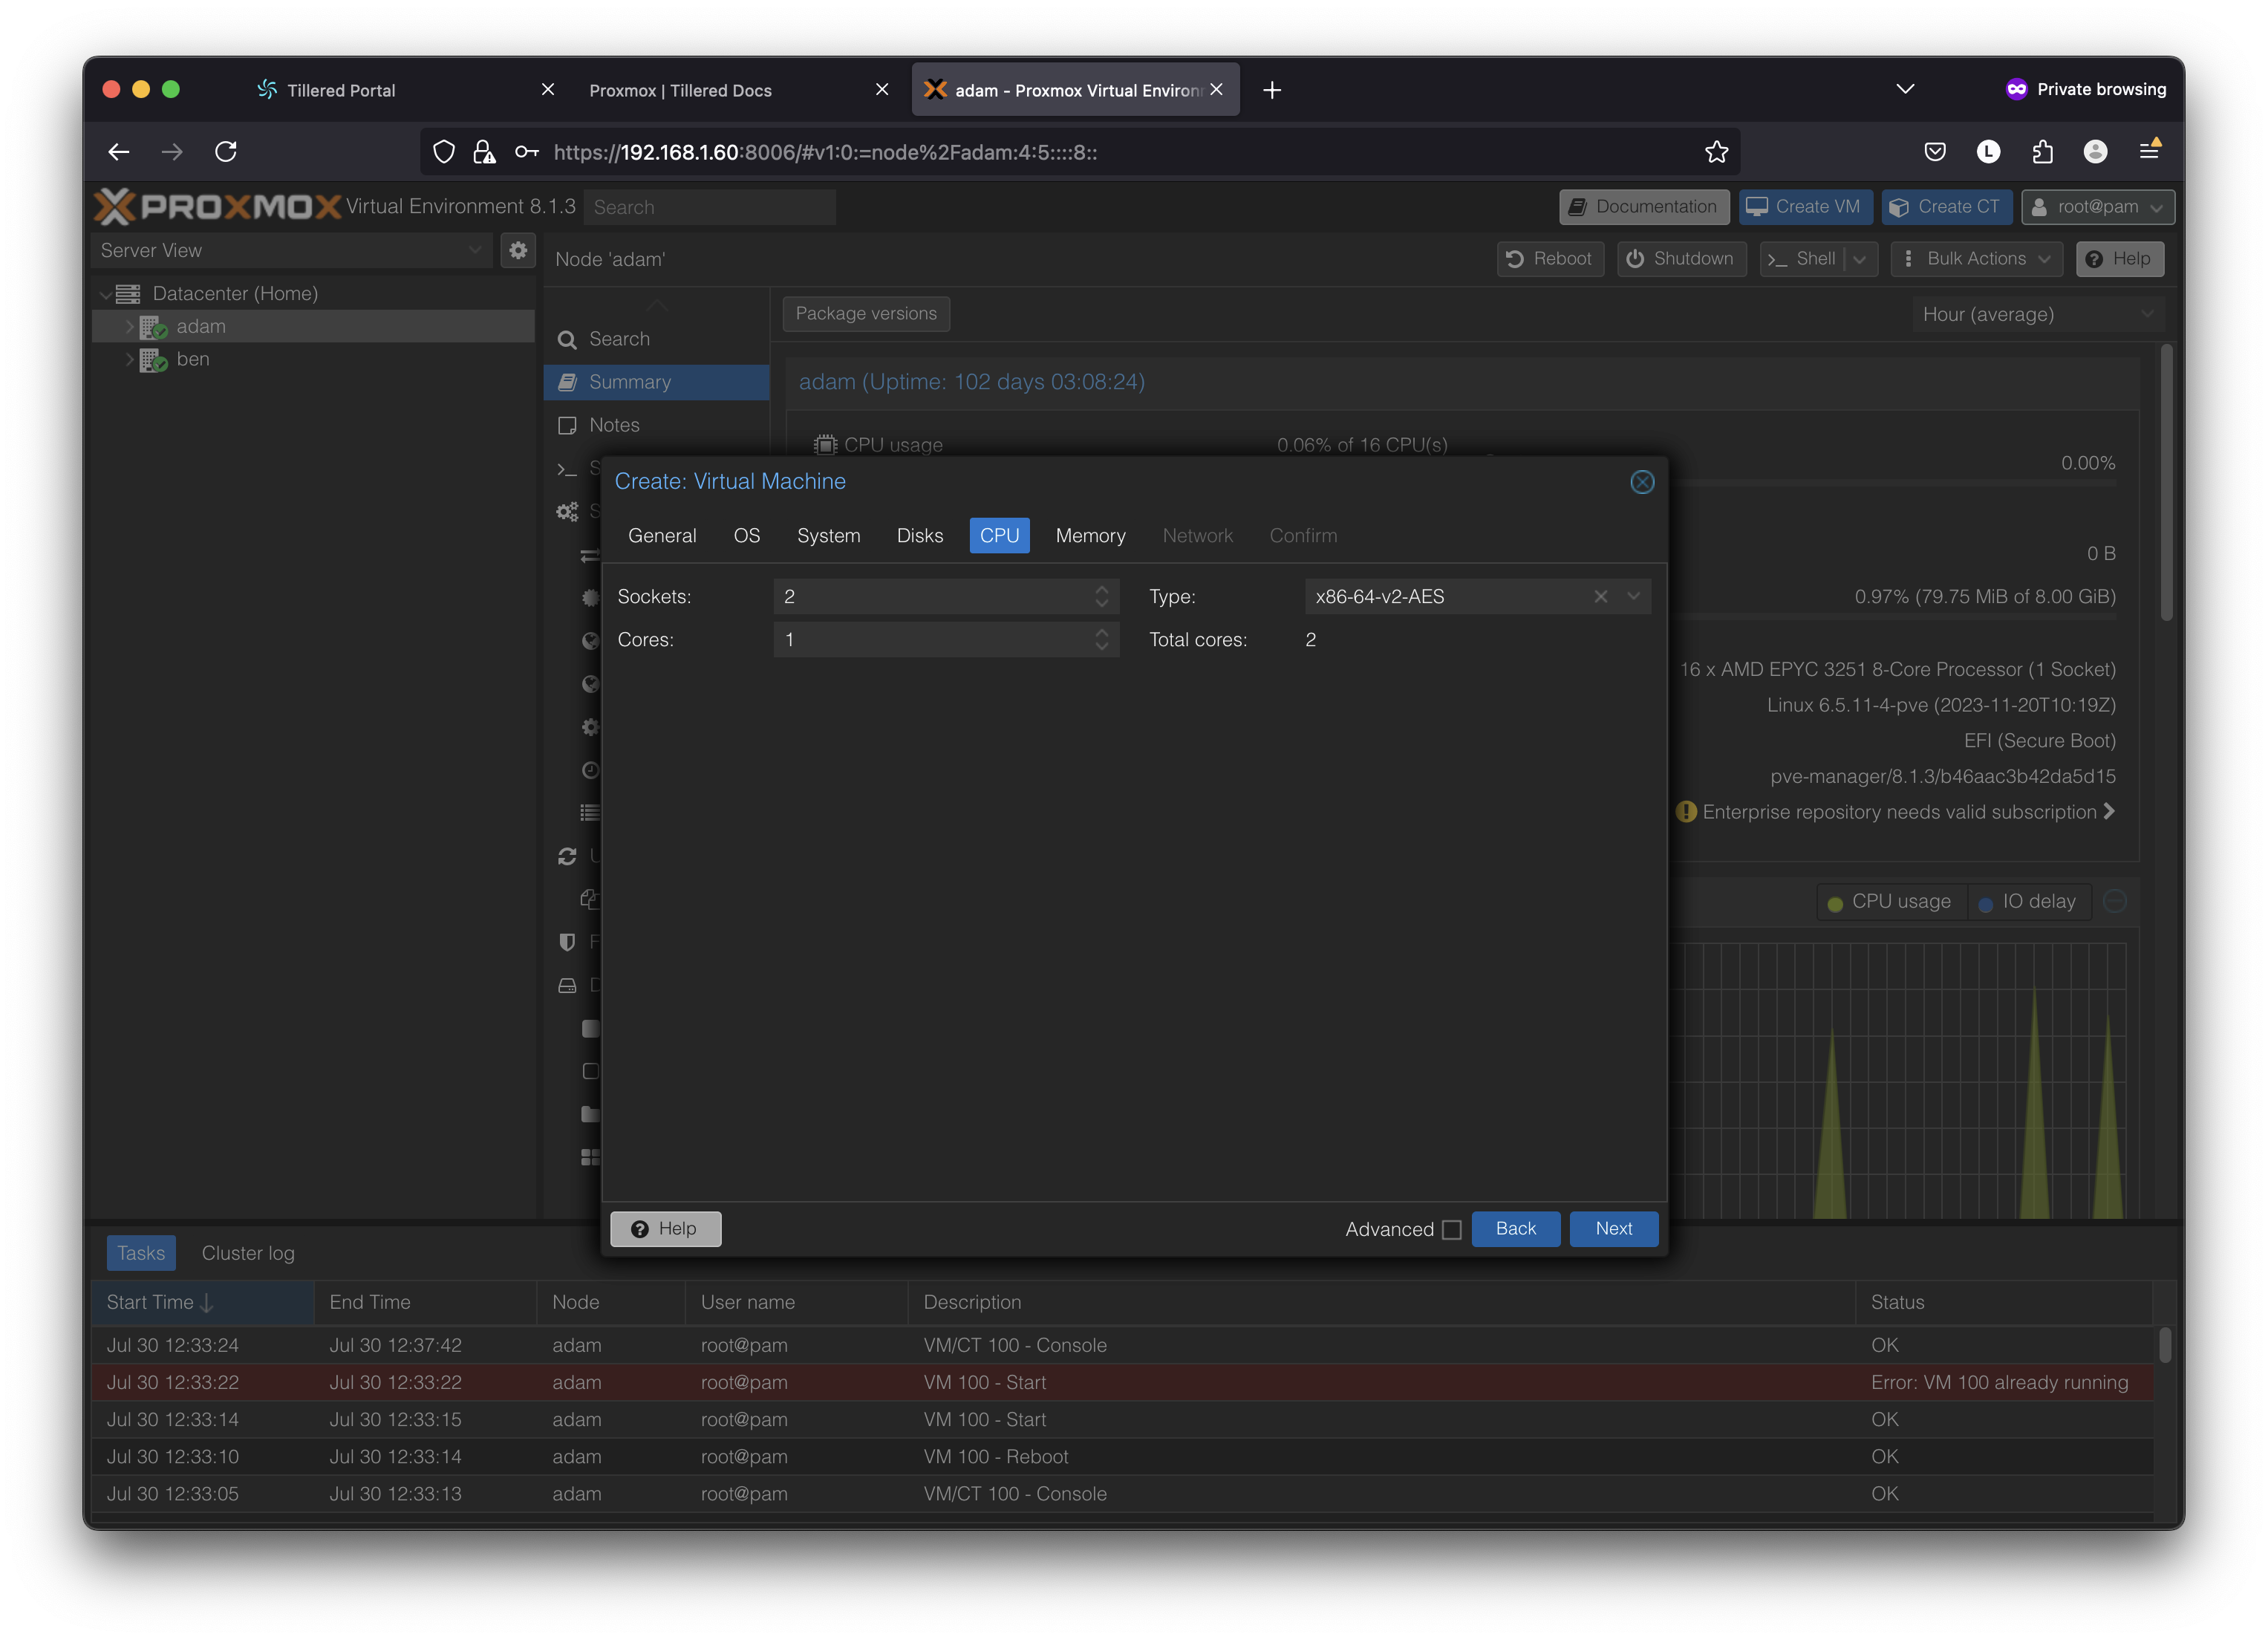
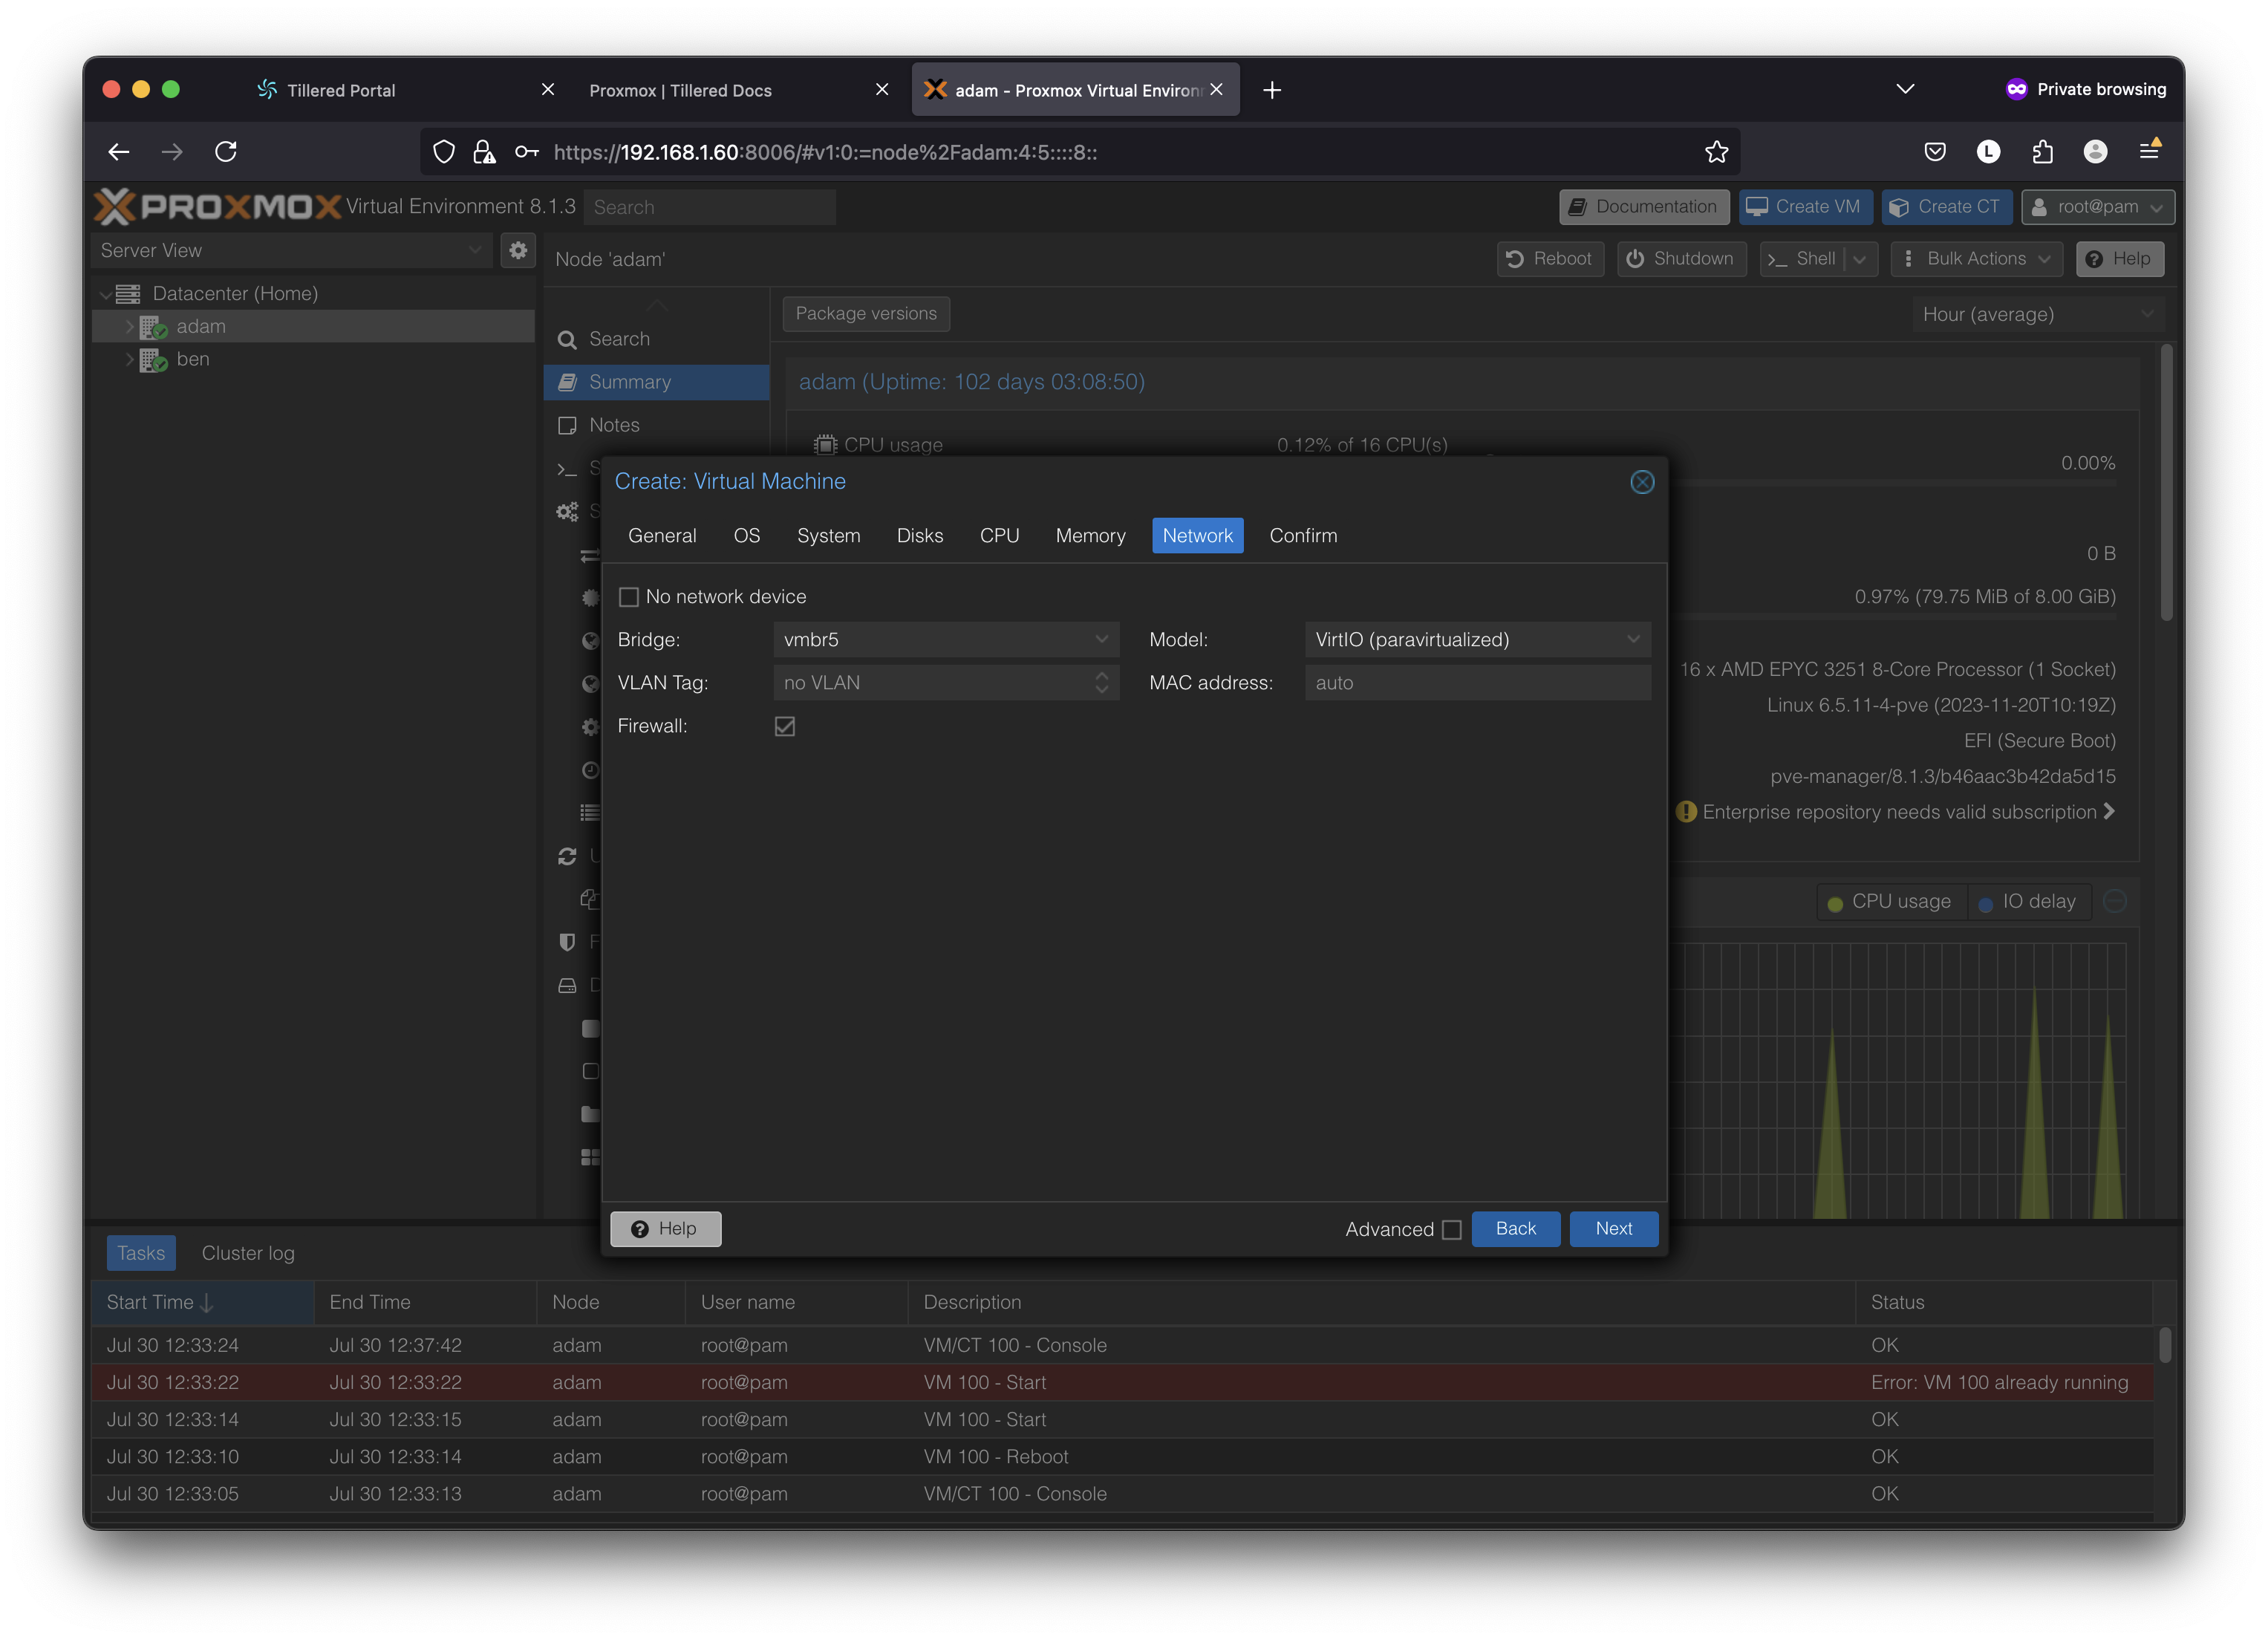
- Network Tab: Set up the network interface, ensuring it aligns with your DMZ or primary interface settings and has internet access.
- OS Tab: Select
- Confirm and do not start the VM yet.
Import and Attach Disk:
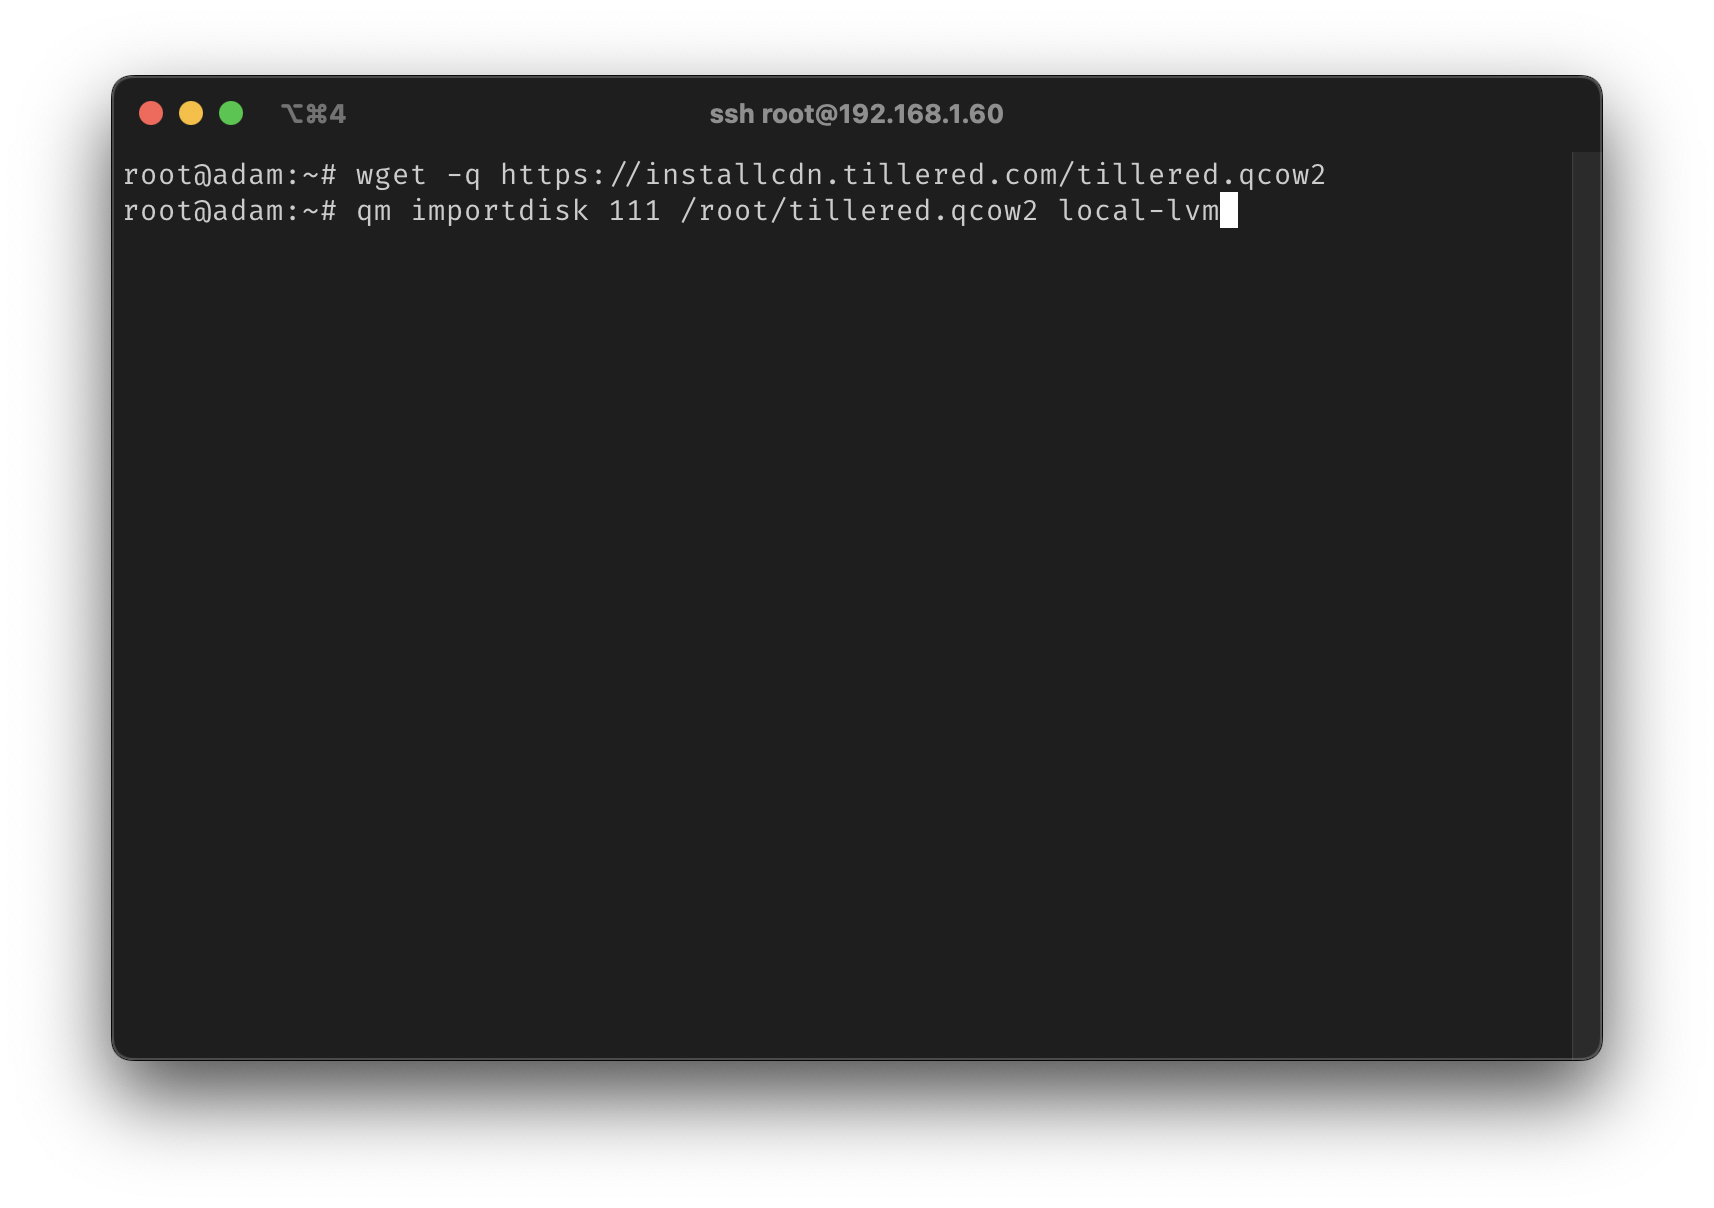
- SSH into the Proxmox server.
- Download the Tillered Disk from
https://installcdn.tillered.com/tillered.qcow2. - Import the Disk using
qm.
Configure the VM:
- Click on the VM and select Hardware
- Select
Unused Disk 0and clickEdit, then clickAddto add the disk to the VM.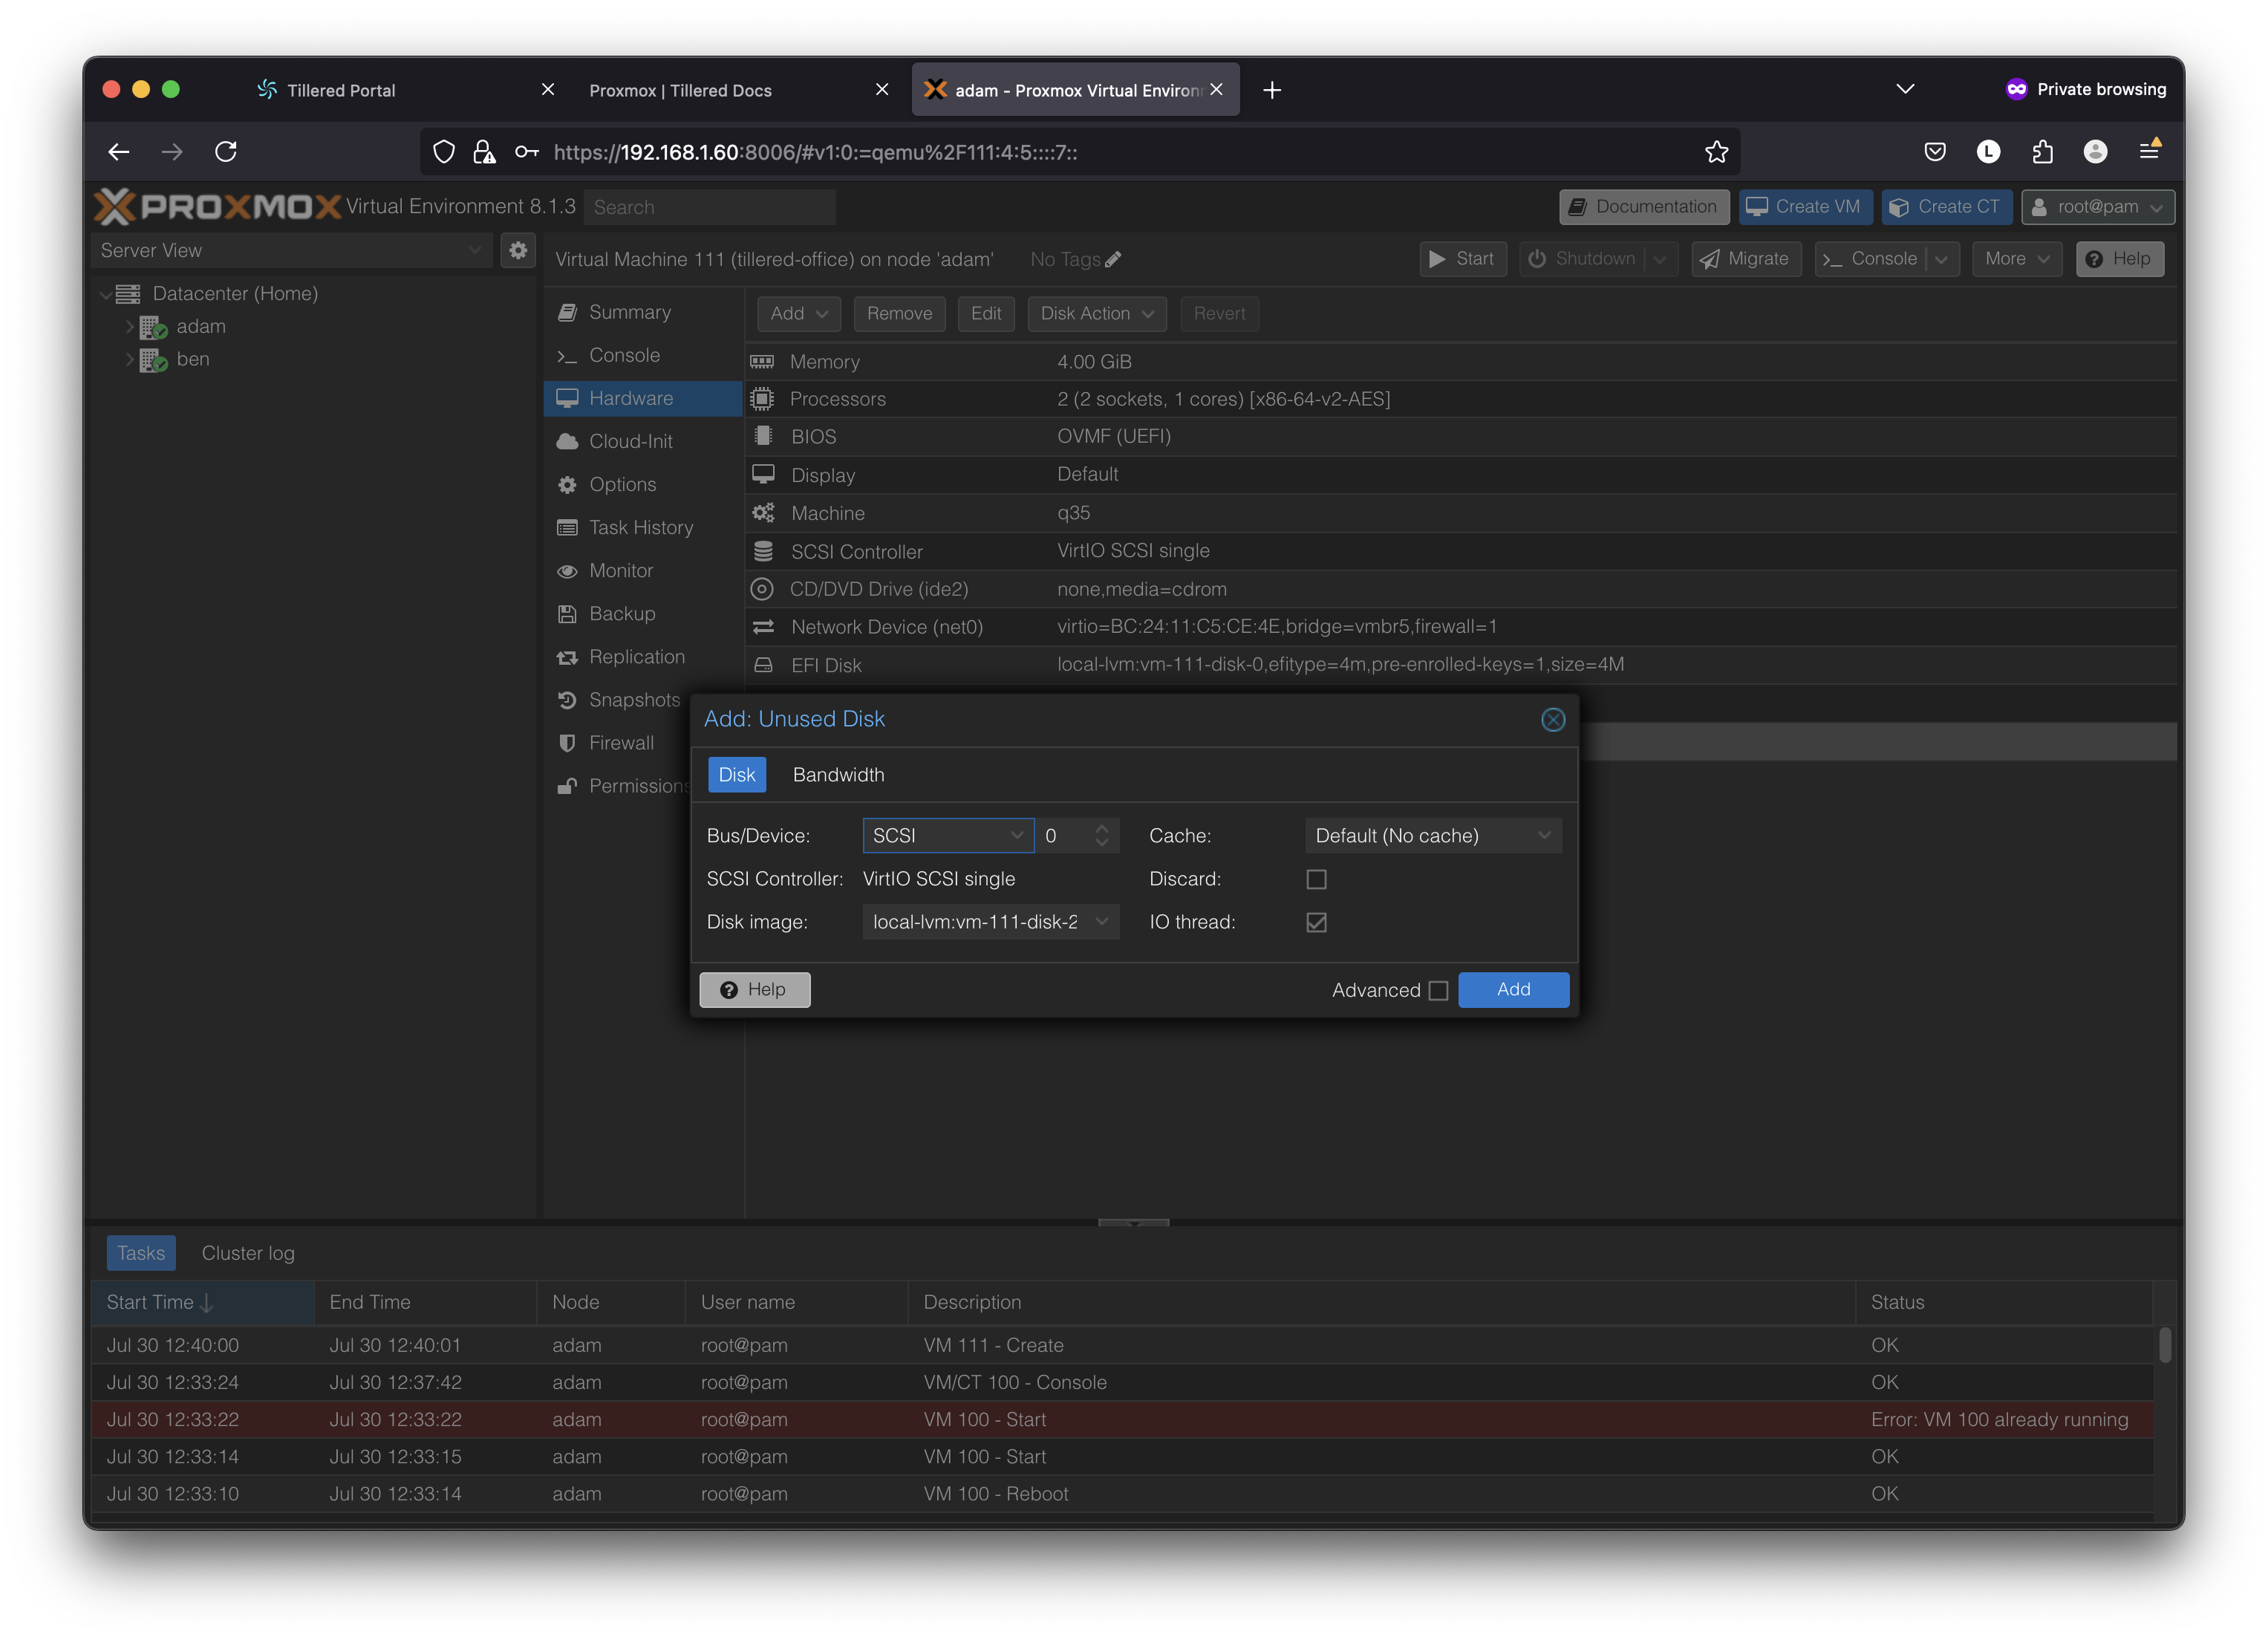
- In Options:
- Boot Order: Enable the
scsi0disk and set it to the highest priority.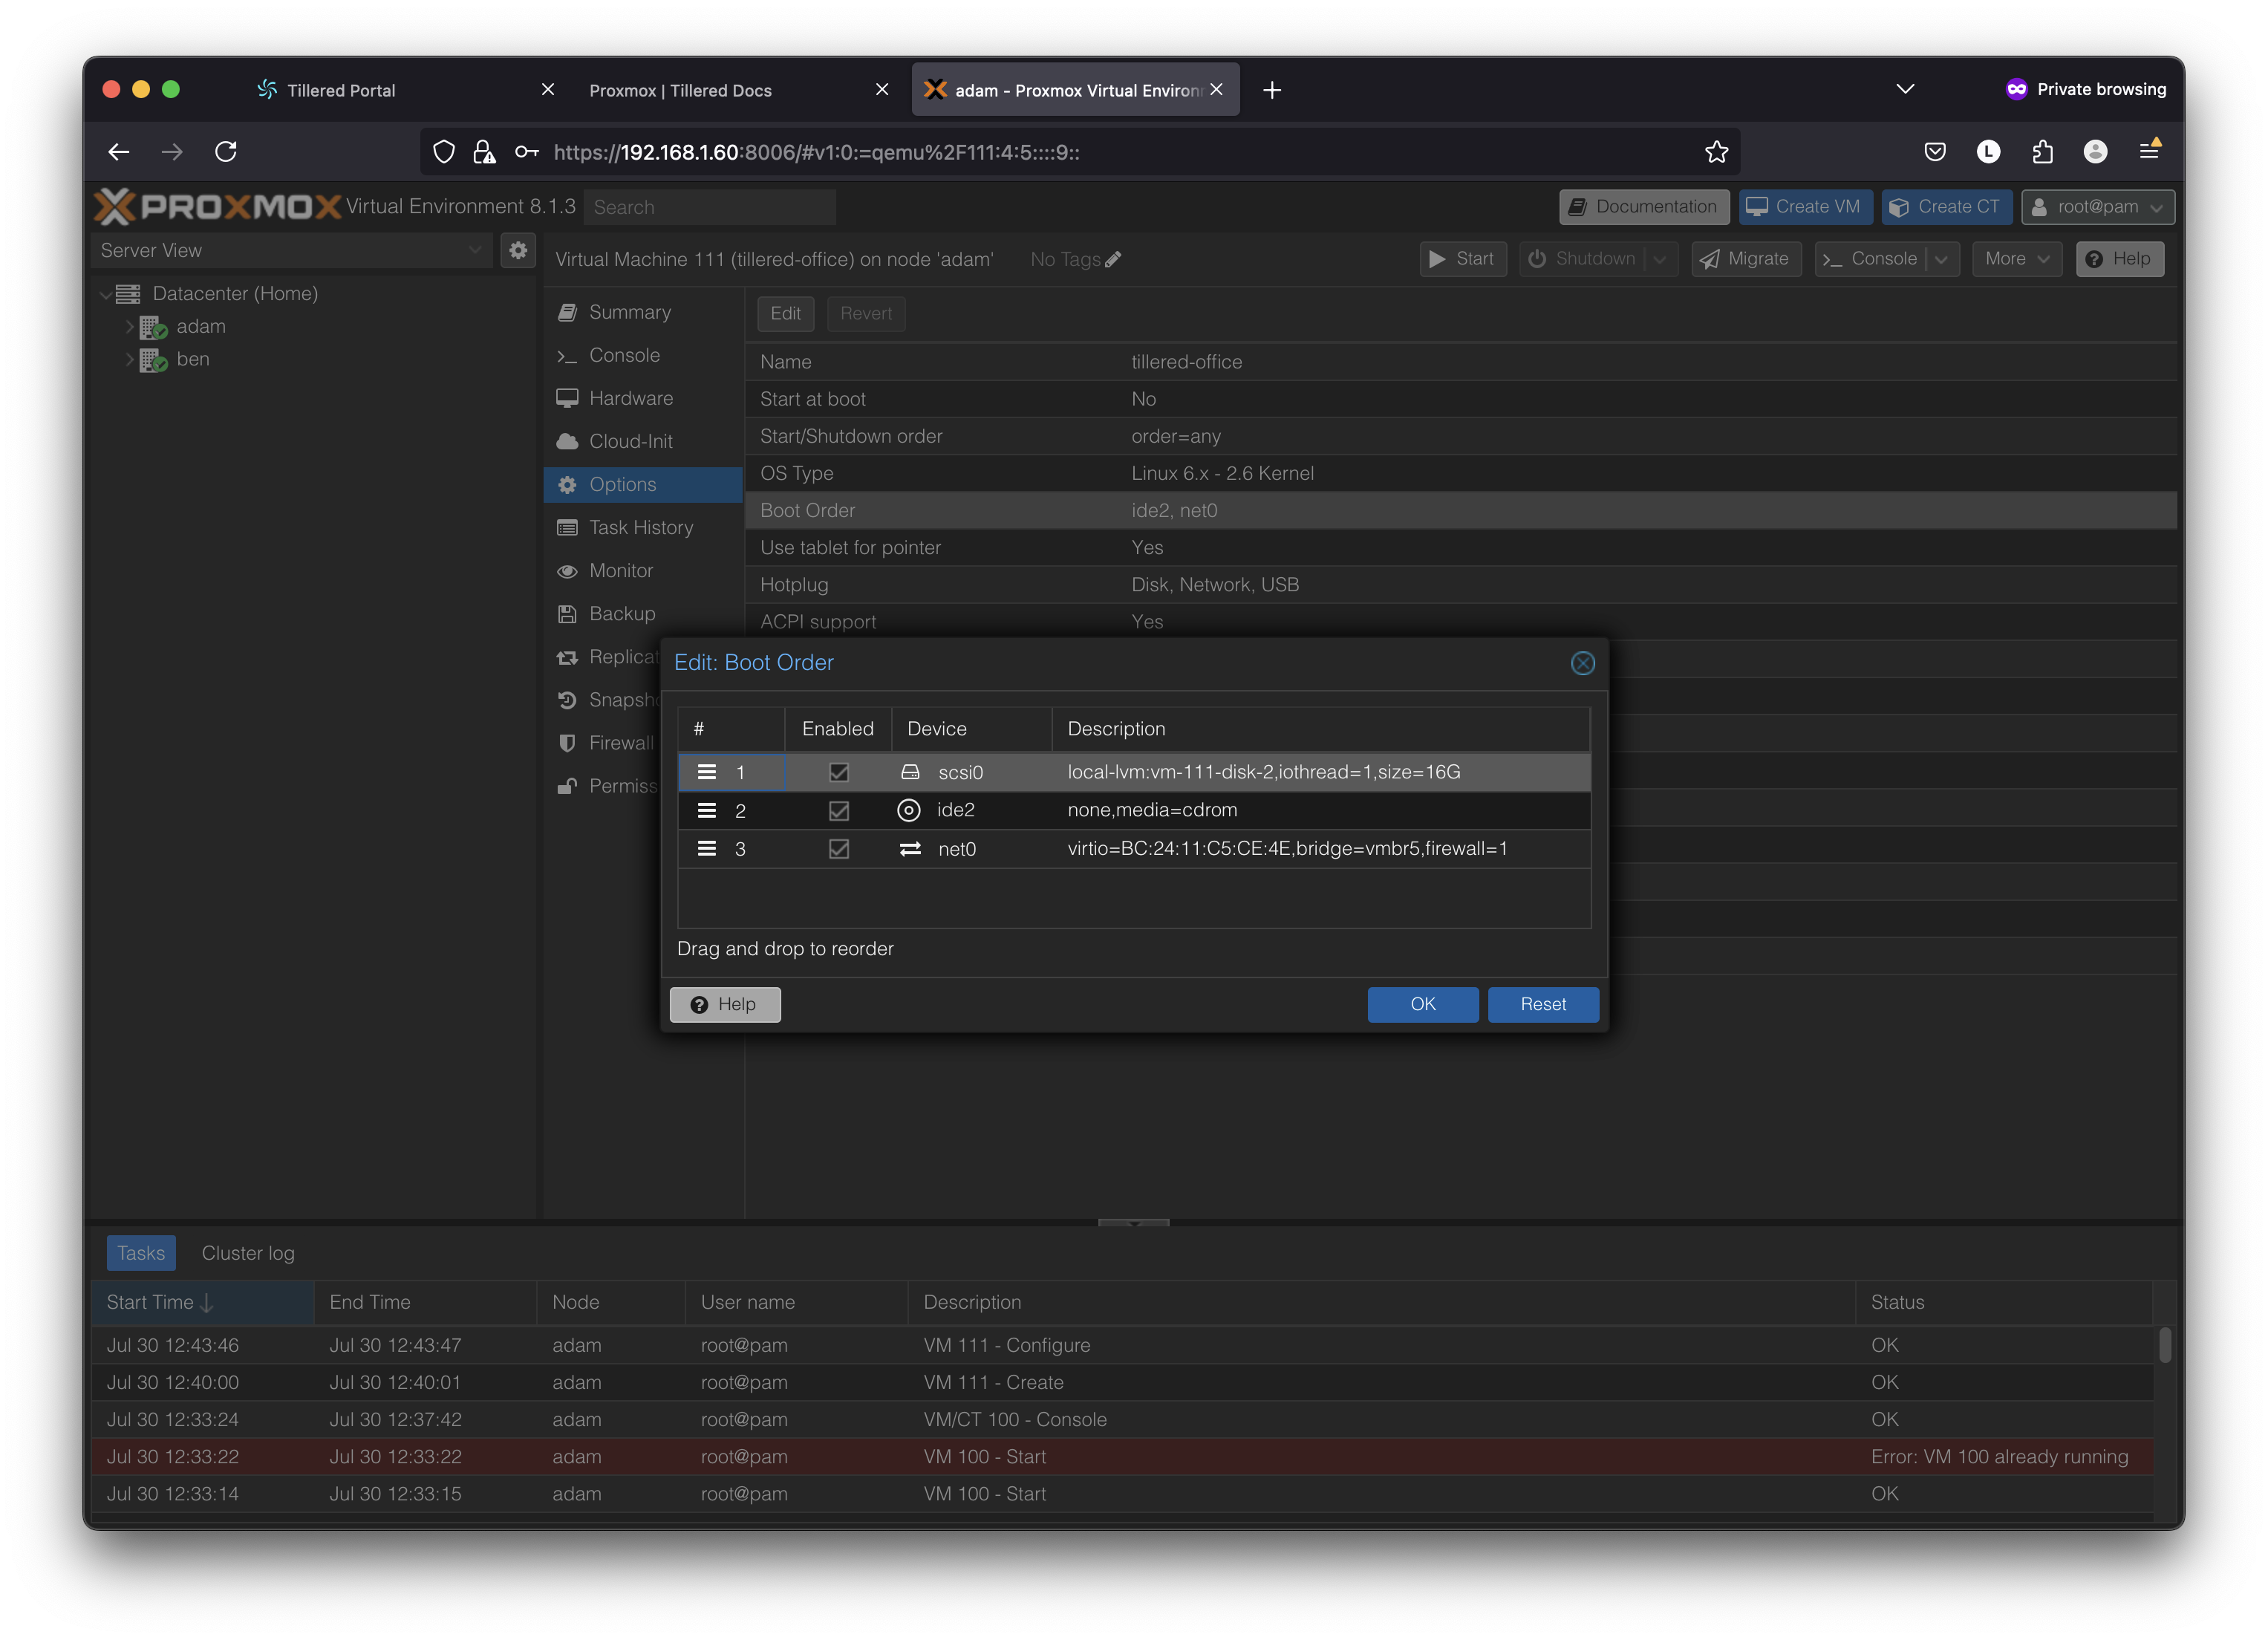
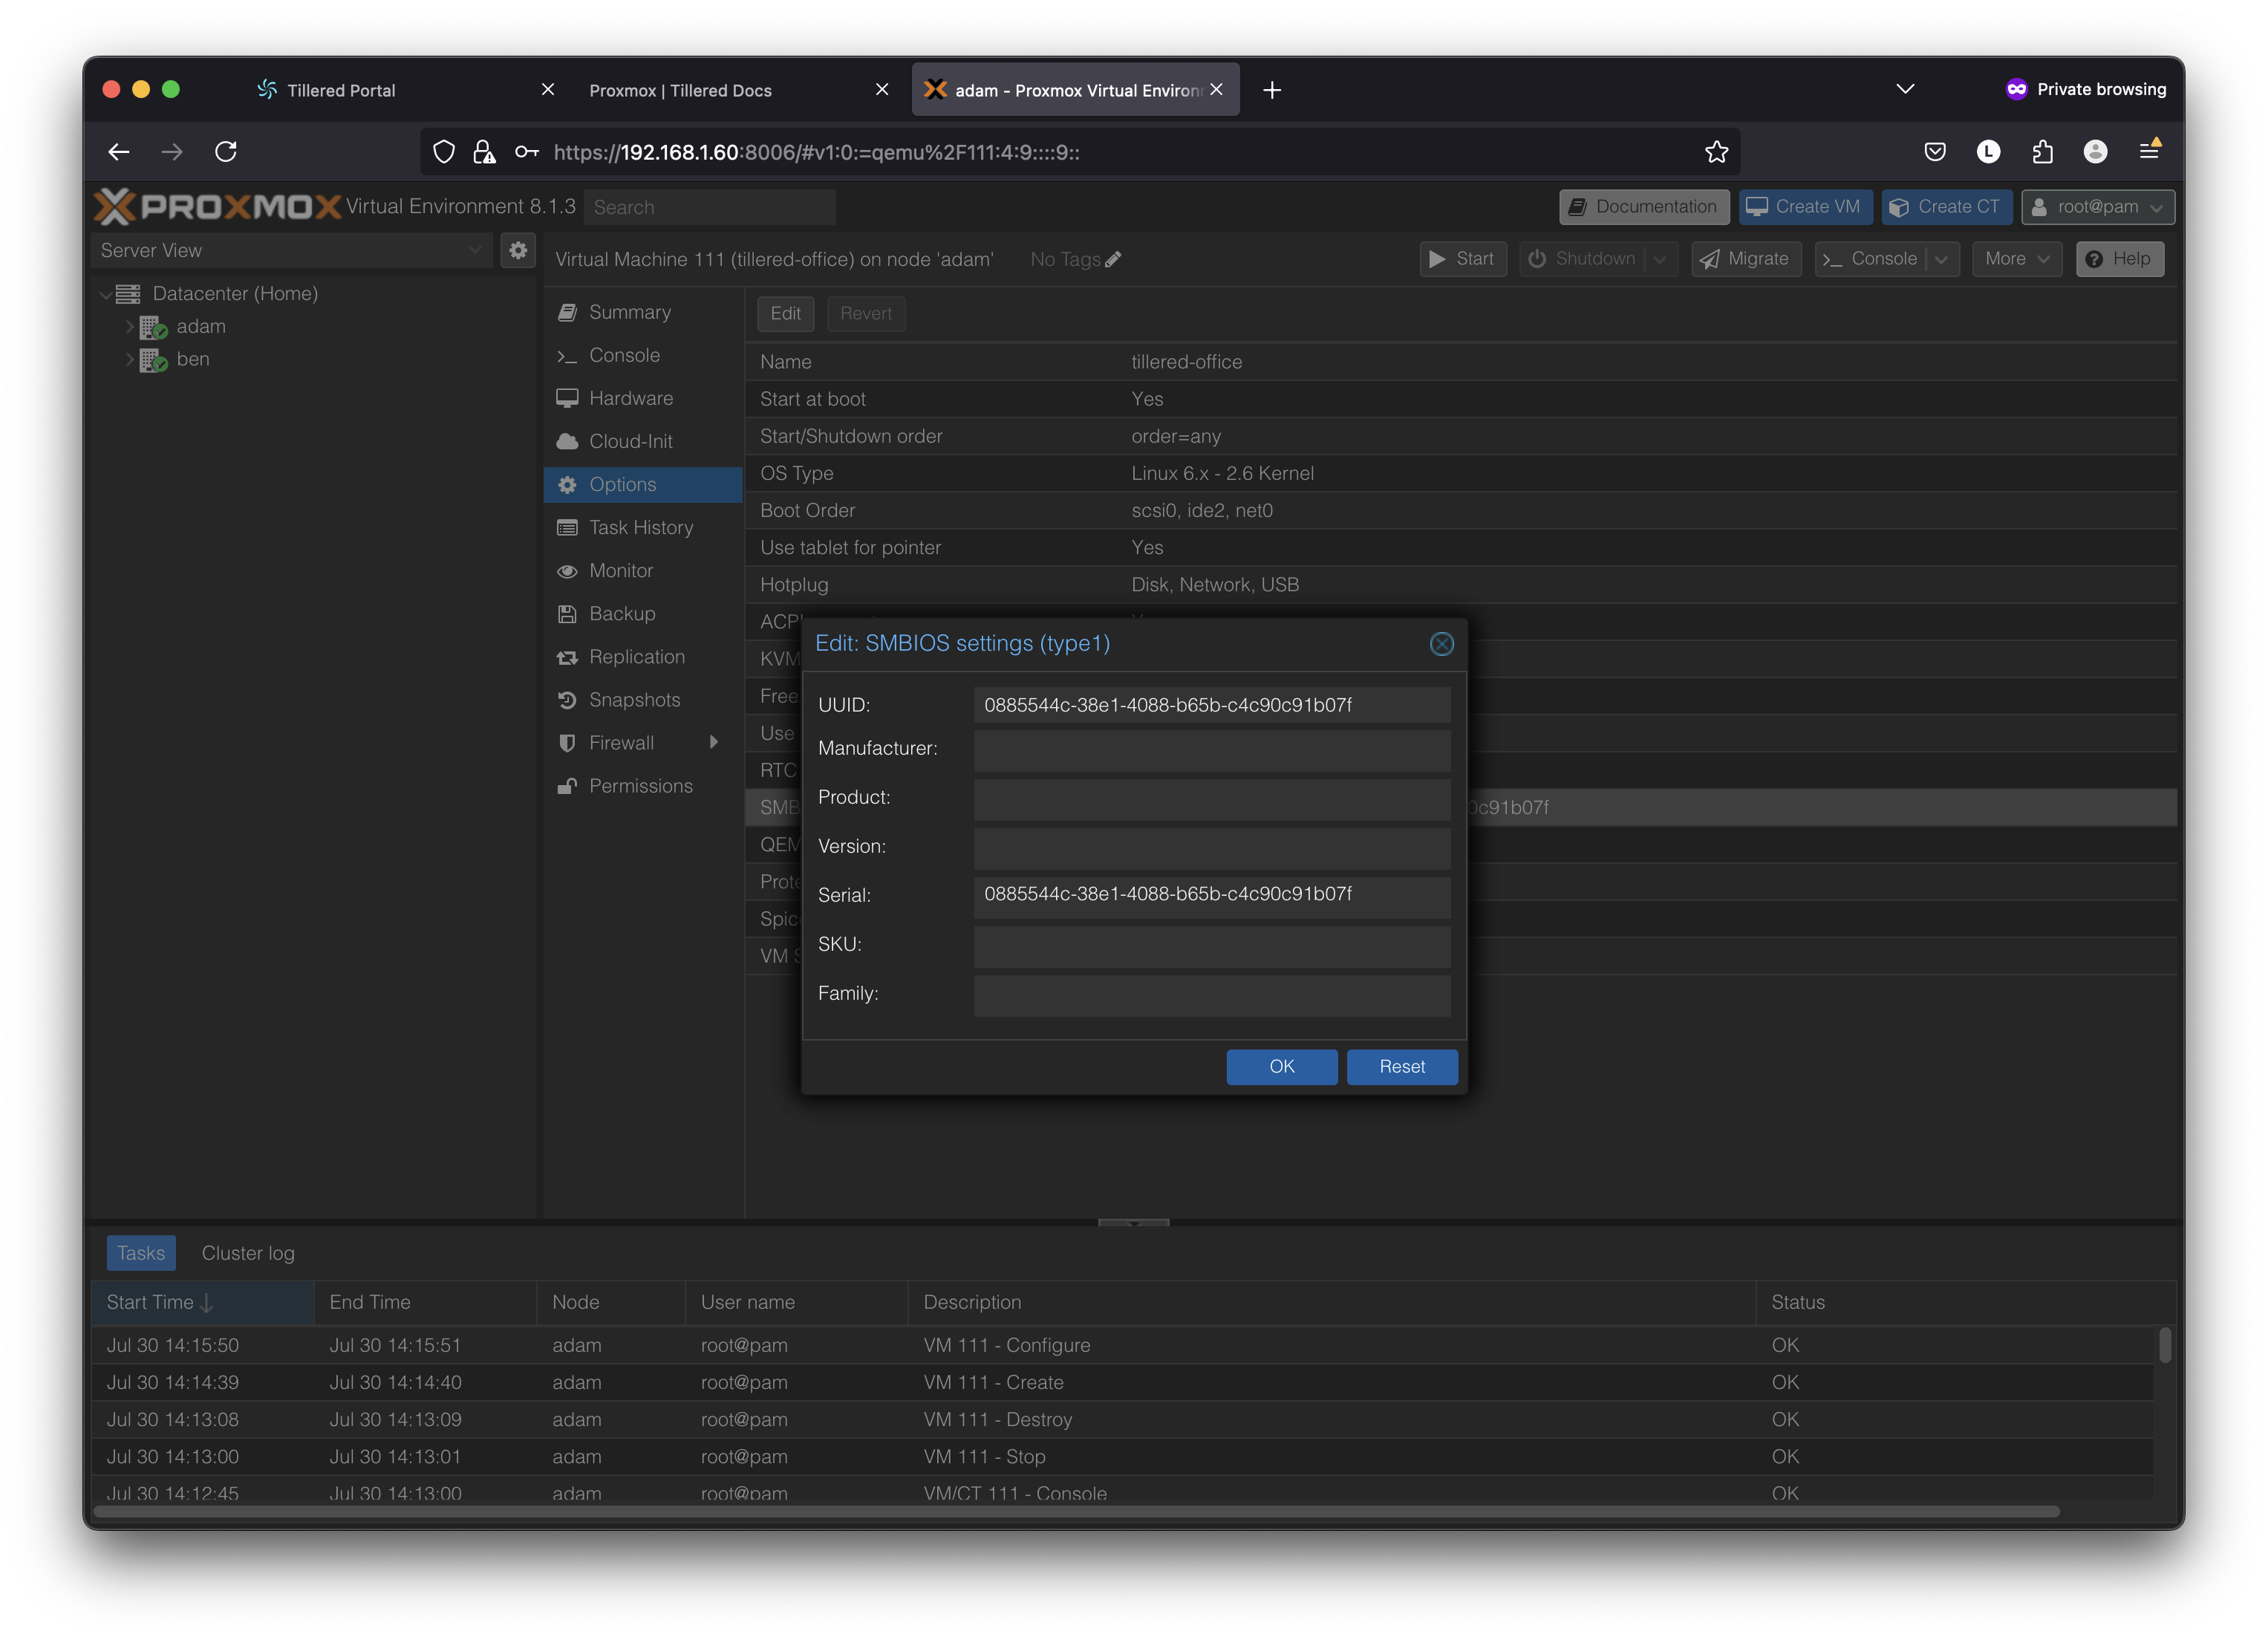
- SMBIOS Settings: Copy the value in the UUID field to the Serial field.
- Start at Boot: Enable this option in the event of your Proxmox machine going down.

- Boot Order: Enable the
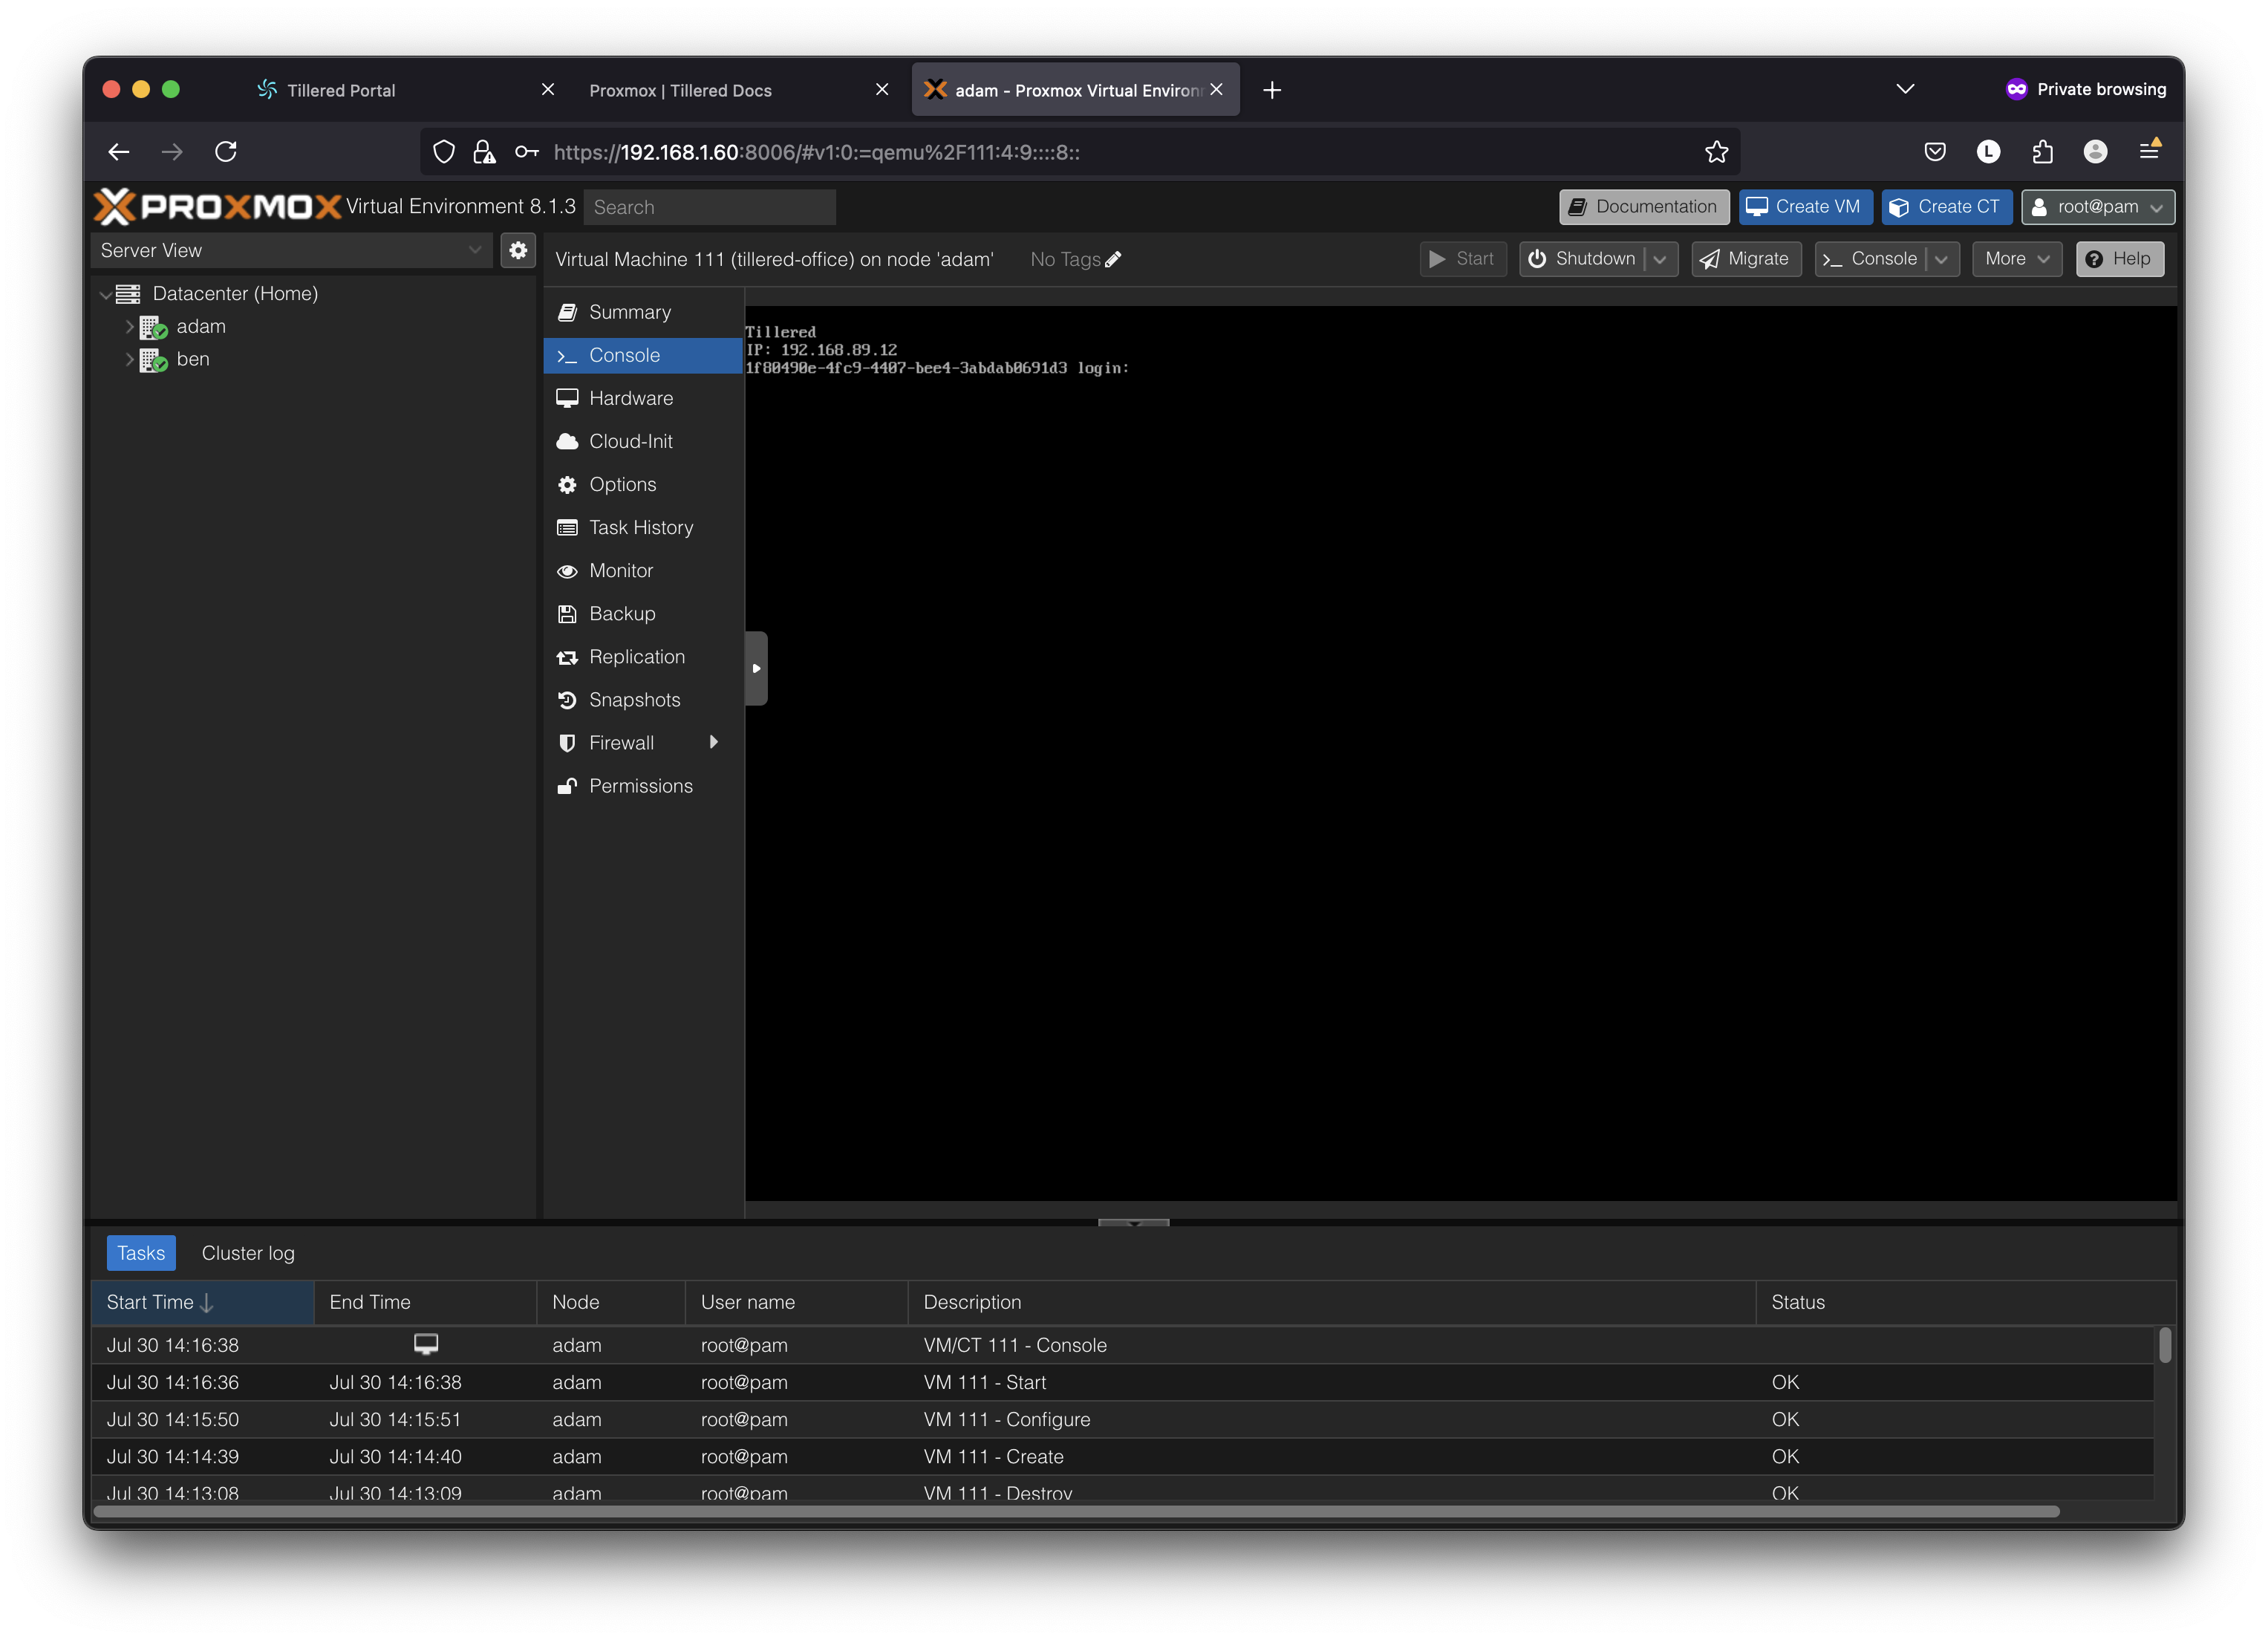
Start the VM: Start the VM and wait until it displays its Private IP and UUID login.
INFO
The setup process may take 5-10 minutes, depending on download speeds.
Step 3: Create a Cloud Exit Node
We'll create a Tillered Cloud Exit Node (CEN) on the Azure platform. You can follow the Azure Node Setup Documentation or the steps below.
IMPORTANT
When selecting a Size for the VM, it must have at least 2 vCPUs and 4GB RAM to ensure proper operation. We recommend the Standard_B2s instance.
Log into Azure and navigate to Virtual Machines.
Create a Virtual Machine:
- Give the VM a descriptive name (e.g., 1).
- Set the Security Type to
Standard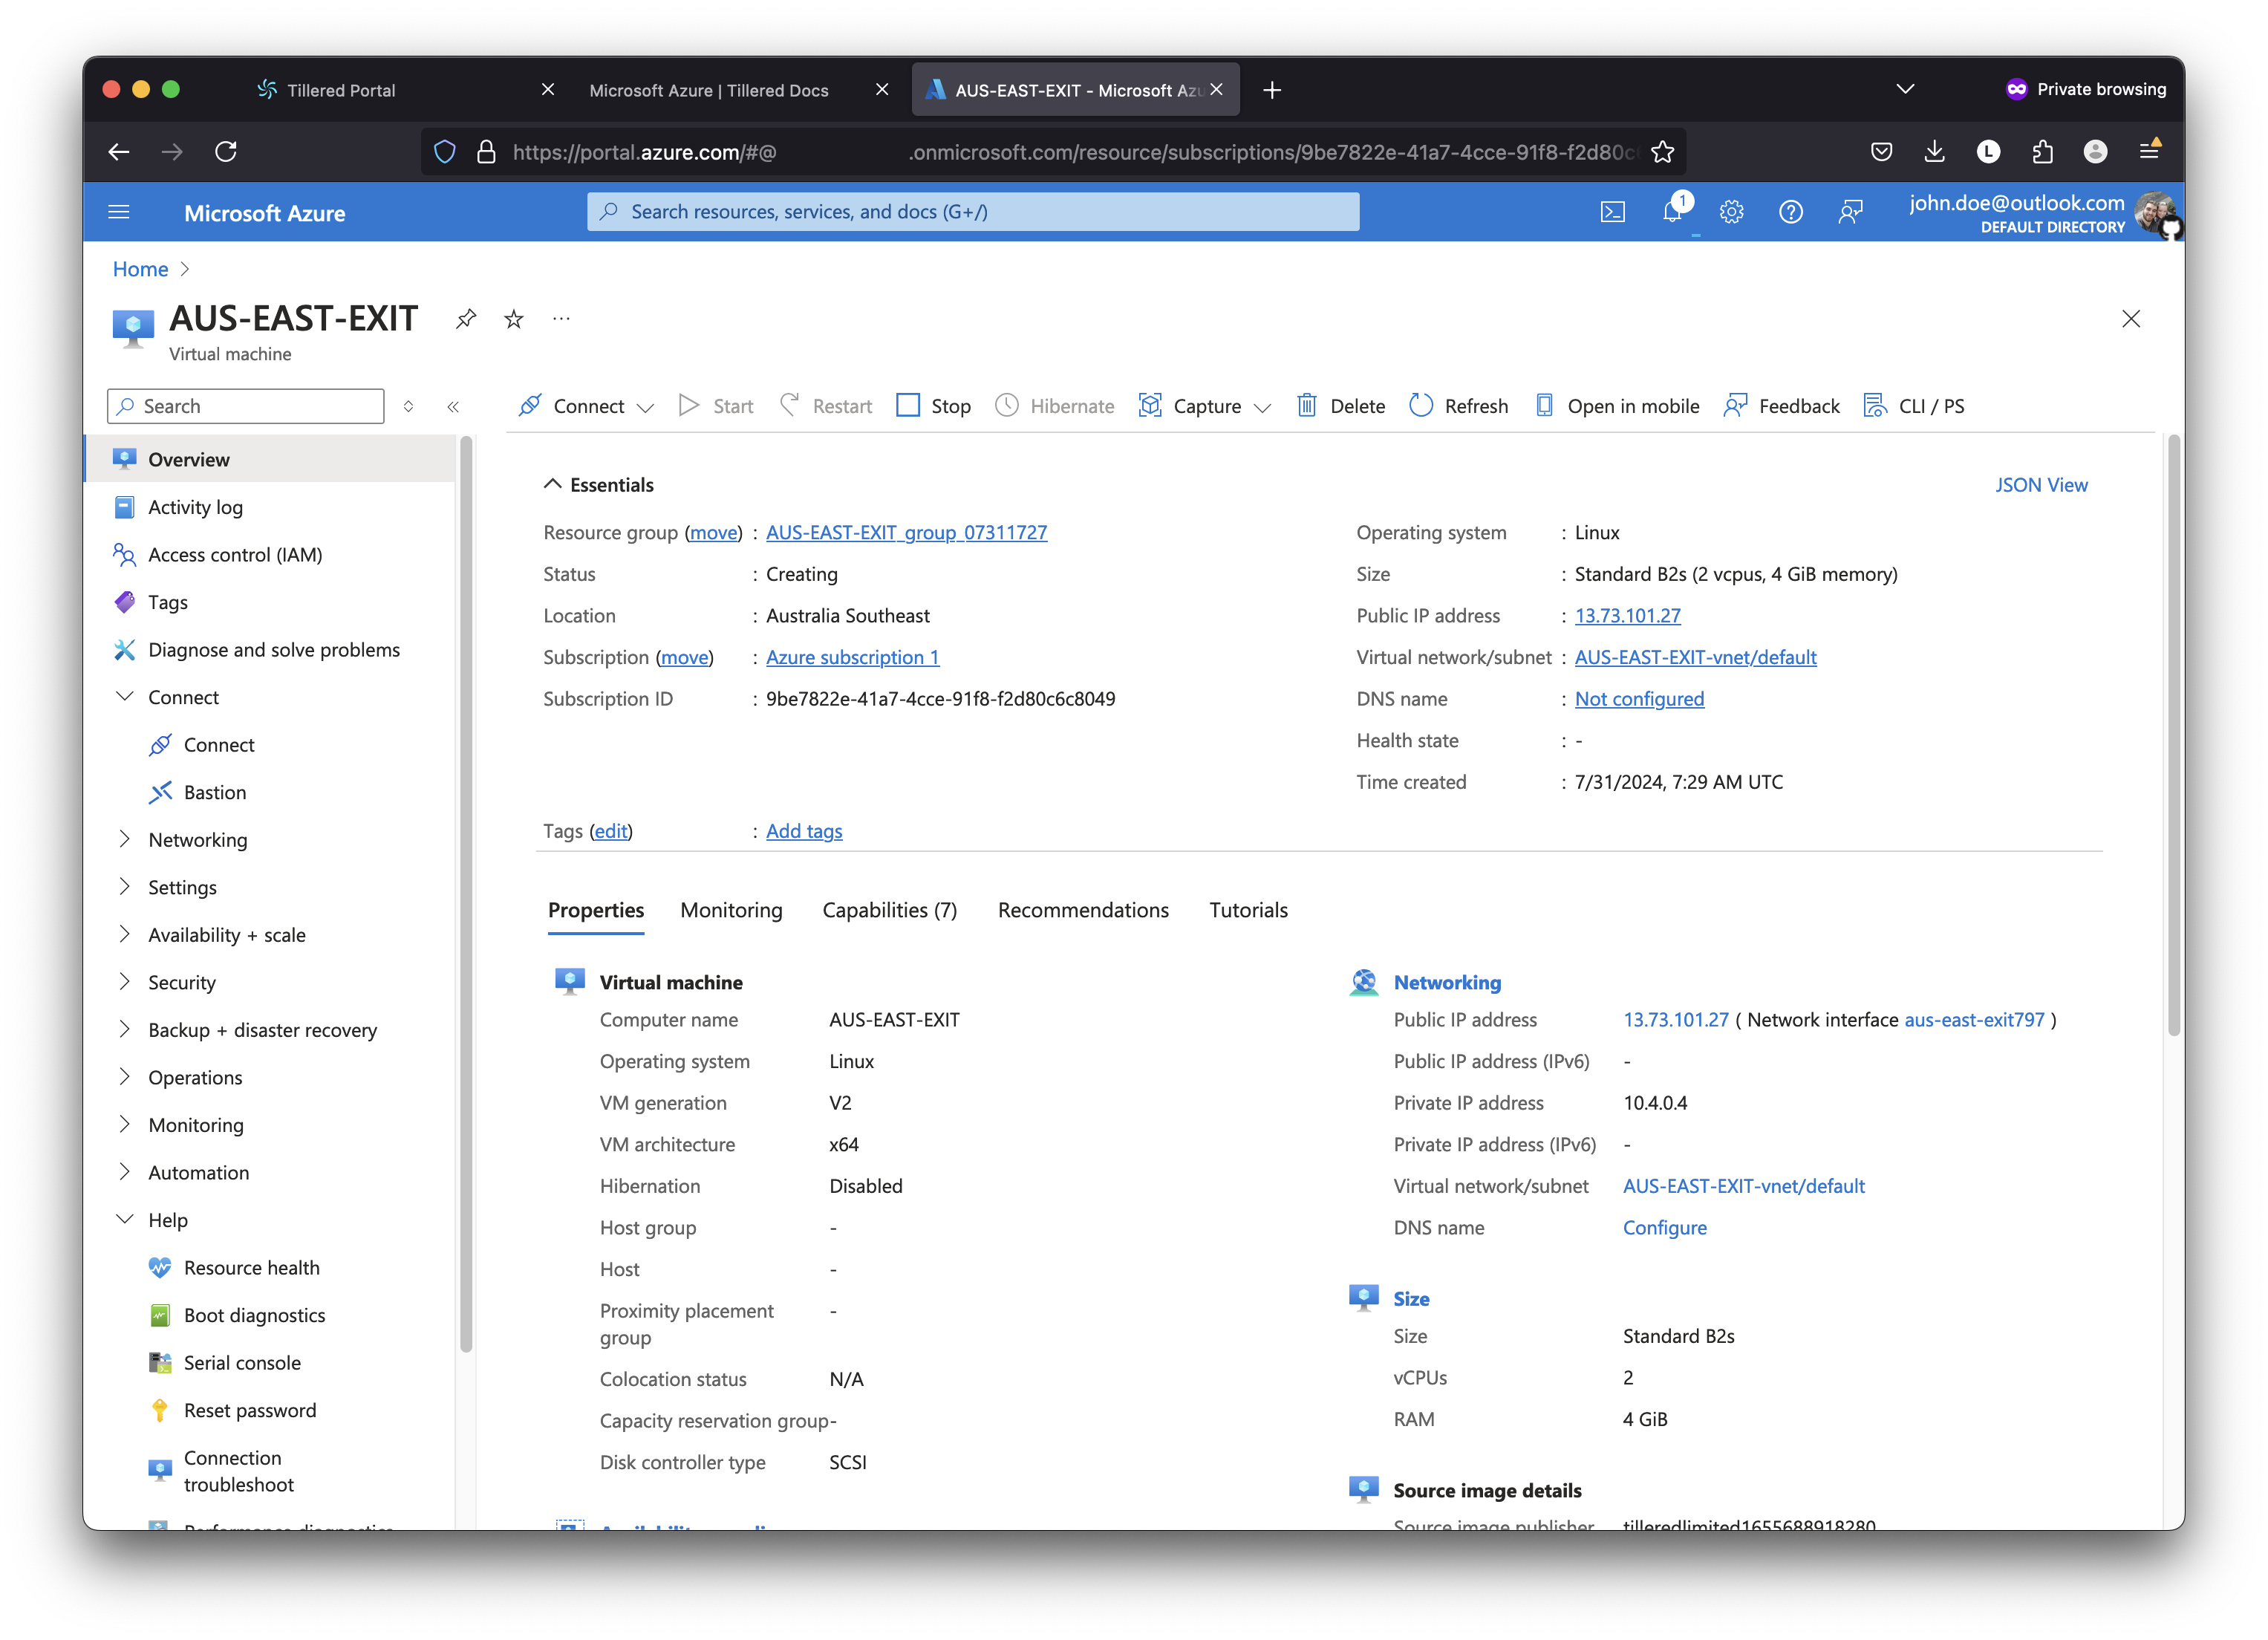
- Select
See all images- Search of
Tillered - Select
Tillered Standard Plan - x64 Gen 2or the latest version.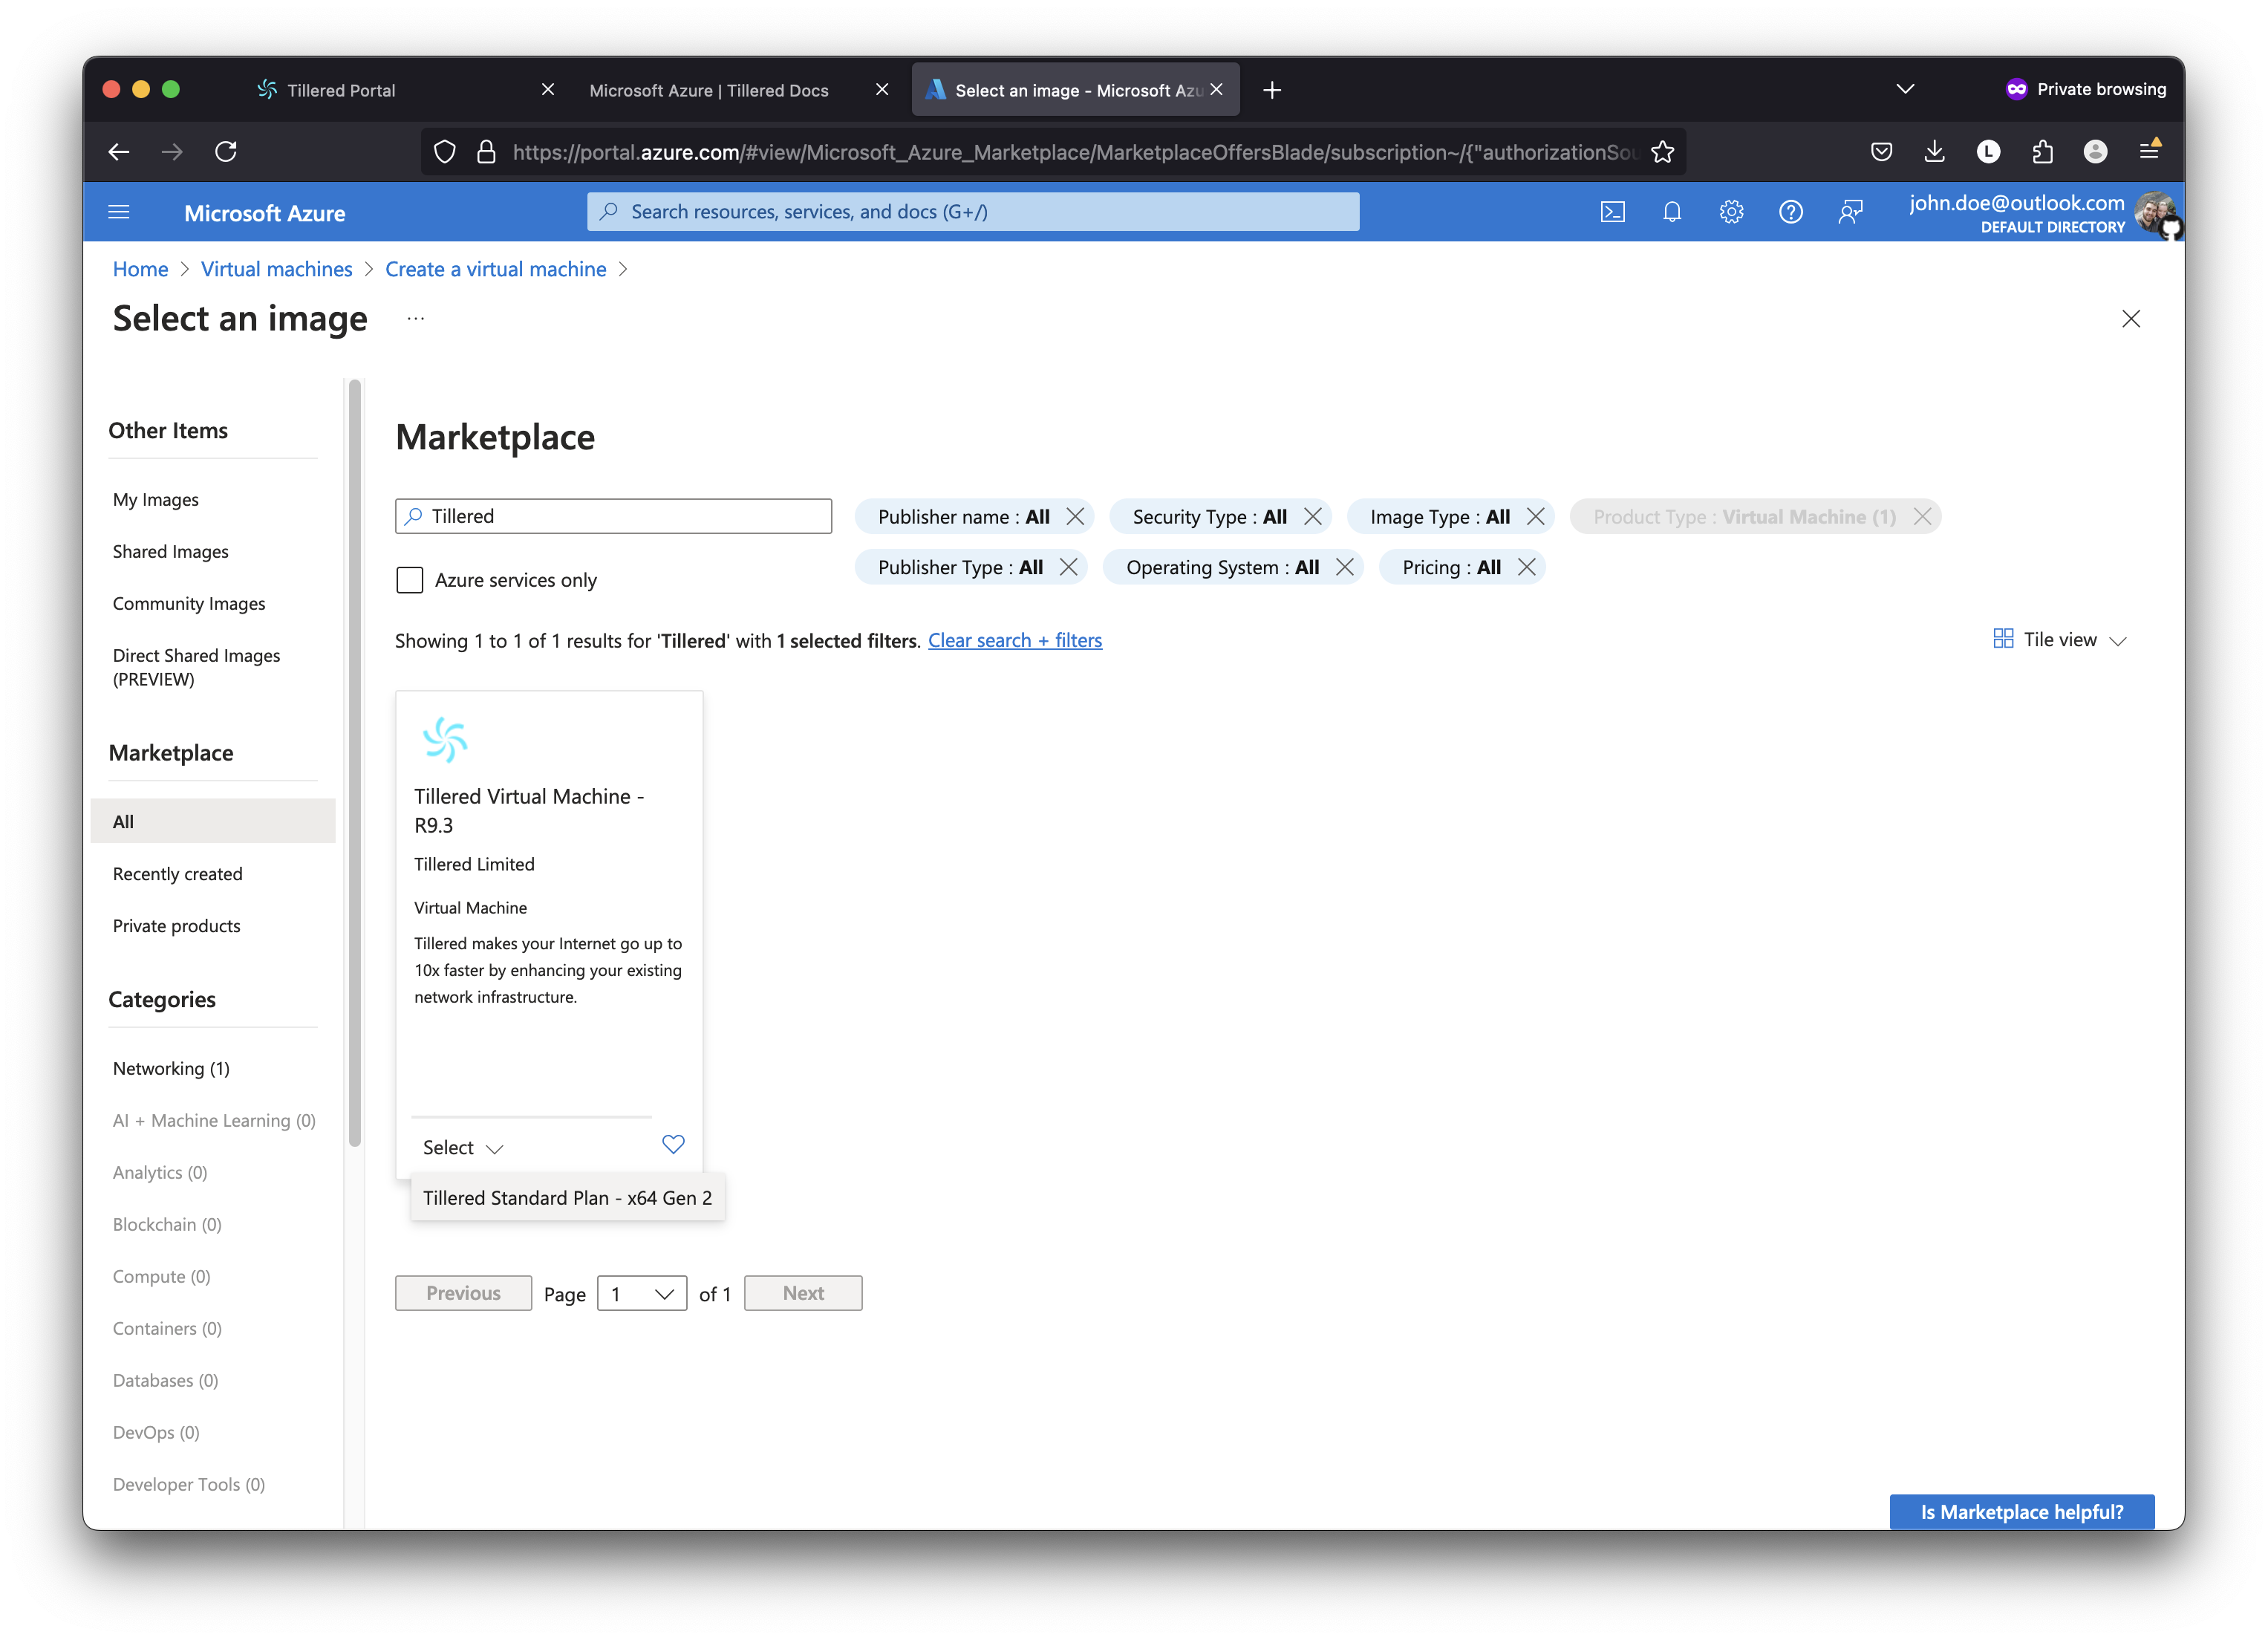
- Search of
- Choose any Authentication type. You won't need to access the VM directly.
- Review and Create.
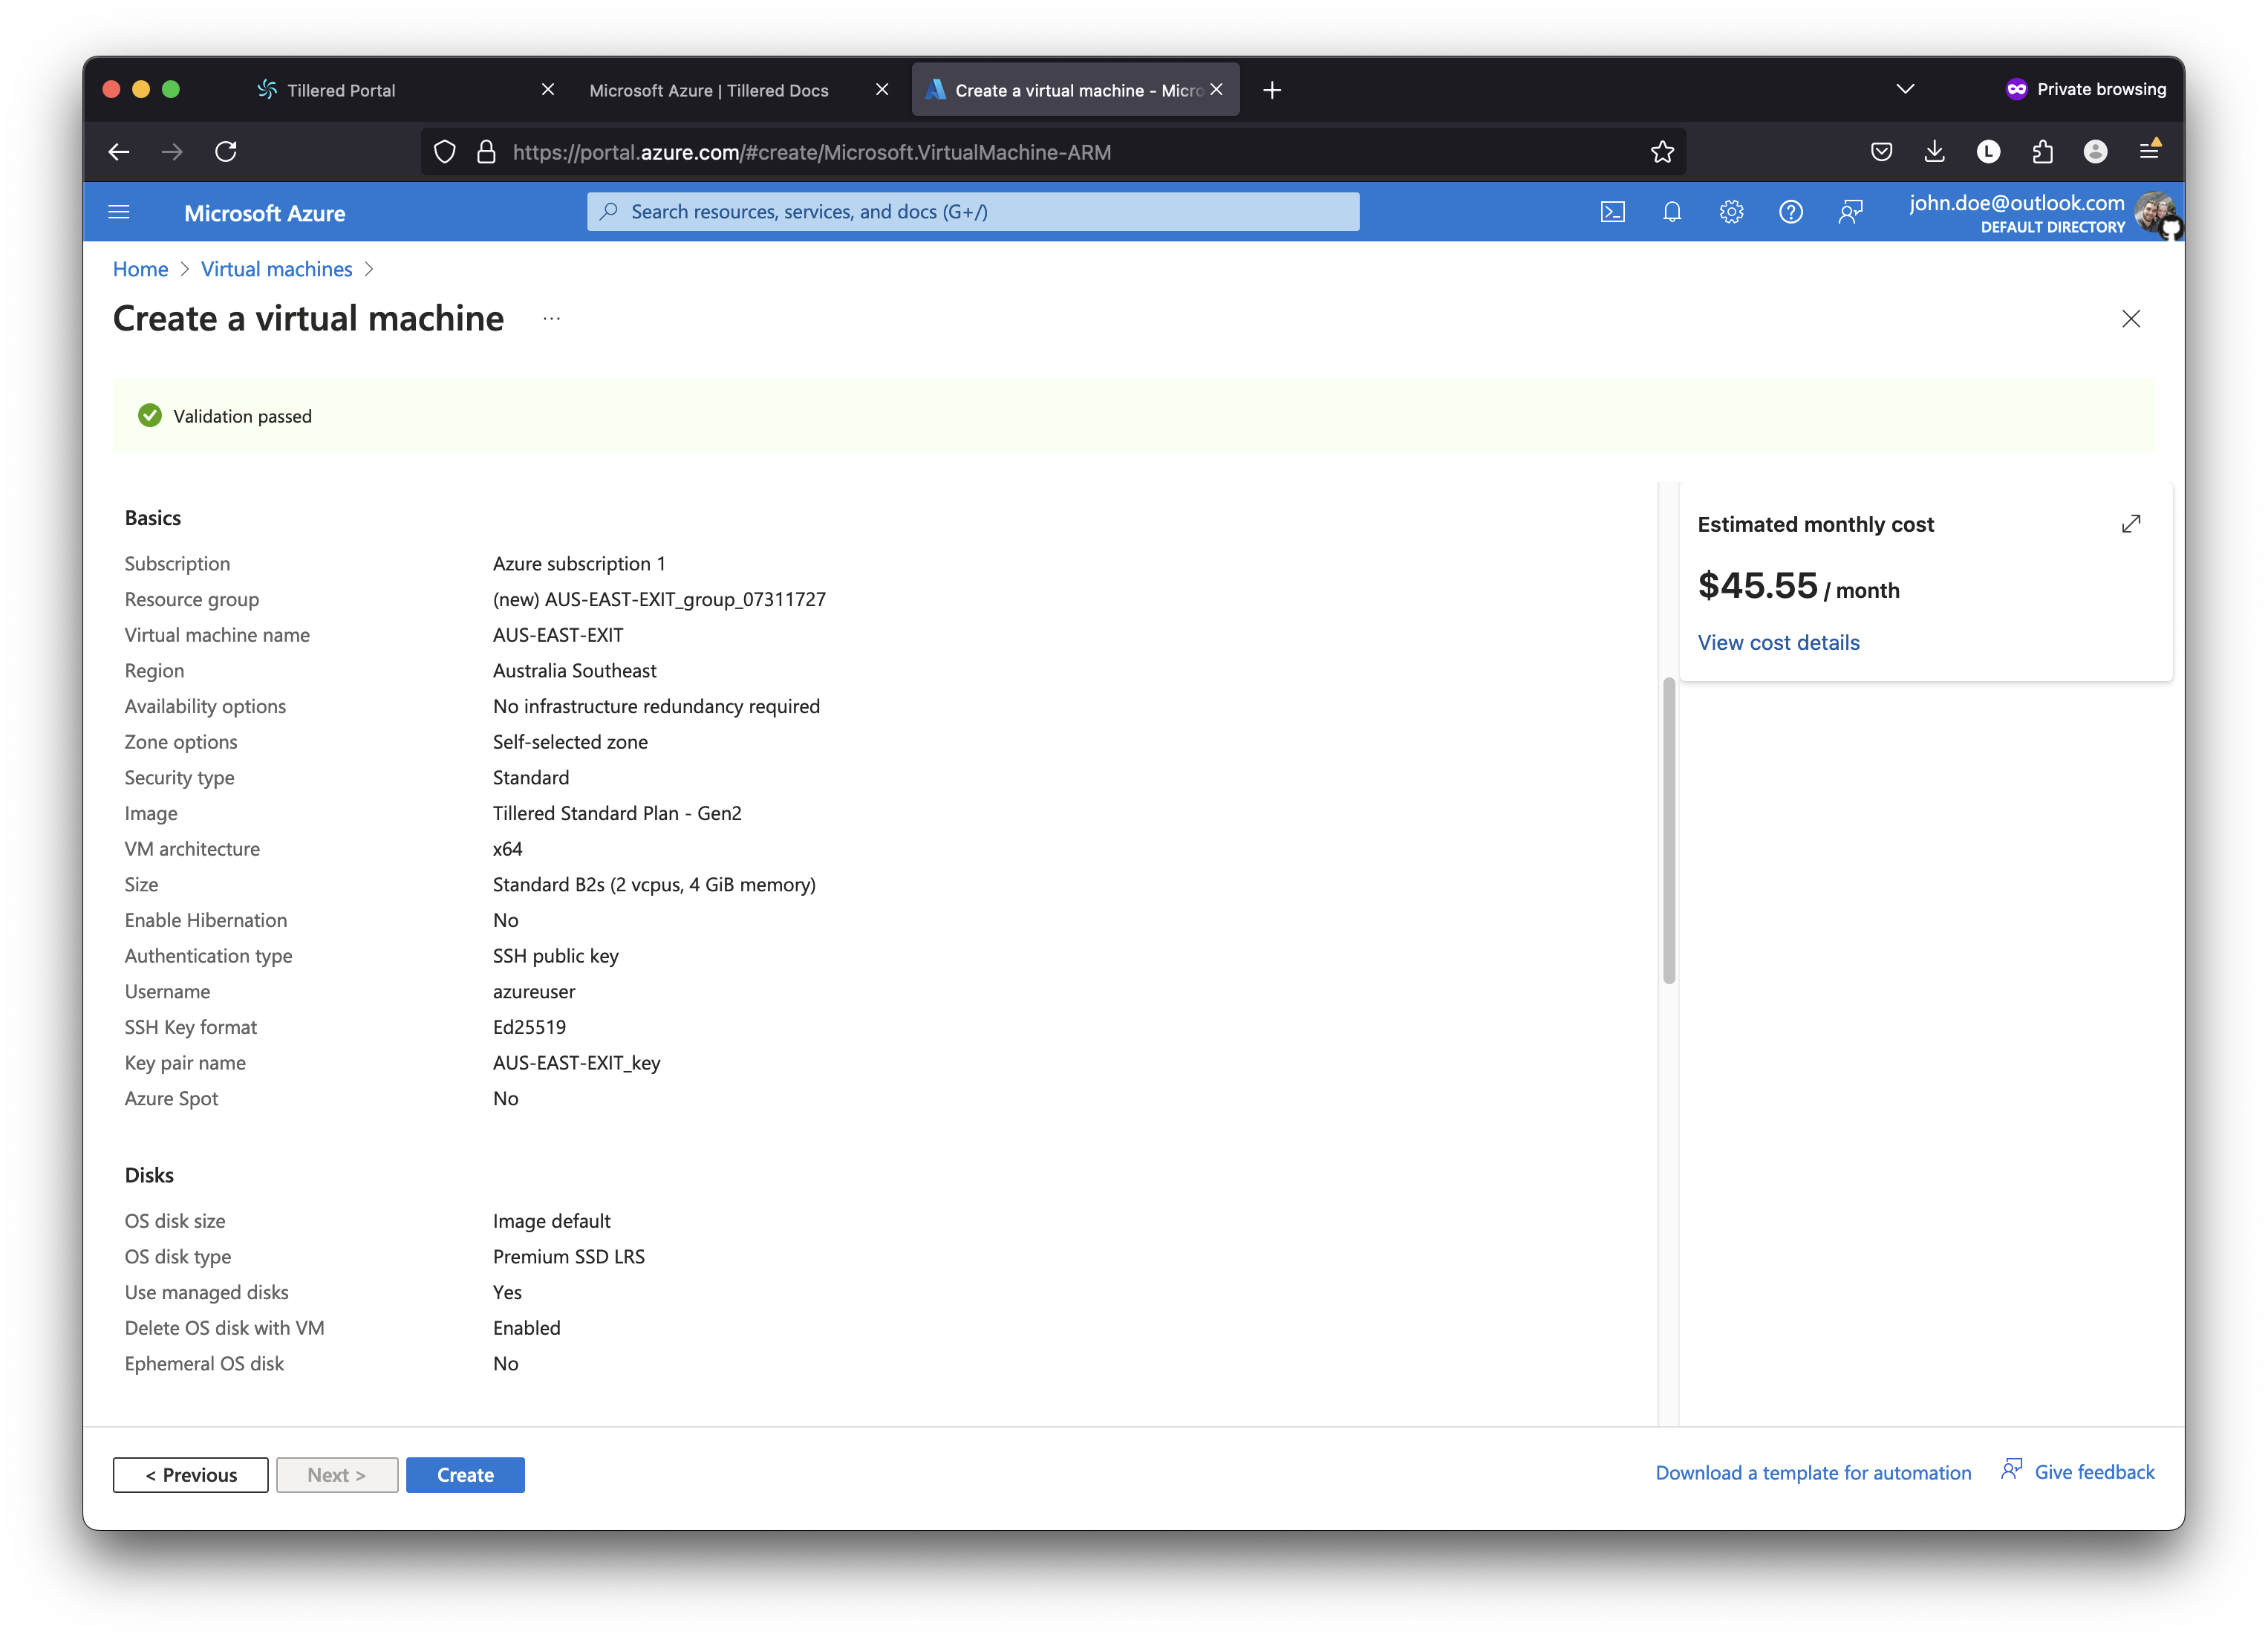
Boot the VM and wait 10-15 minutes for it to deploy. Azure will notify you when the node is ready.
INFO
After the node is ready, refresh the VM details page. The Computer Name field will show a Tillered FQDN.
Step 4: Add Nodes to Tillered Hub
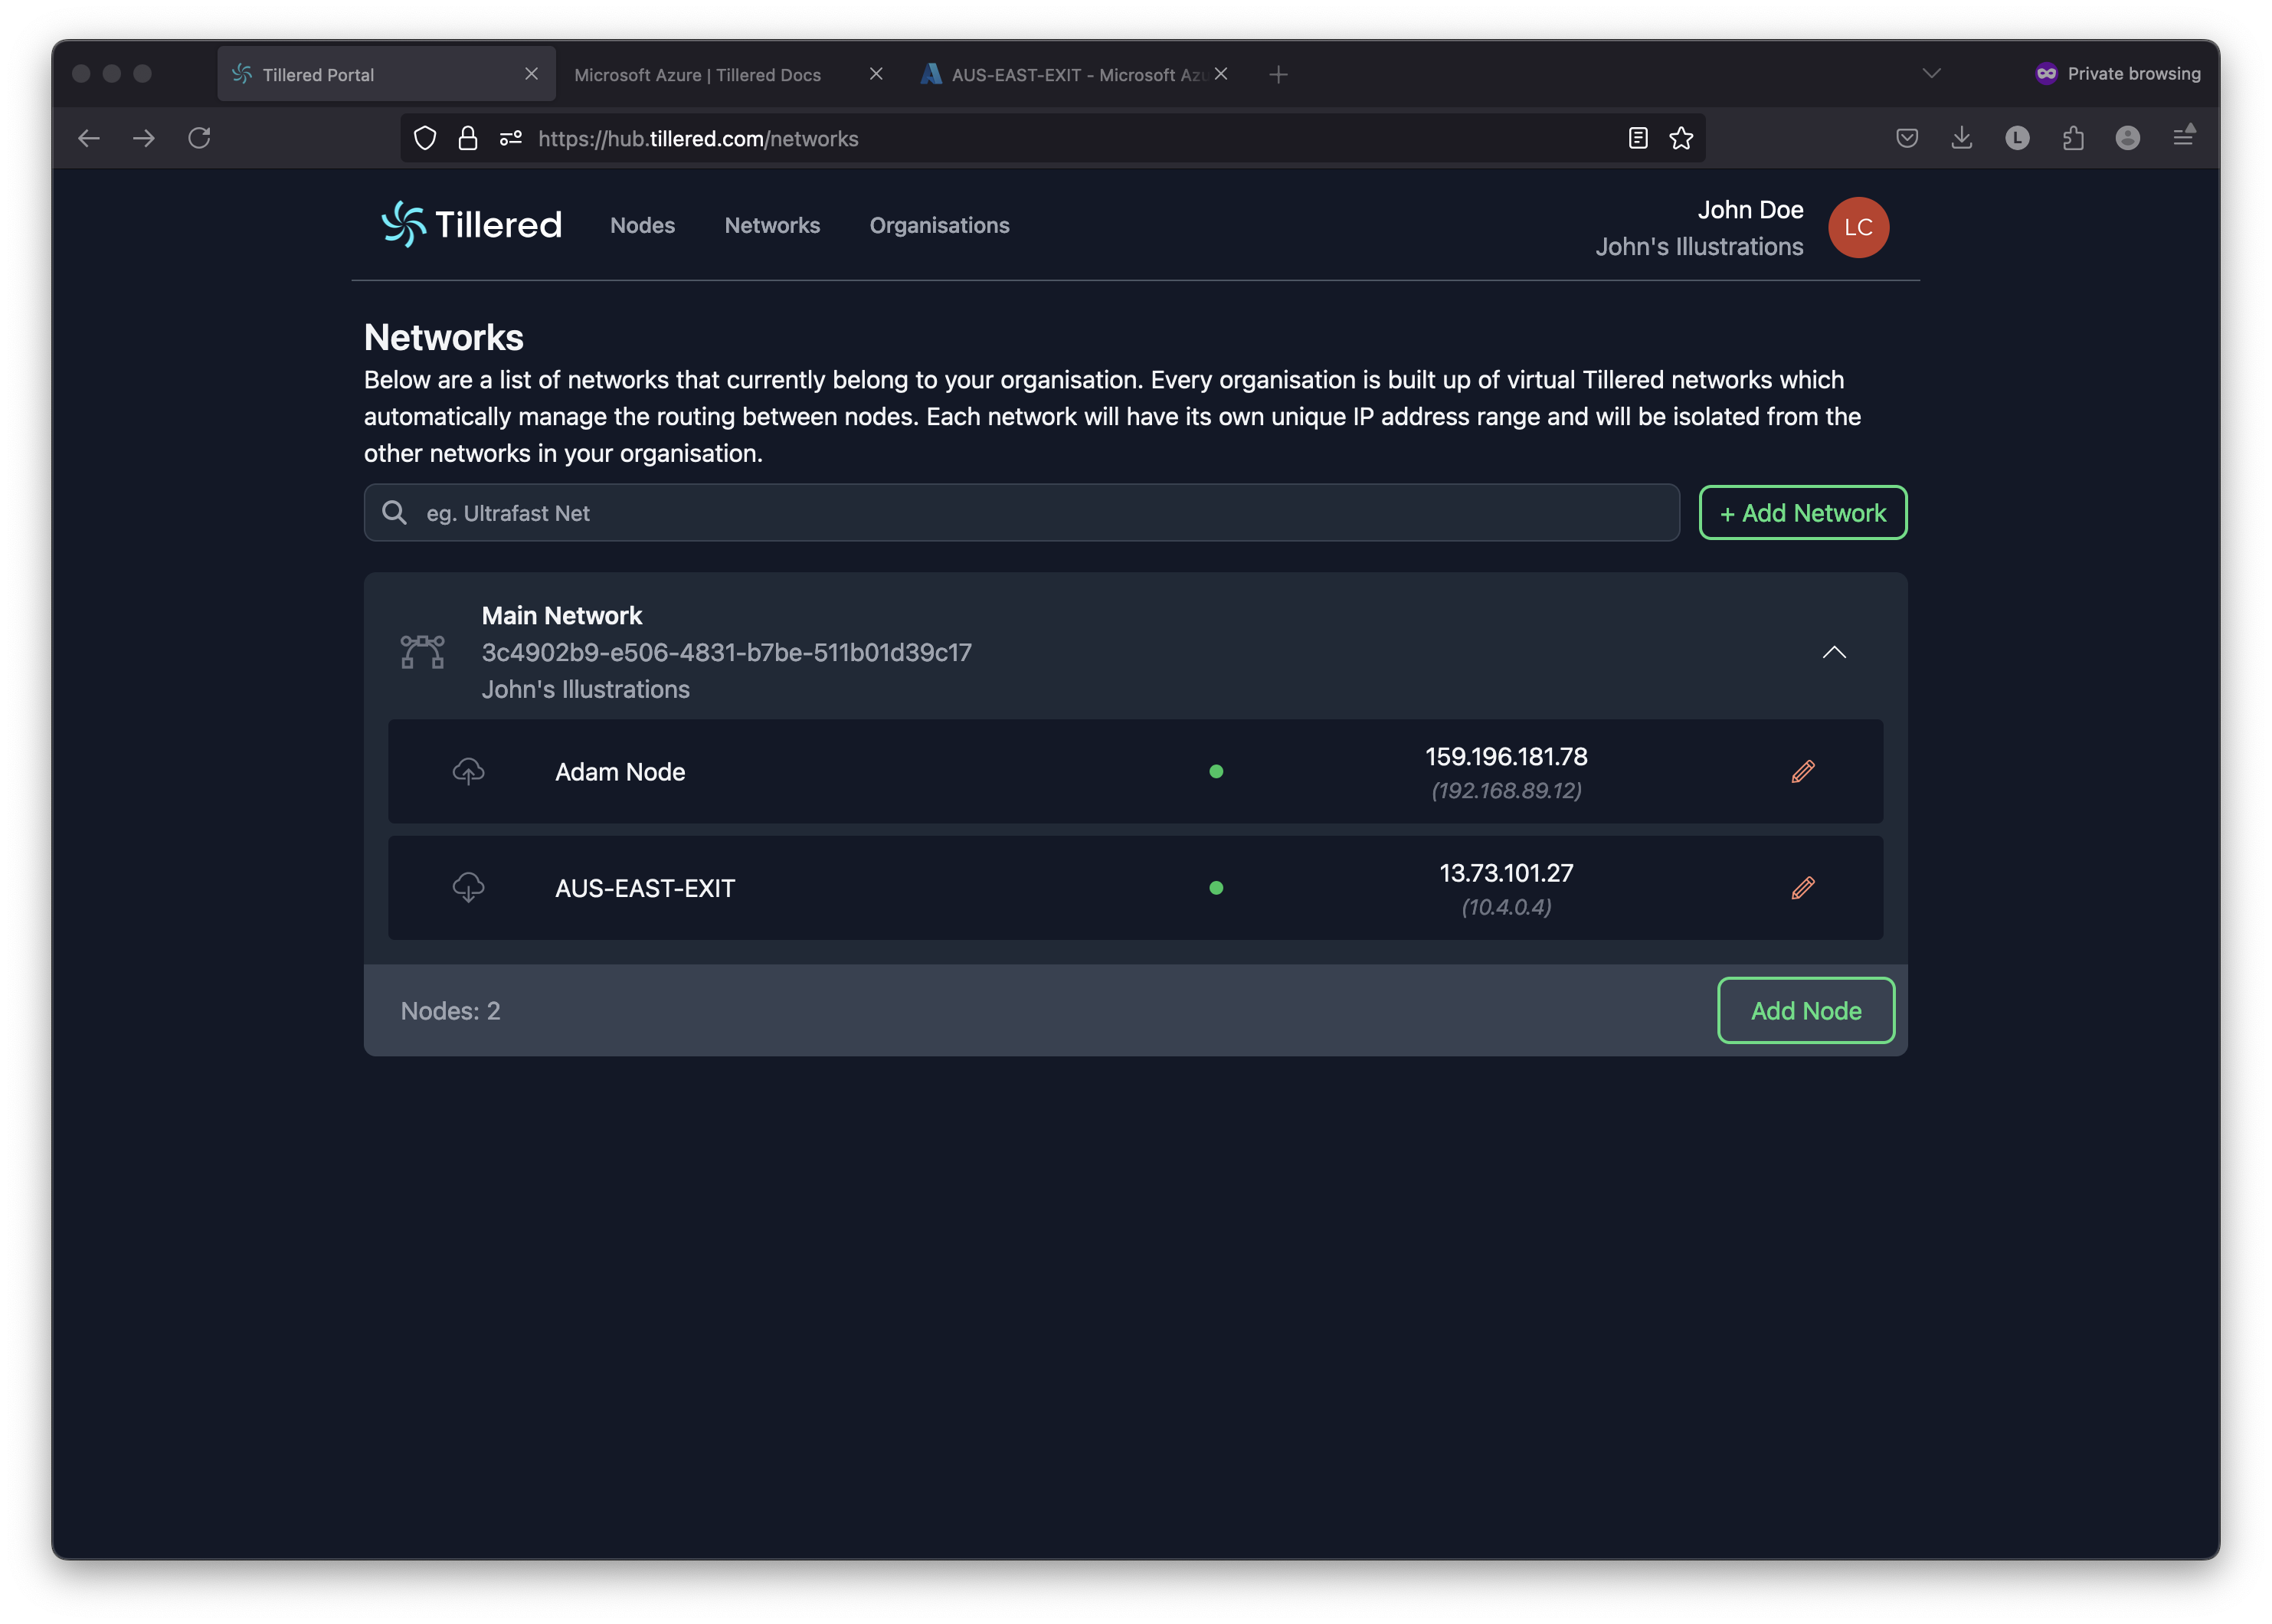
- Go to the Tillered Hub
- Create a Network:
- Navigate to the Network Tab.
- Click
+ Add Network - Name your network.
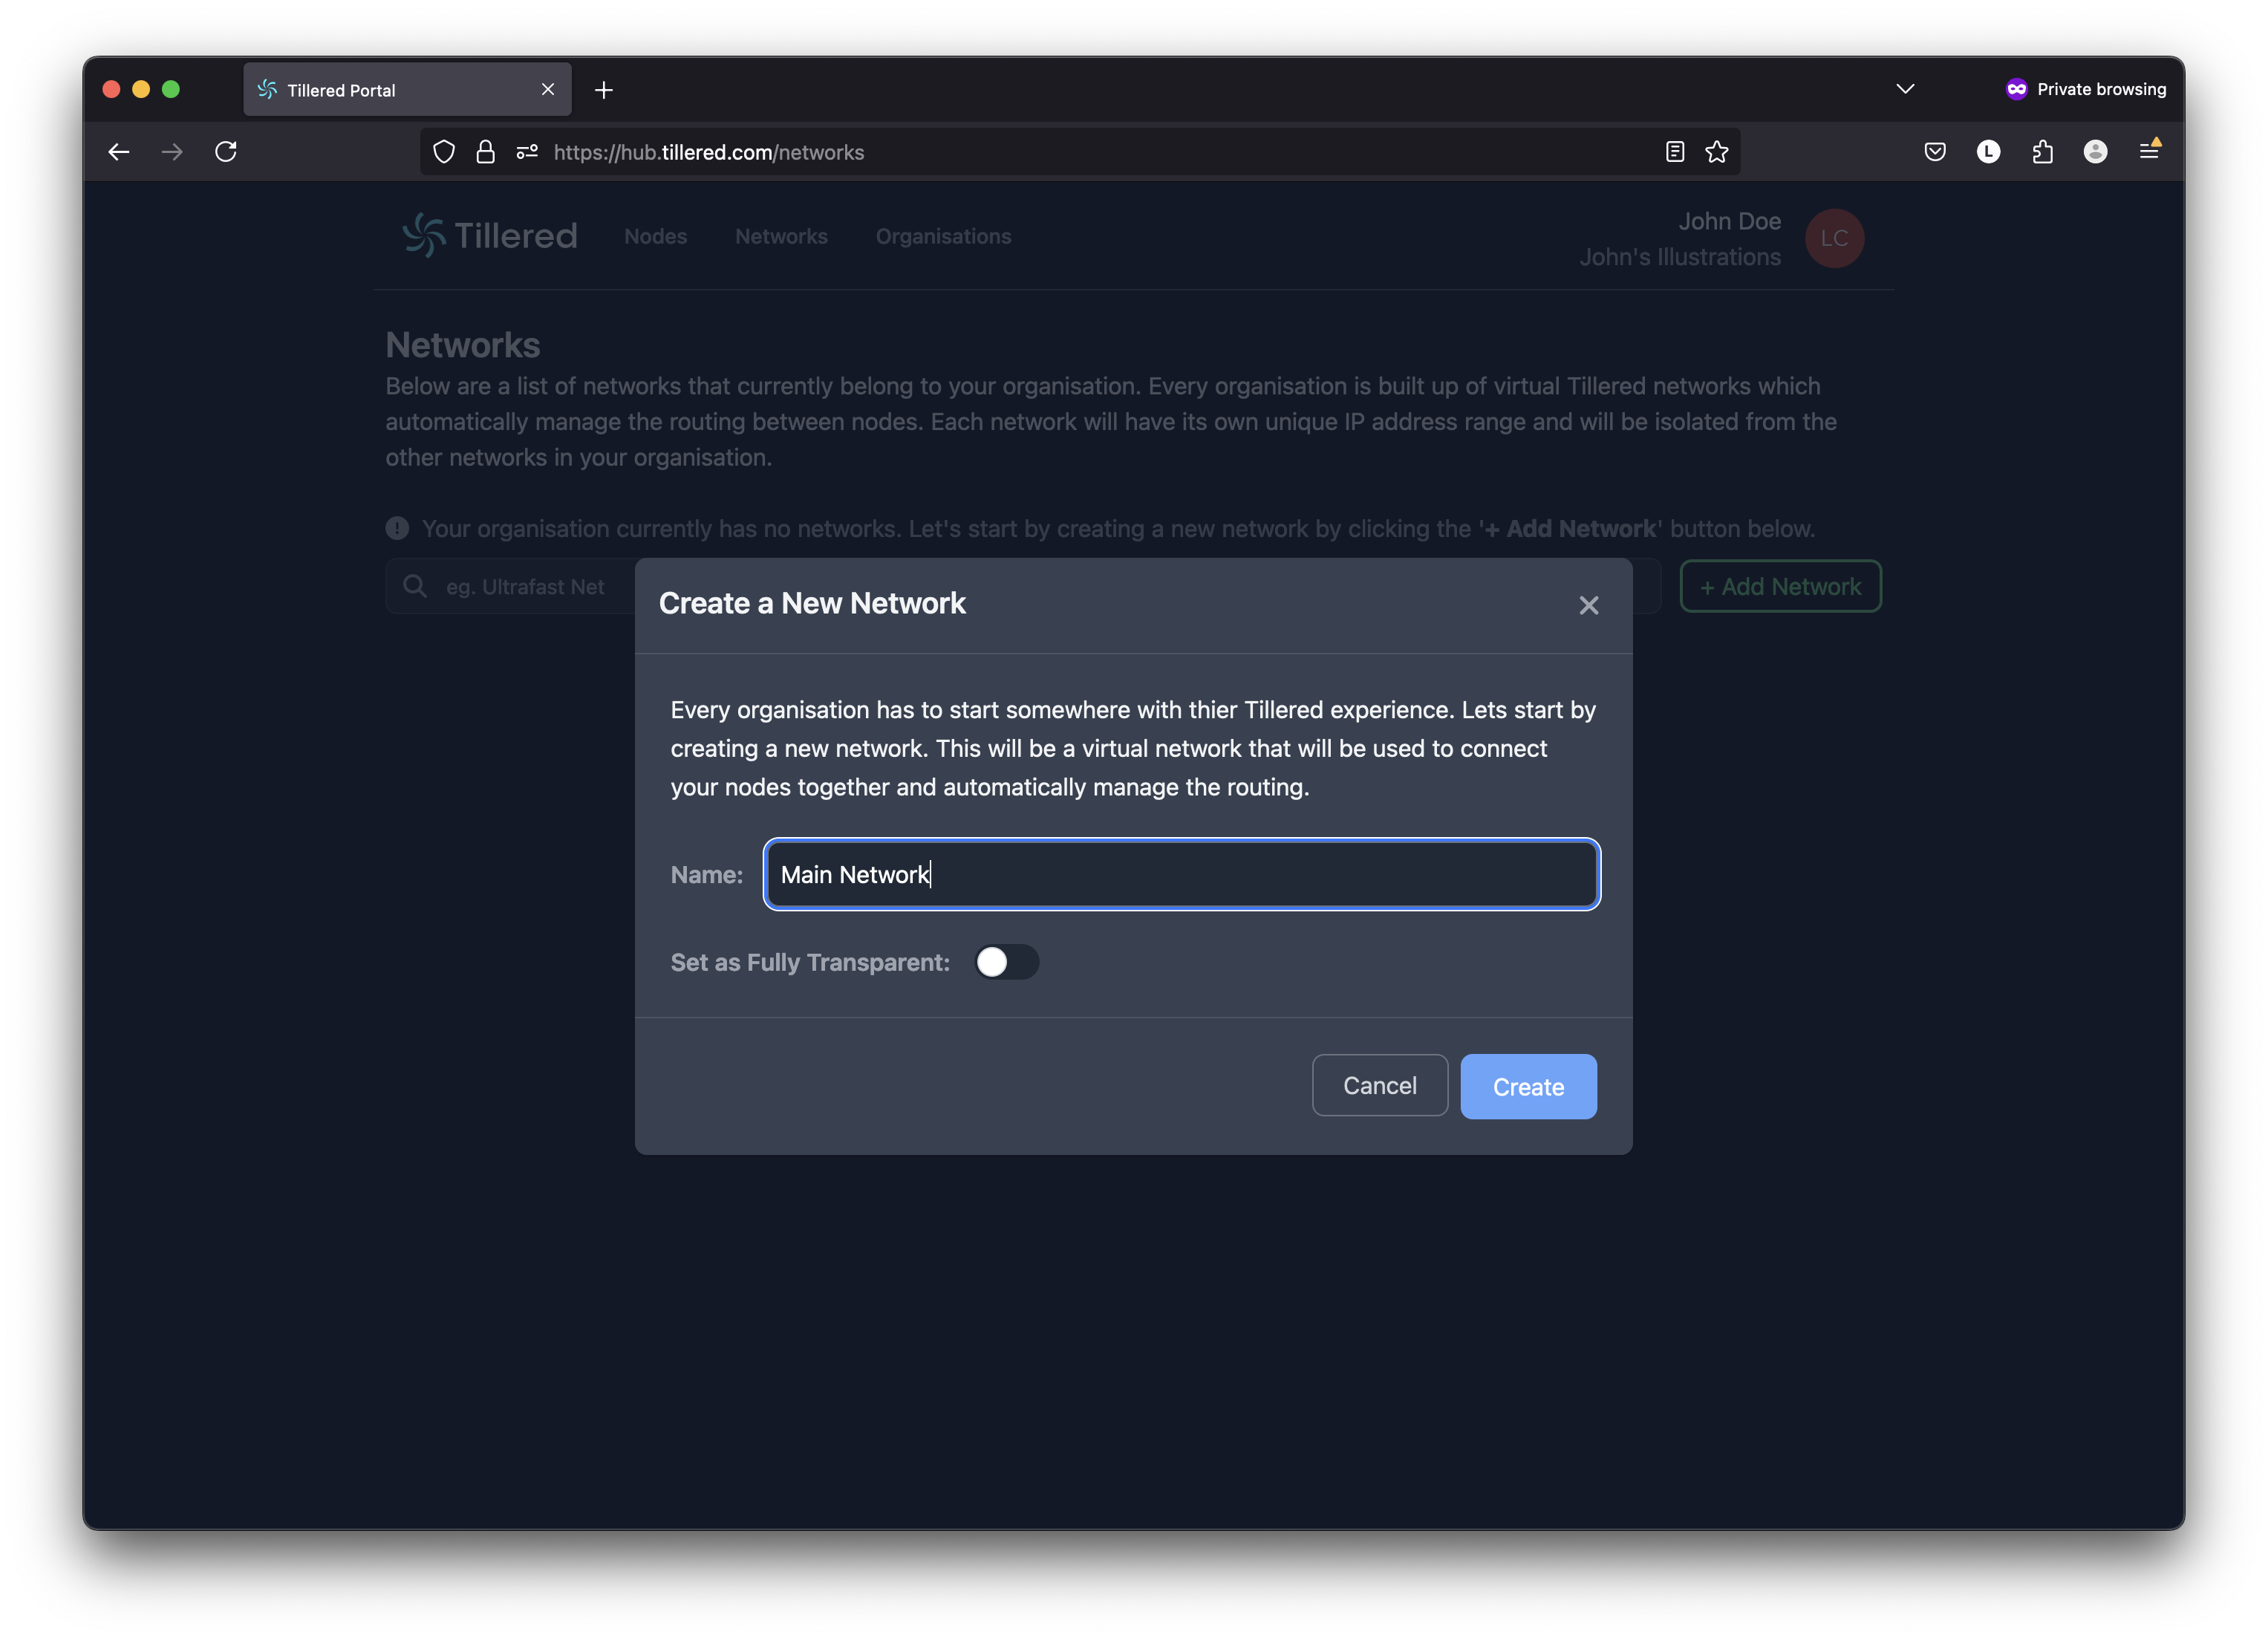
- Click Create.
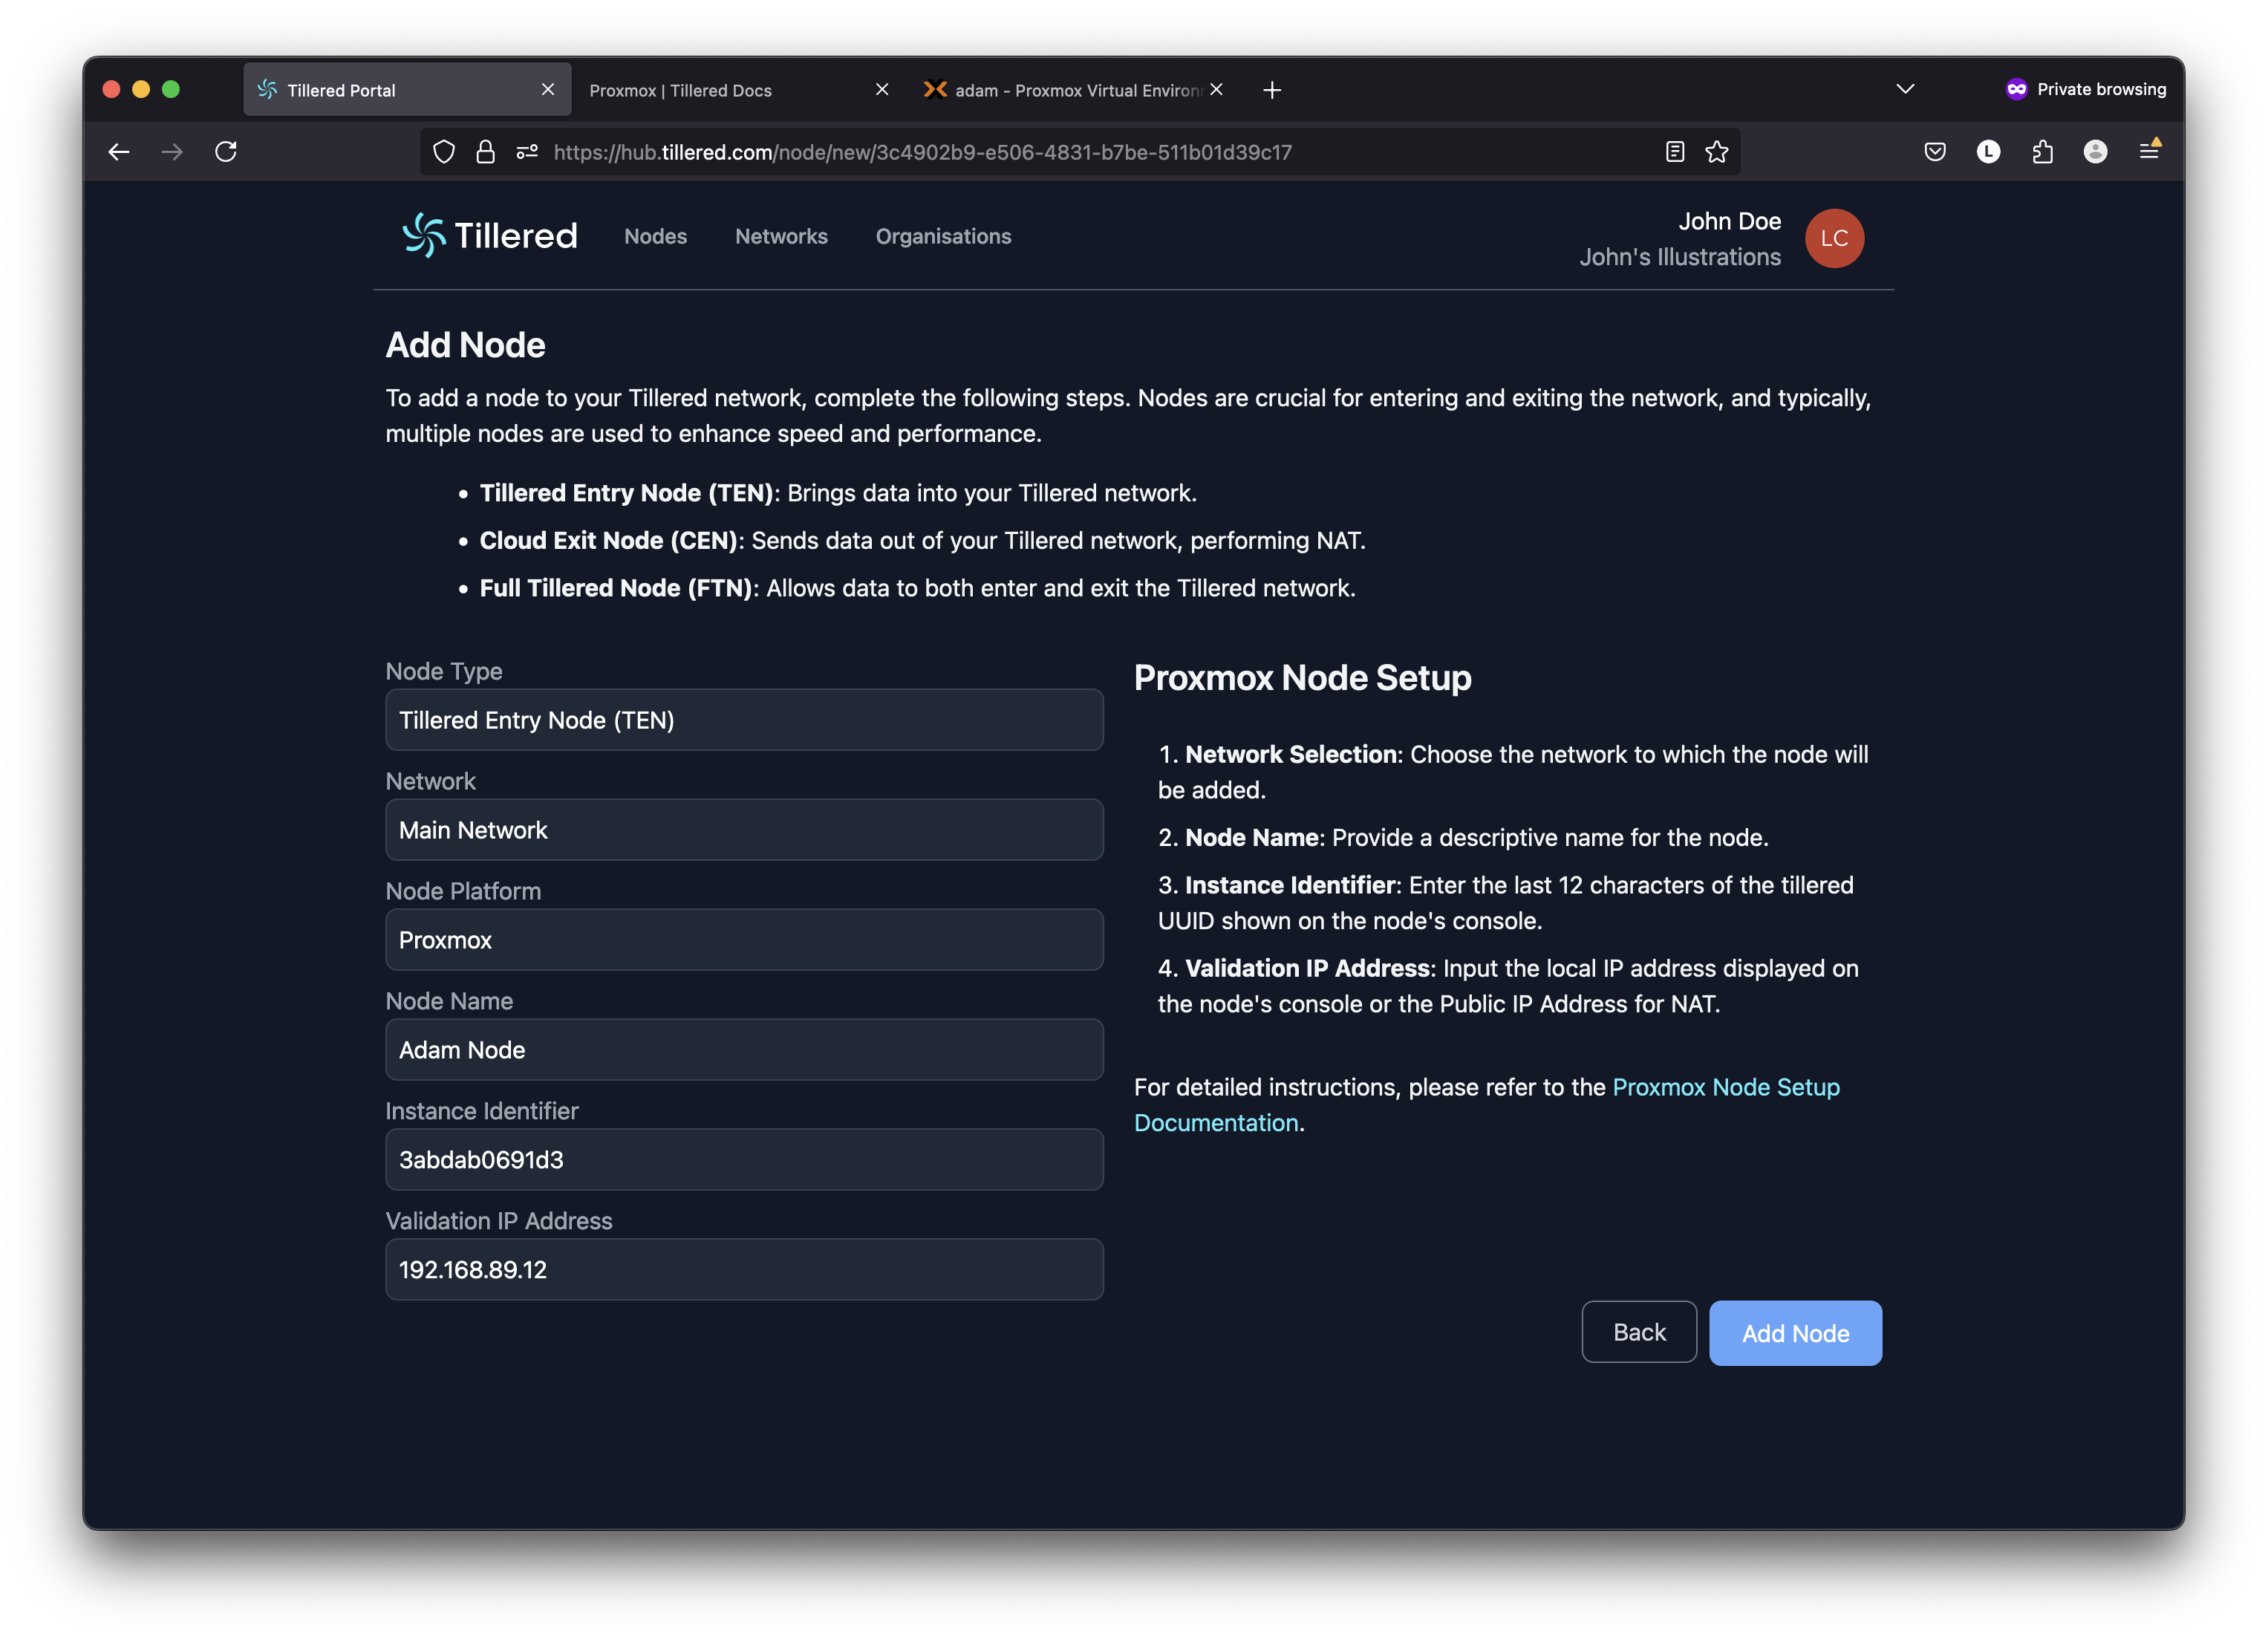
- Add Entry Node
- In the network you just created, click
Add Node.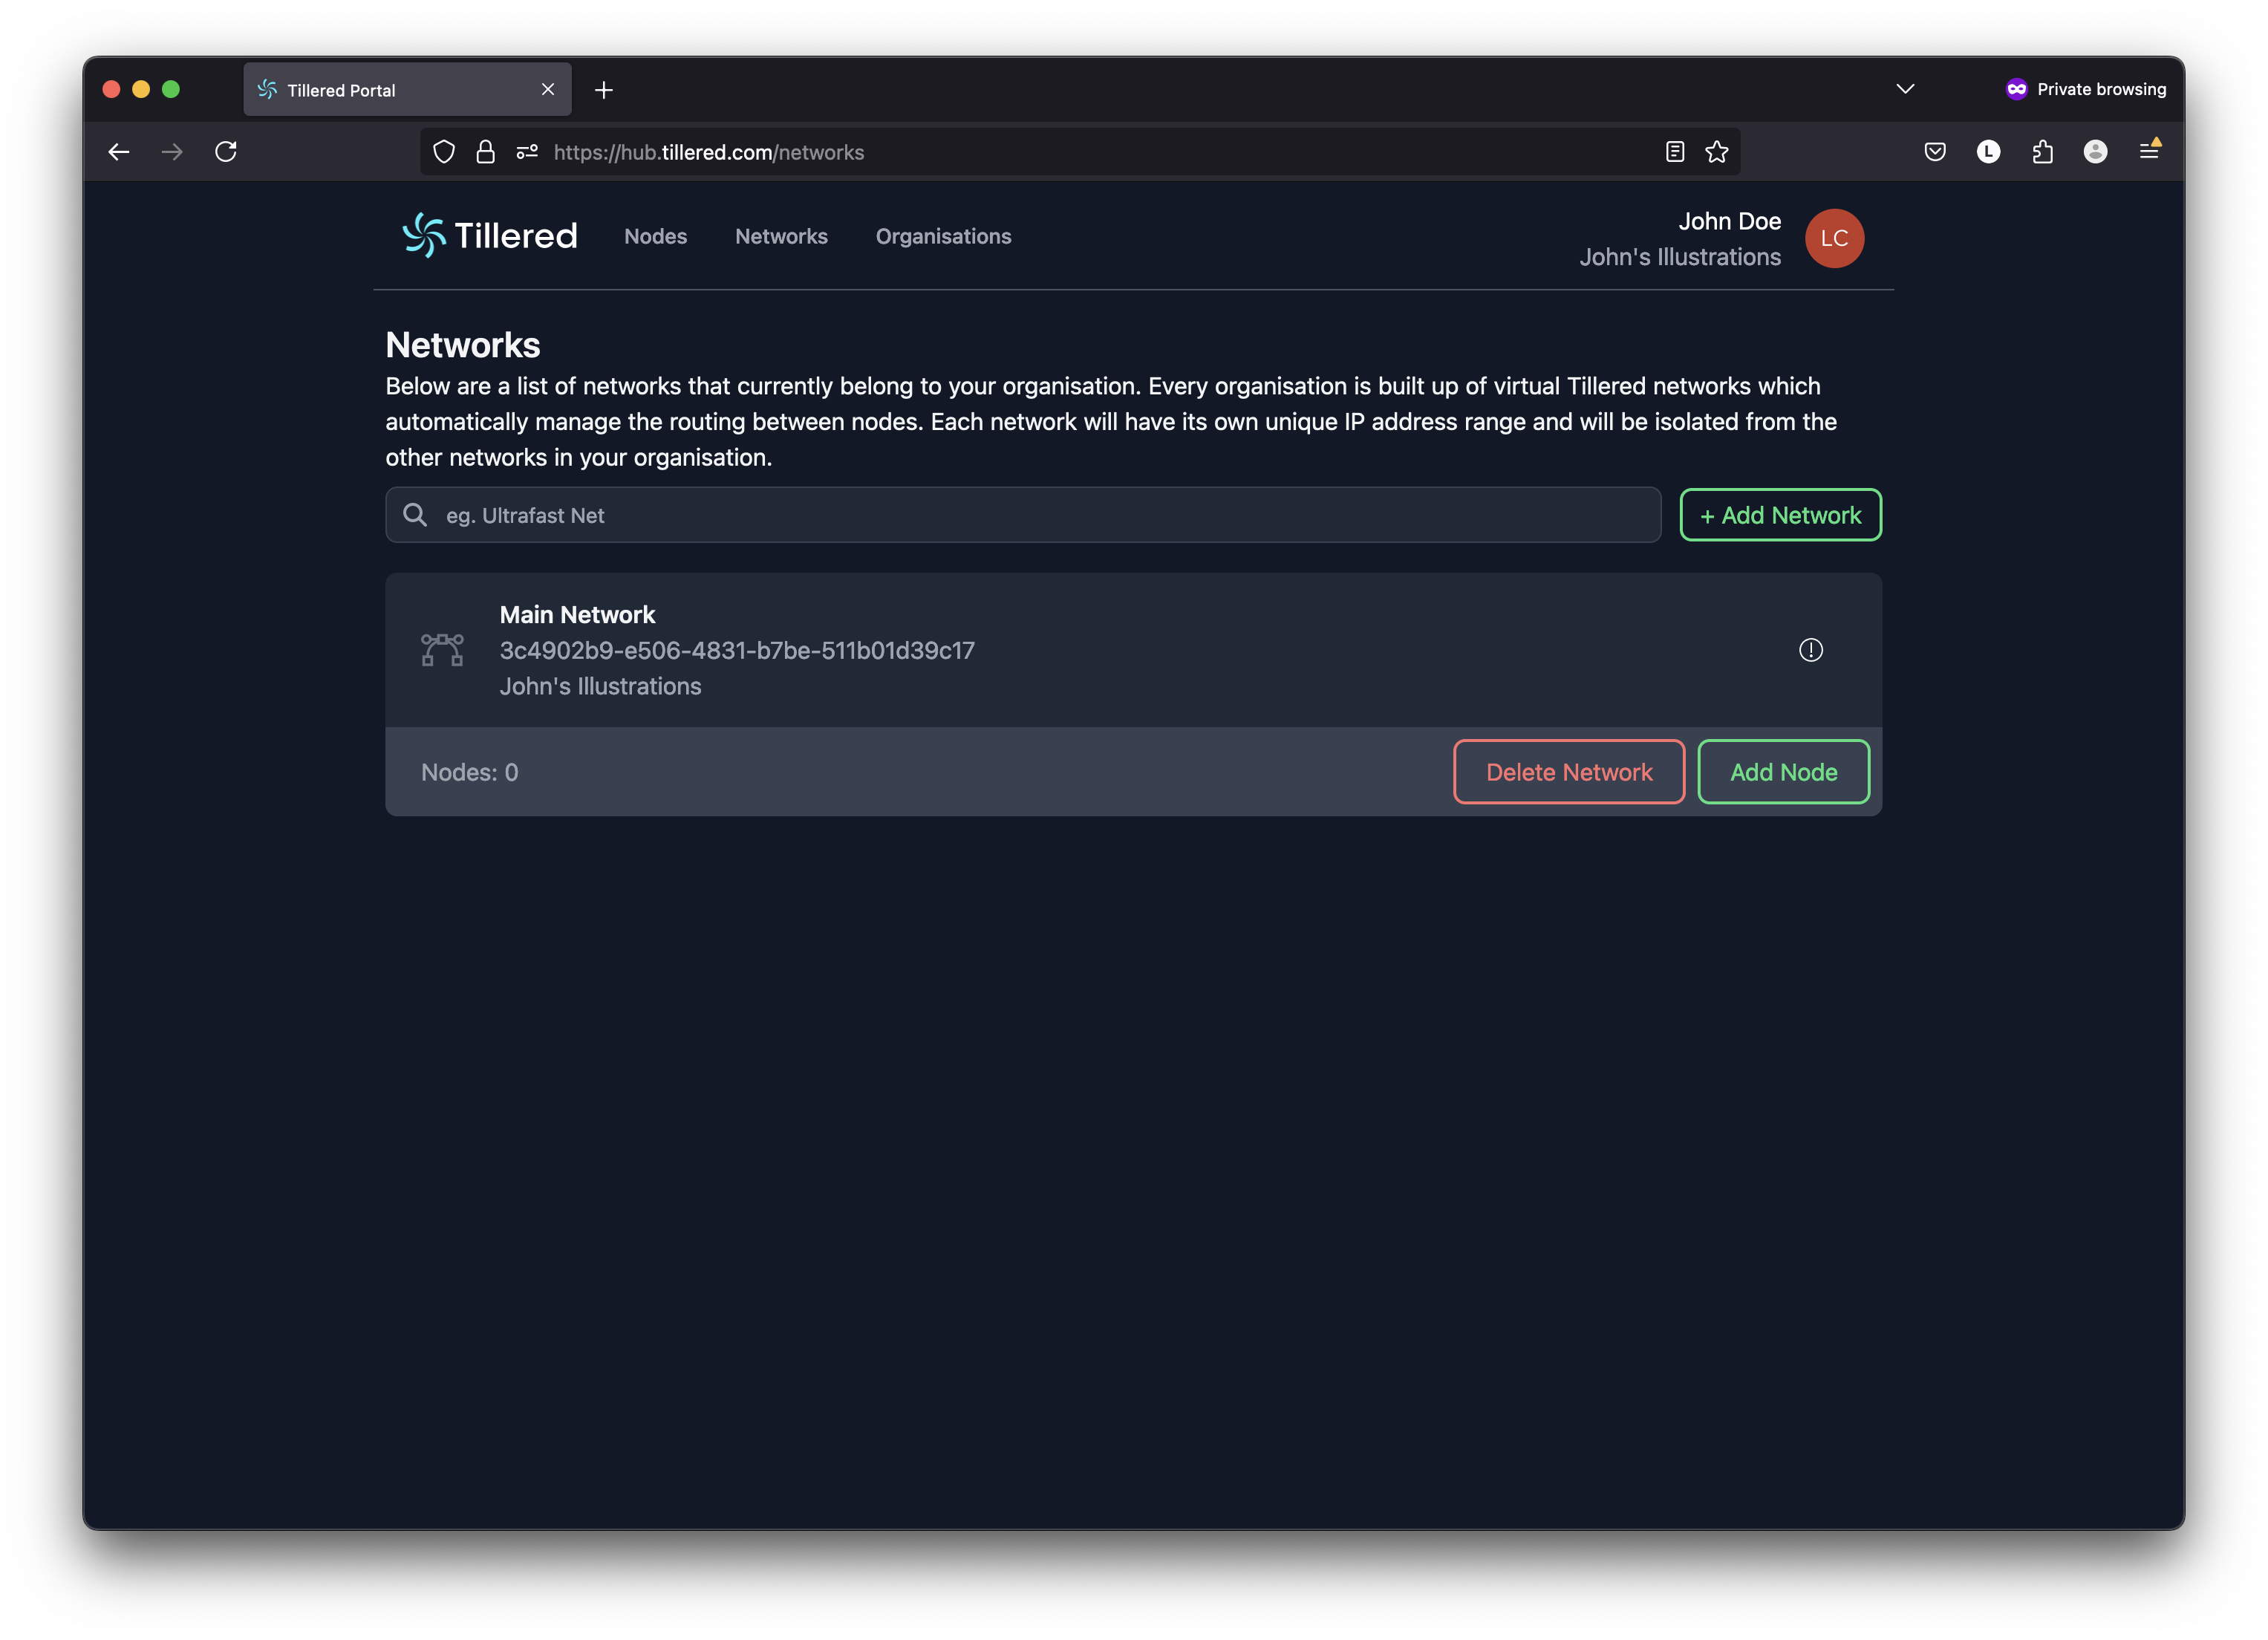
- Fill in the details:
- Node Type:
Tillered Entry Node (TEN) - Network: Your created network (pre-filled).
- Node Platform:
Proxmox - Node Name: Descriptive name for the node.
- Instance Identifier: The last 12 characters of the UUID from the Proxmox Node's console.

- Validation IP Address: The IP from the Proxmox Node's console.
- Node Type:
- Click
Add Nodeand typeConfirmin the modale. - Complete the payment process if this is your first node.
- In the network you just created, click
- Add Exit Node
- In the network, click Add Node again.
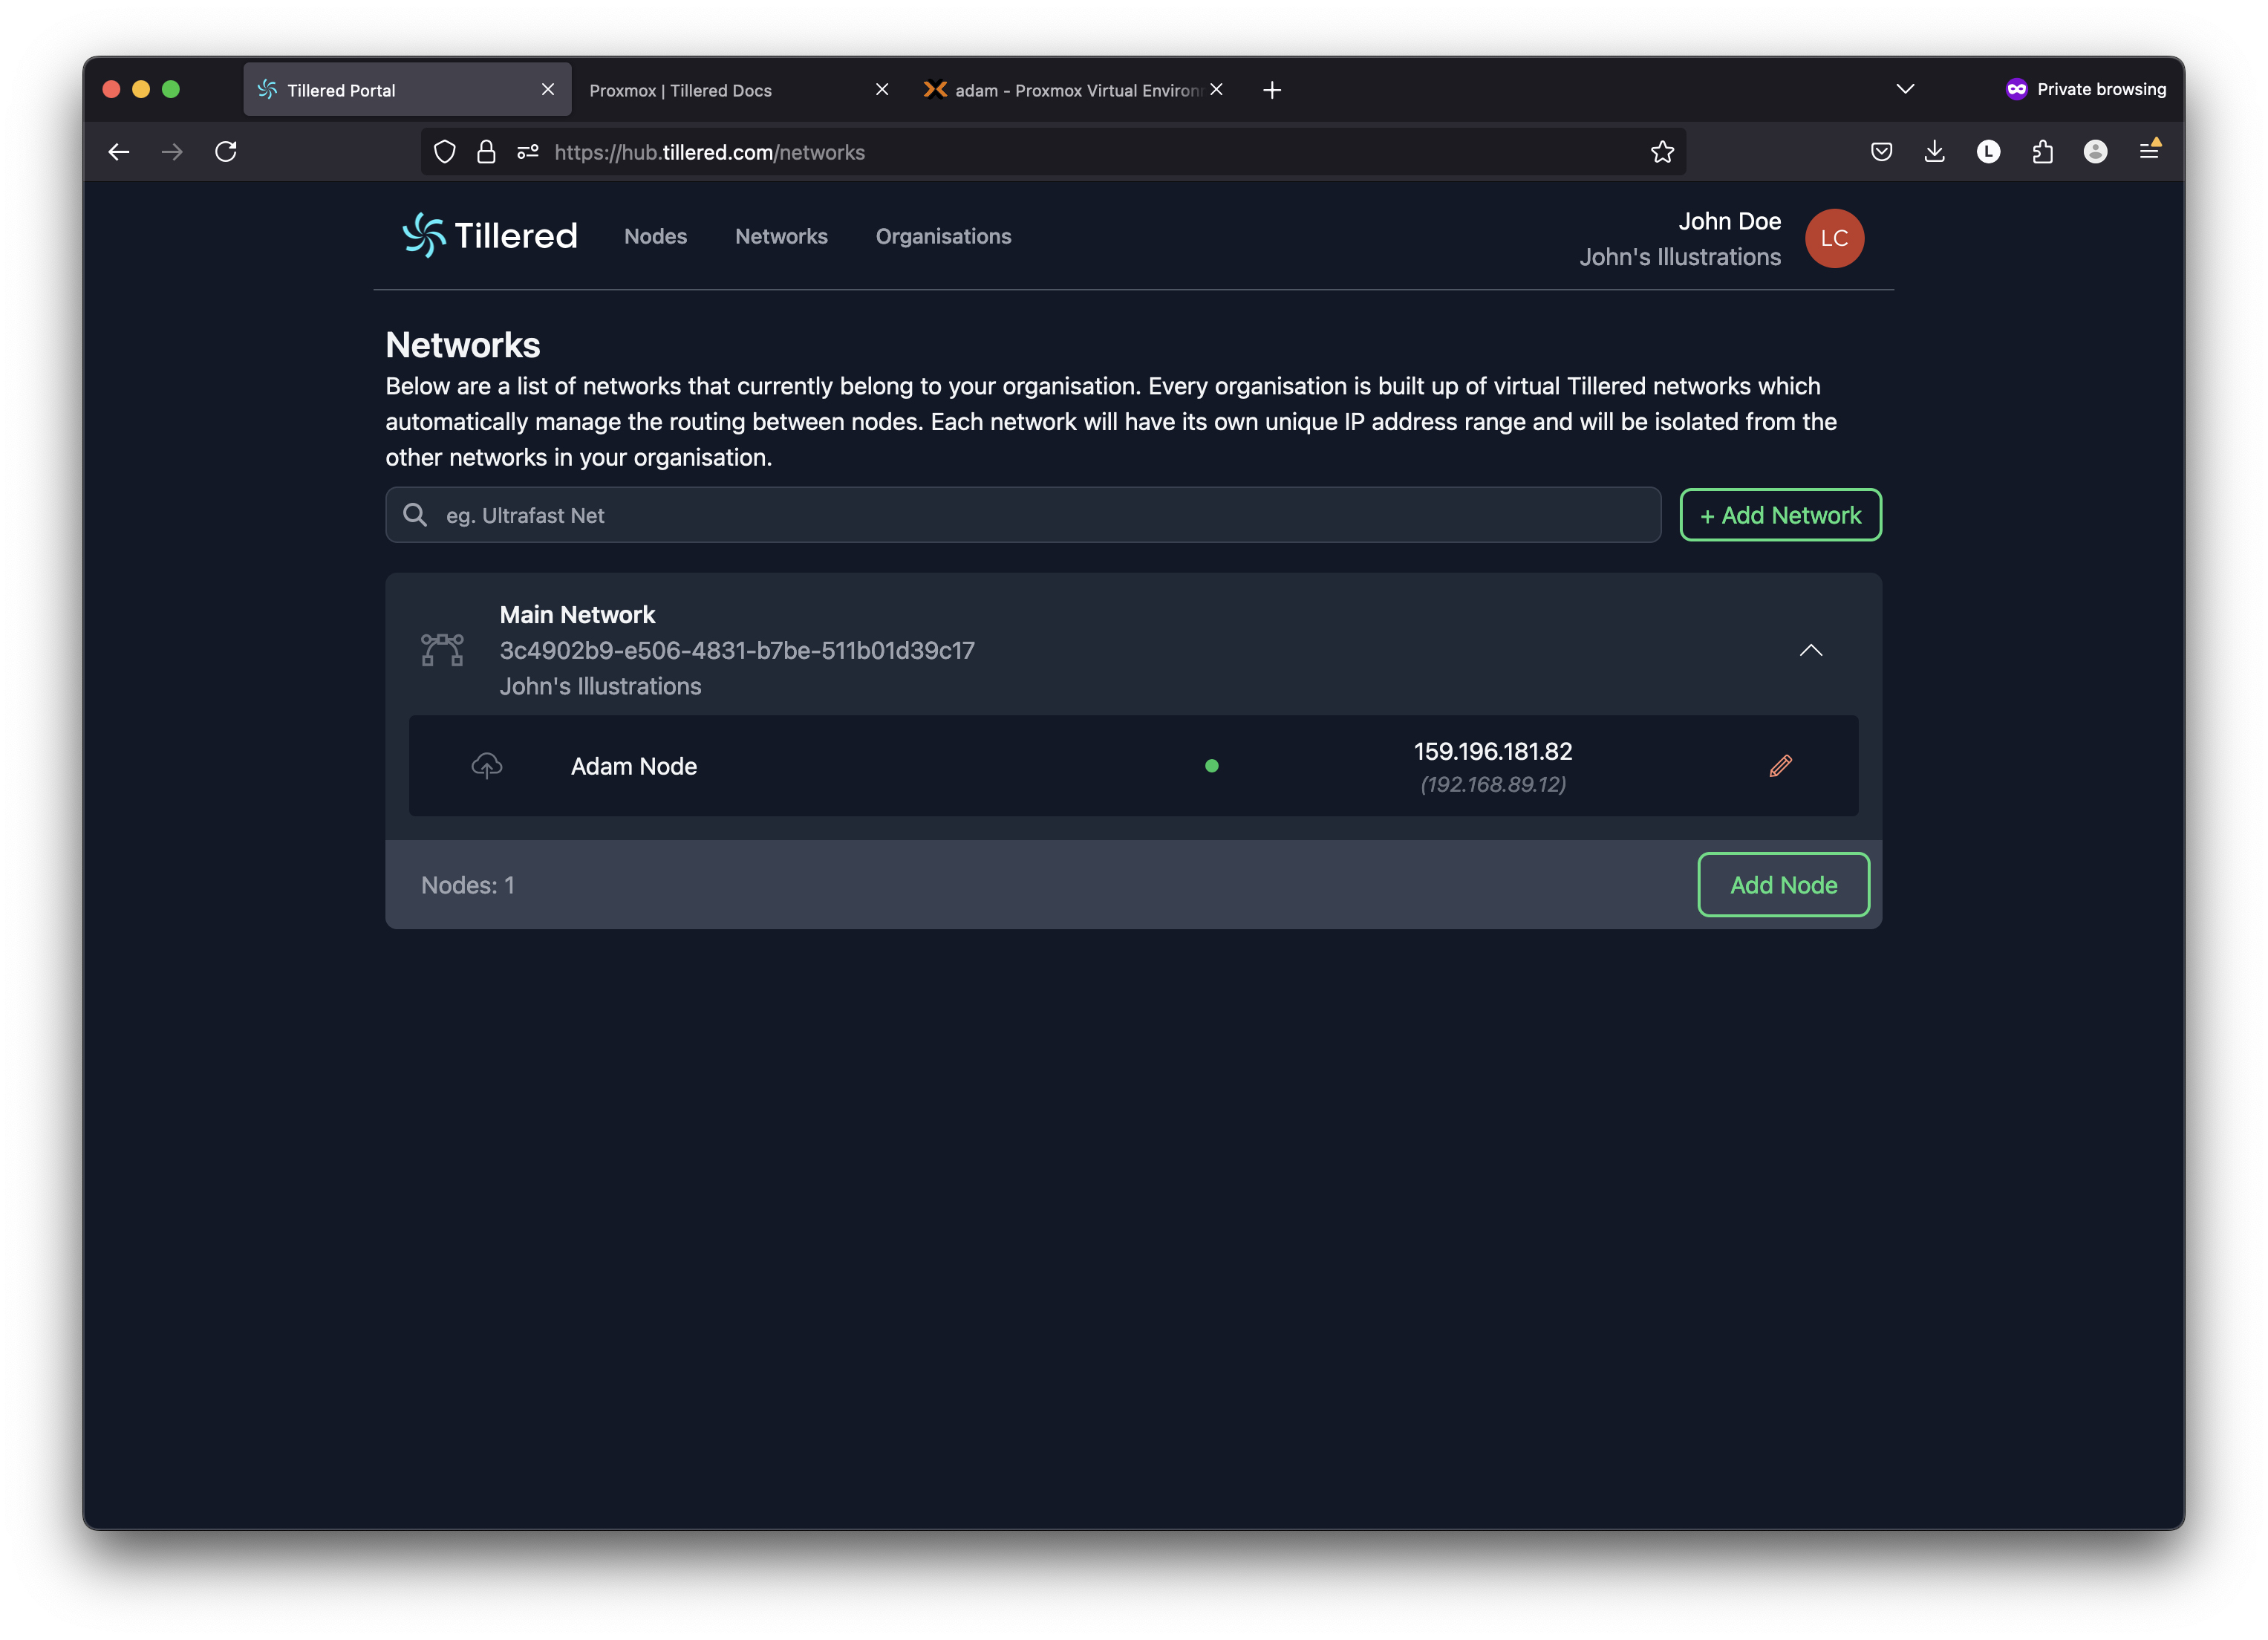
- Click Add Node again
- Fill in the details:
- Node Type:
Tillered Cloud Exit Node (CEN) - Network: Your created network (pre-filled).
- Node Platform:
Microsoft Azure Marketplace - Node Name: Add a descriptive name for the node
- Instance Identifier: The
Computer Namefrom Azure.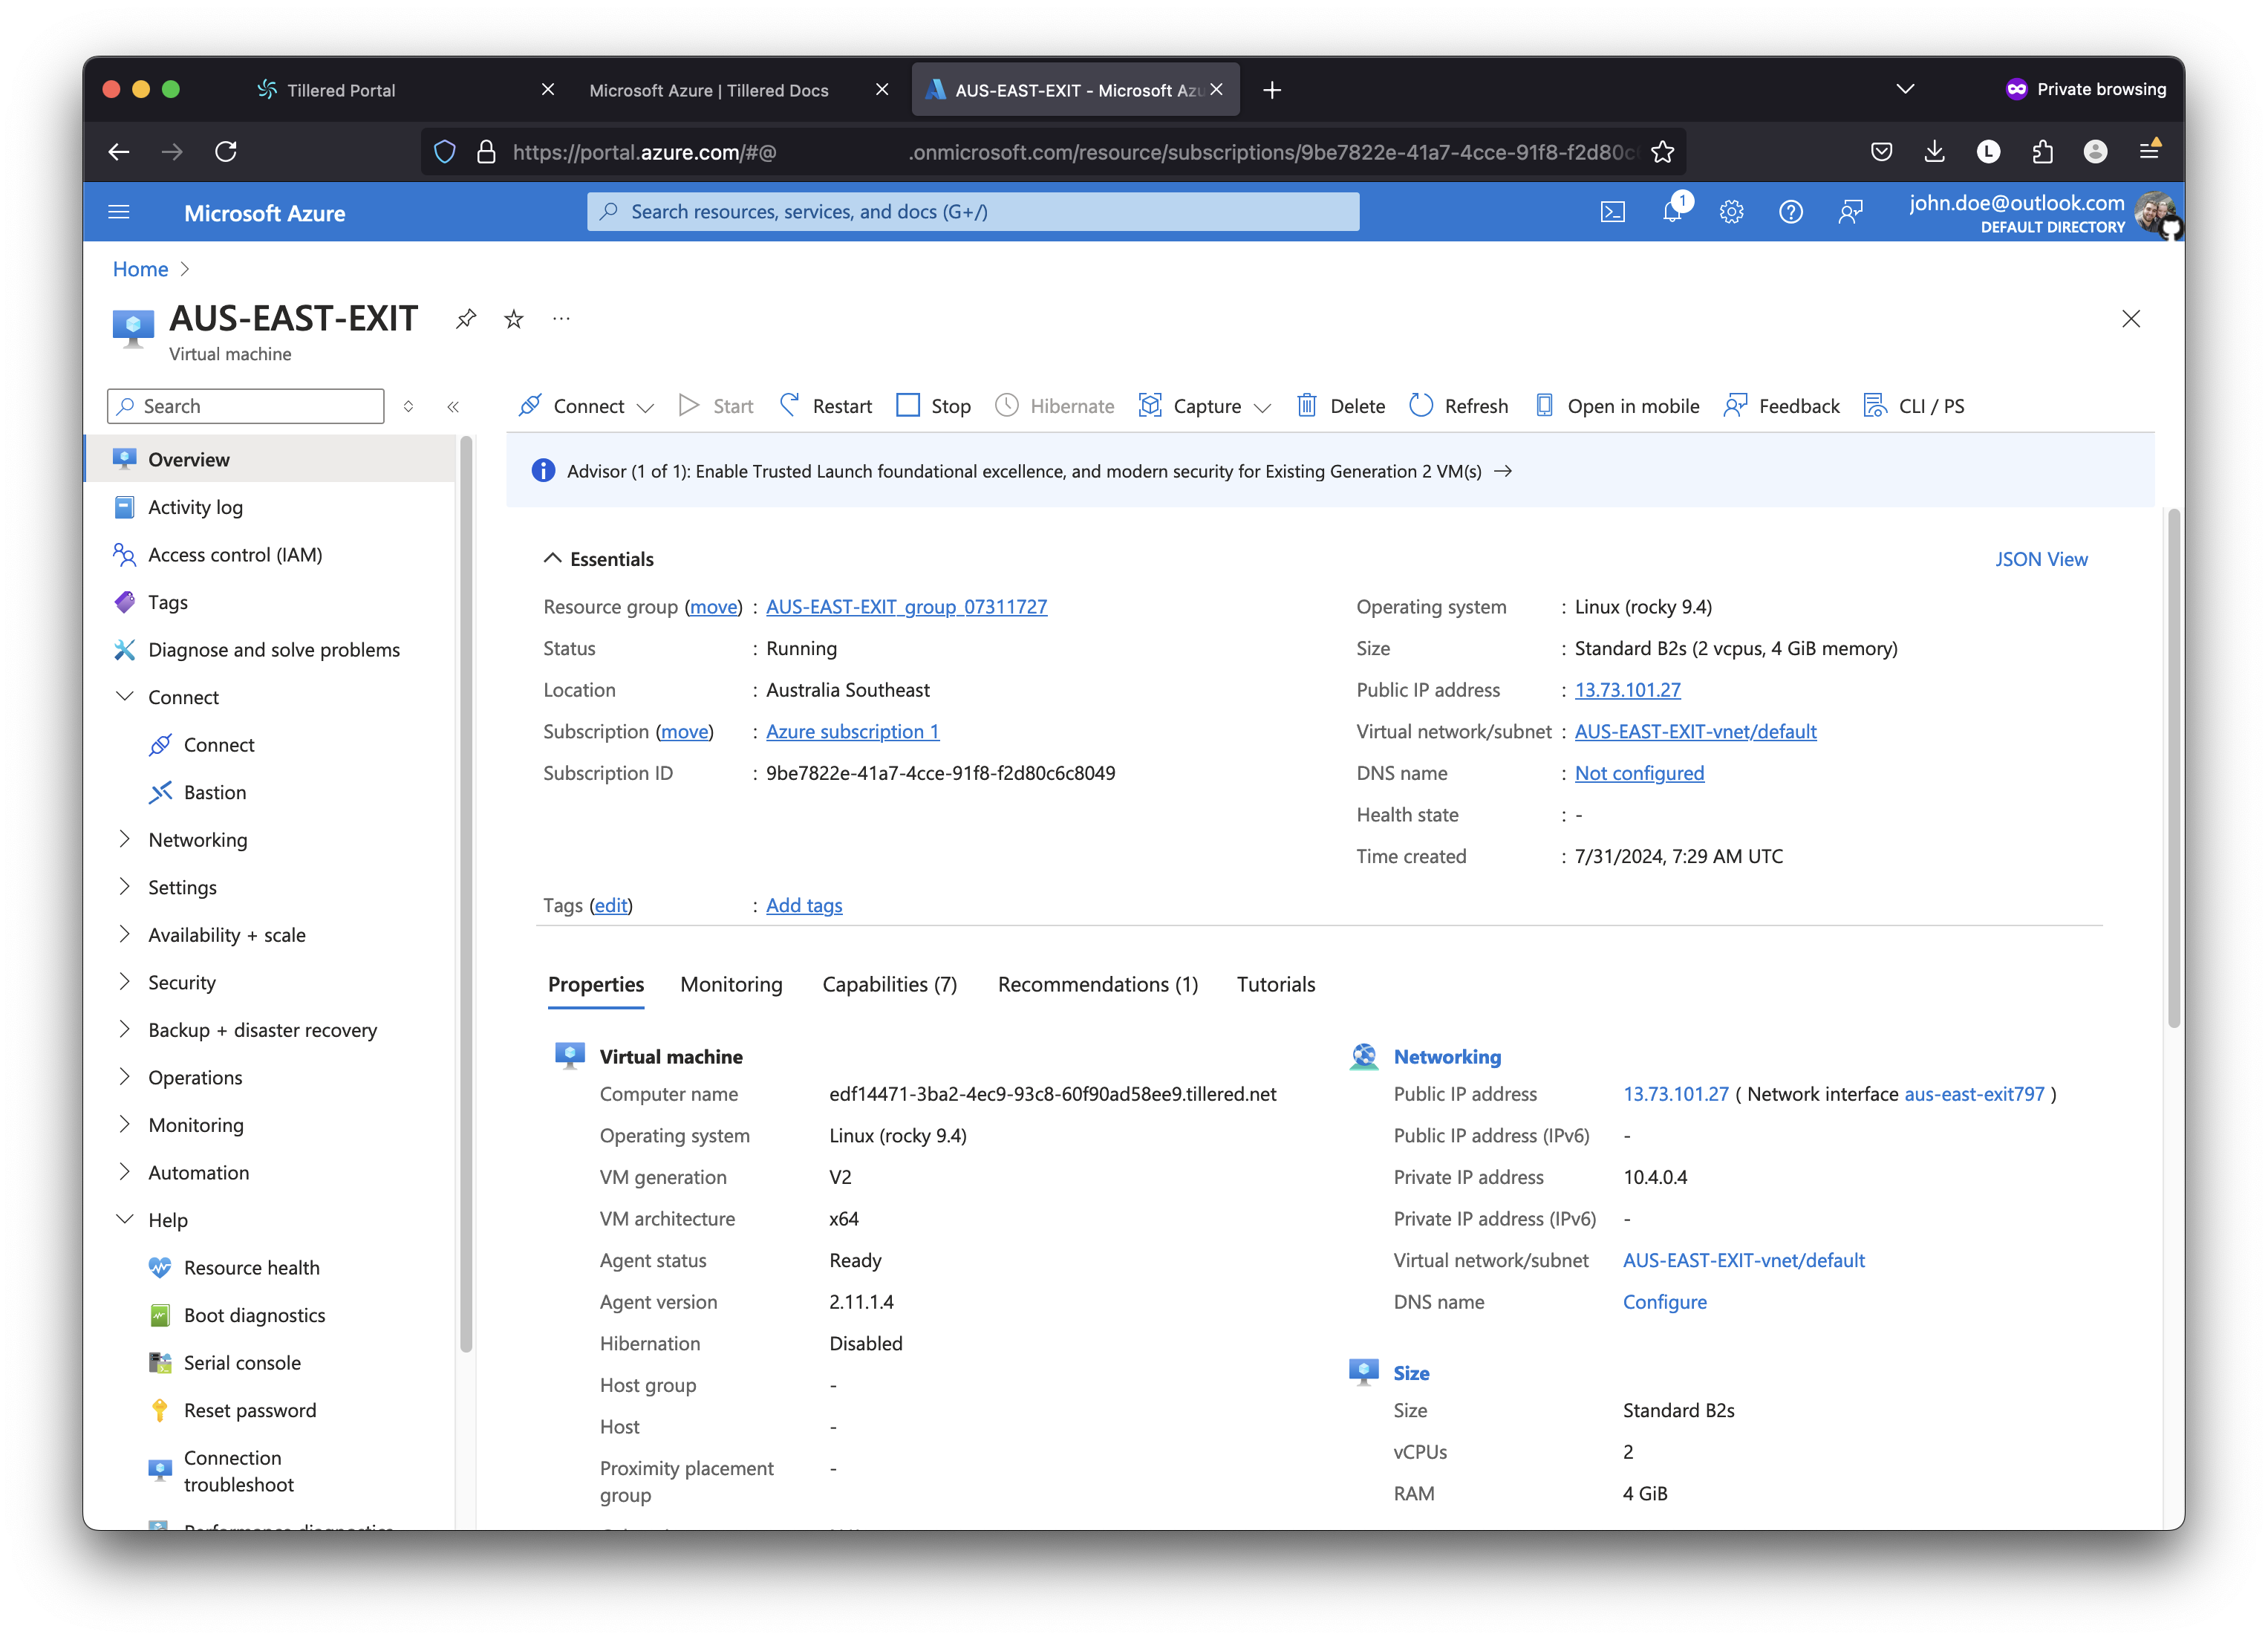
- Validation IP Address: The
Private IPfrom Azure.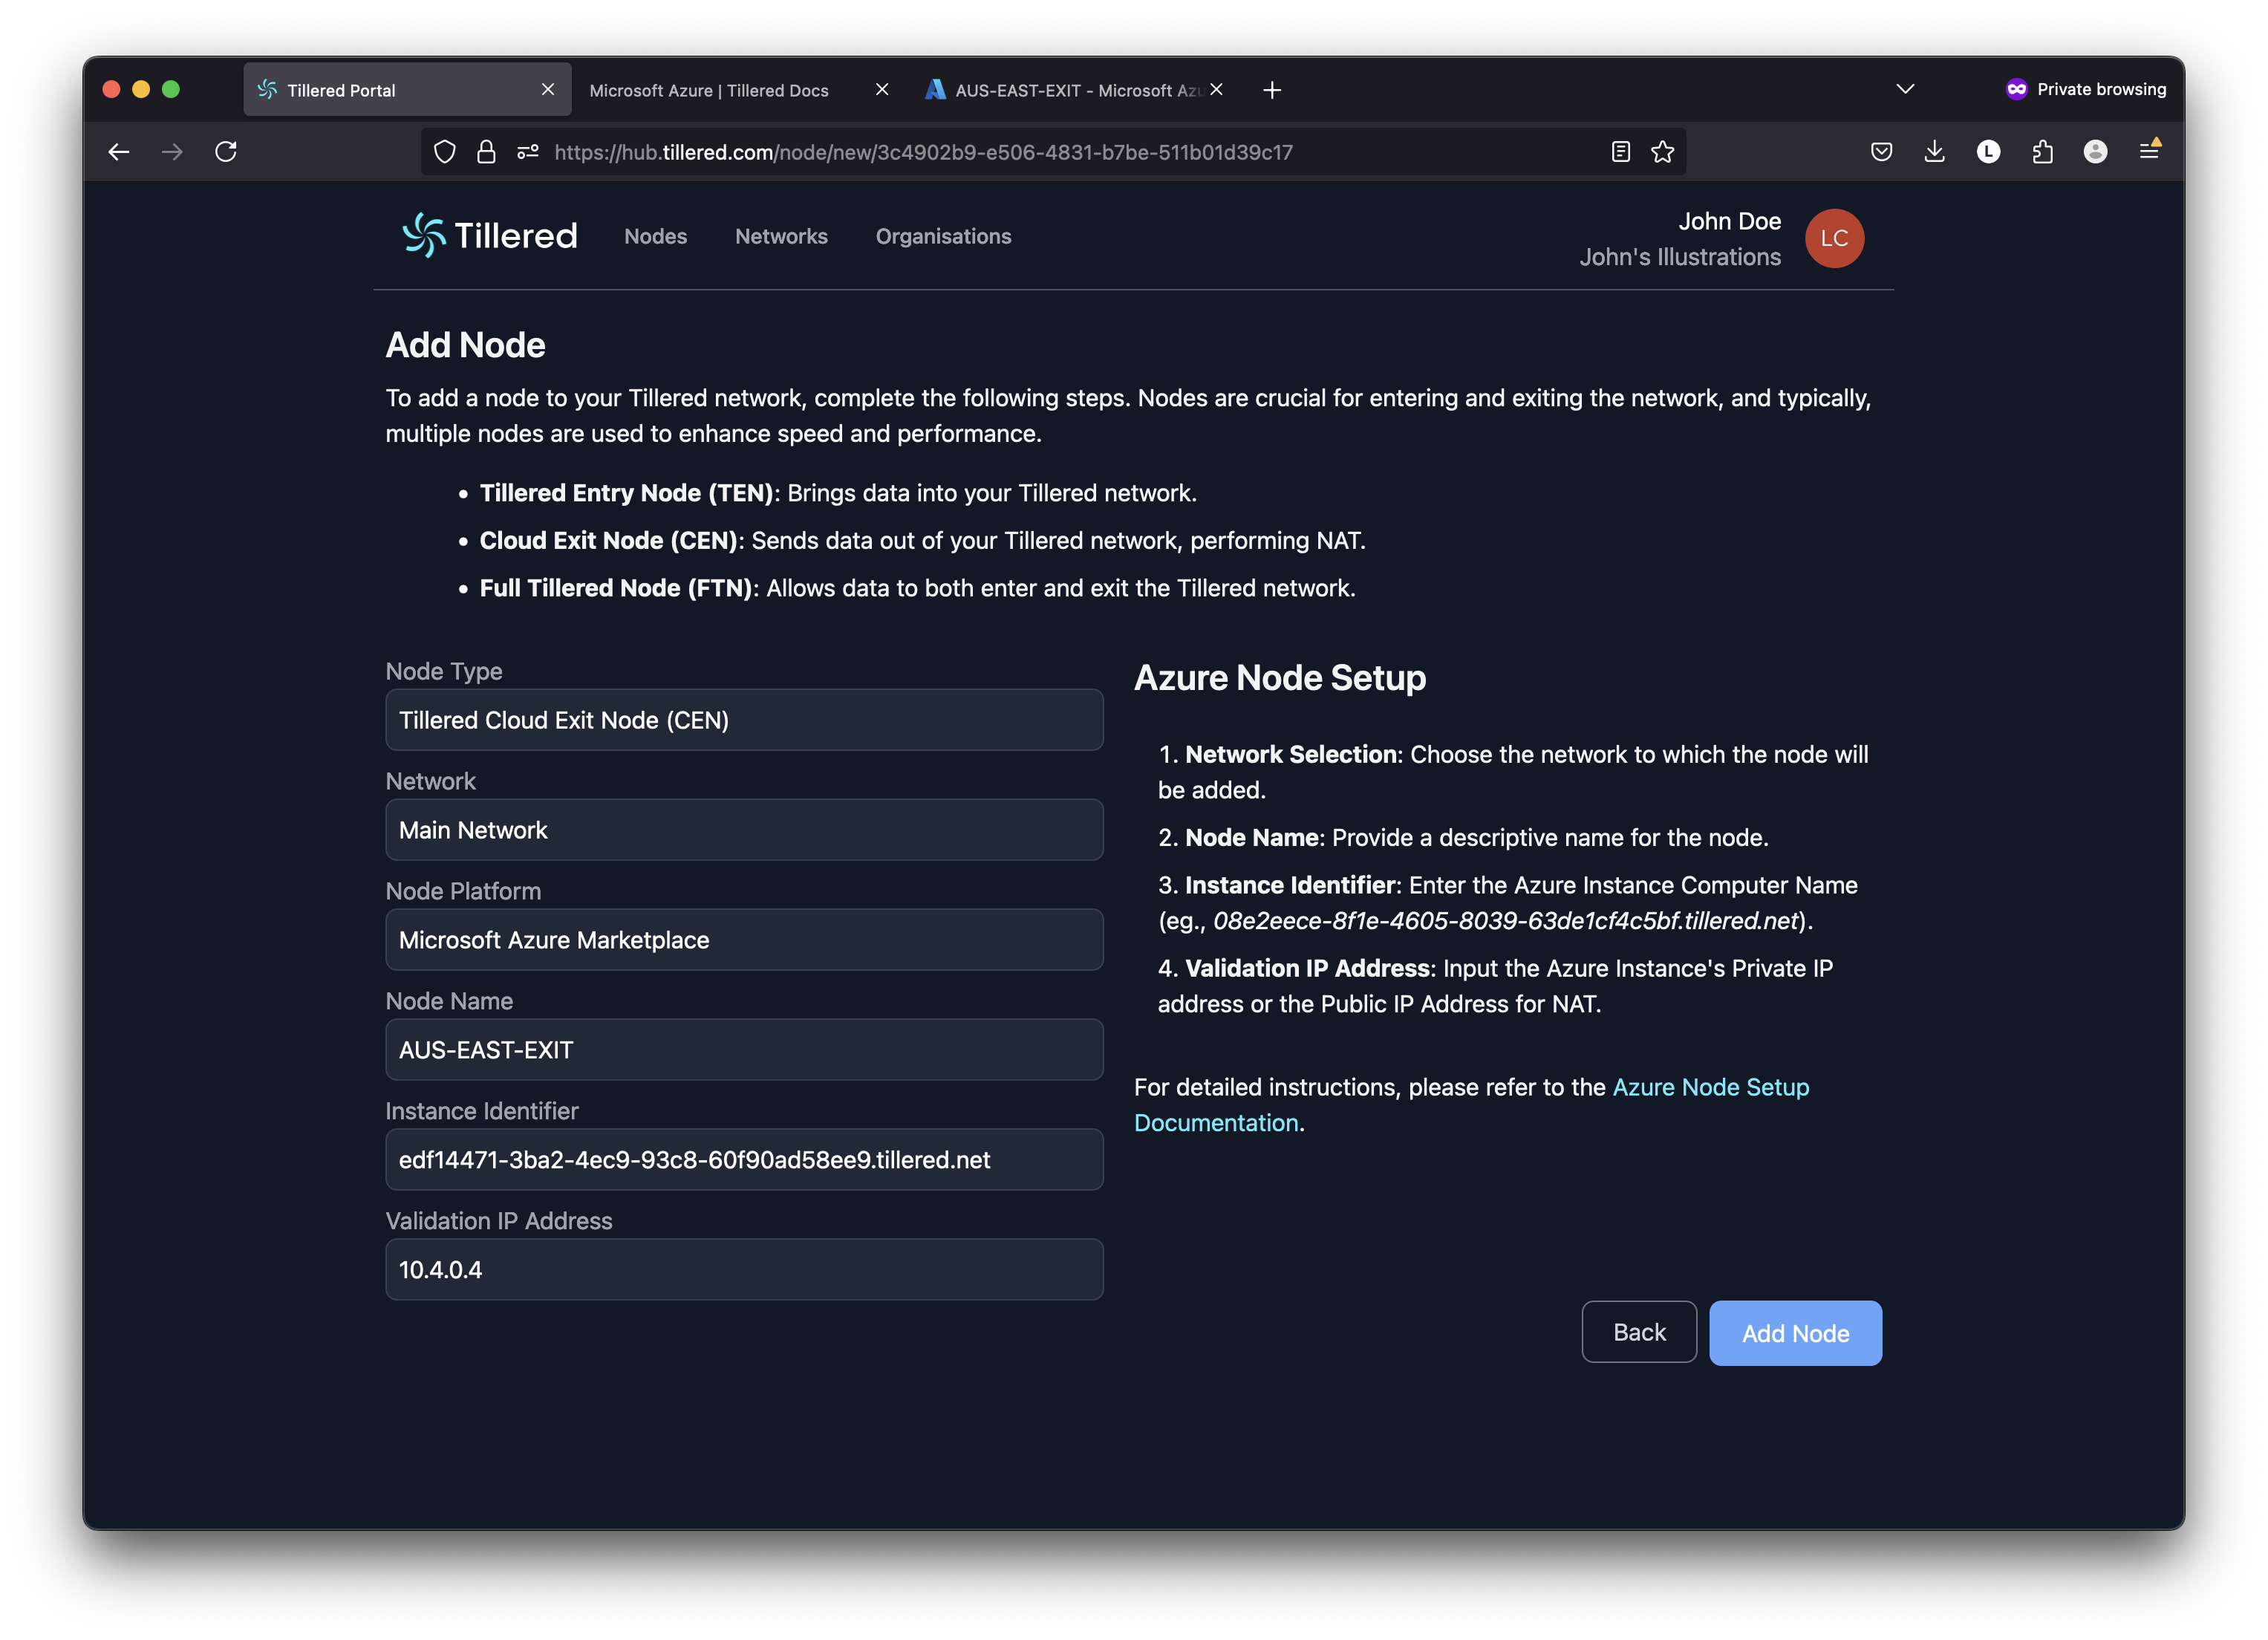
- Node Type:
- Click
Add Nodeand typeConfirmin the modal.
- In the network, click Add Node again.
- Wait for the Nodes to Provision: This may take up to 5 minutes. Wait for the node status dots to turn green.
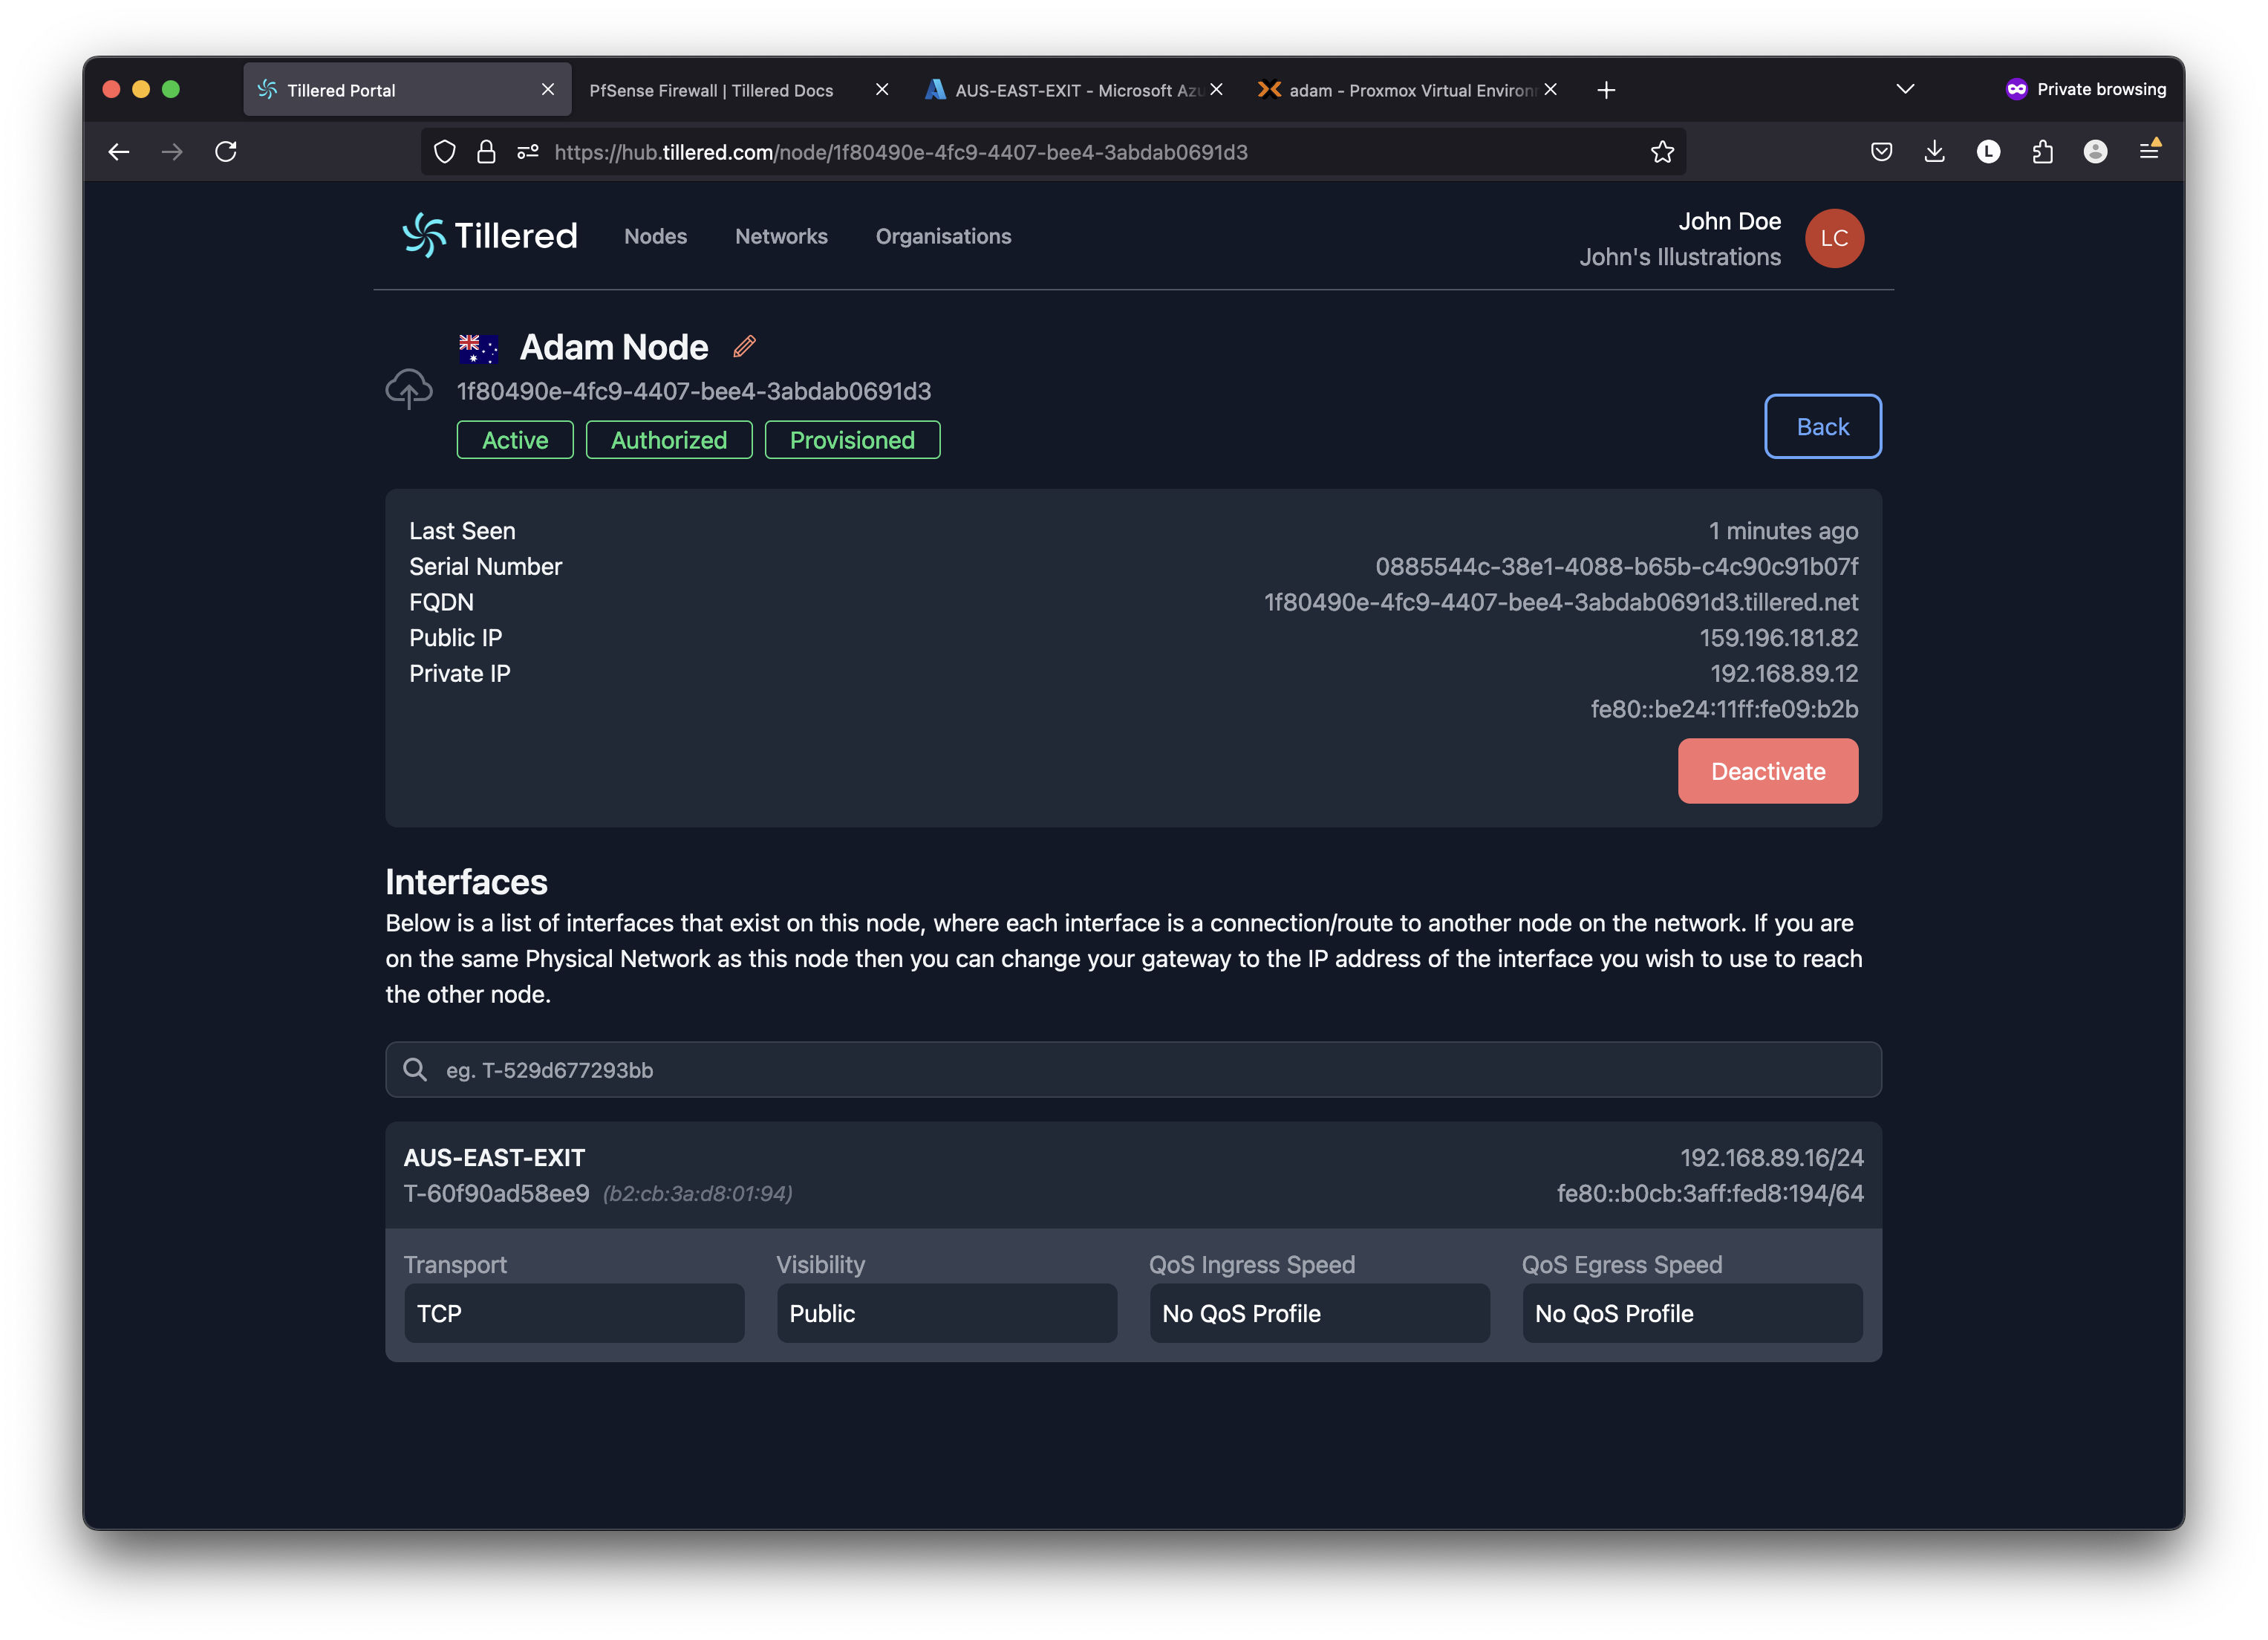
INFO
Note the interfaces on the Entry node. Each Exit node will have a corresponding interface with a different Private IP, which can be used as a gateway for policy routing traffic.
Step 5: Route Traffic via Entry Node
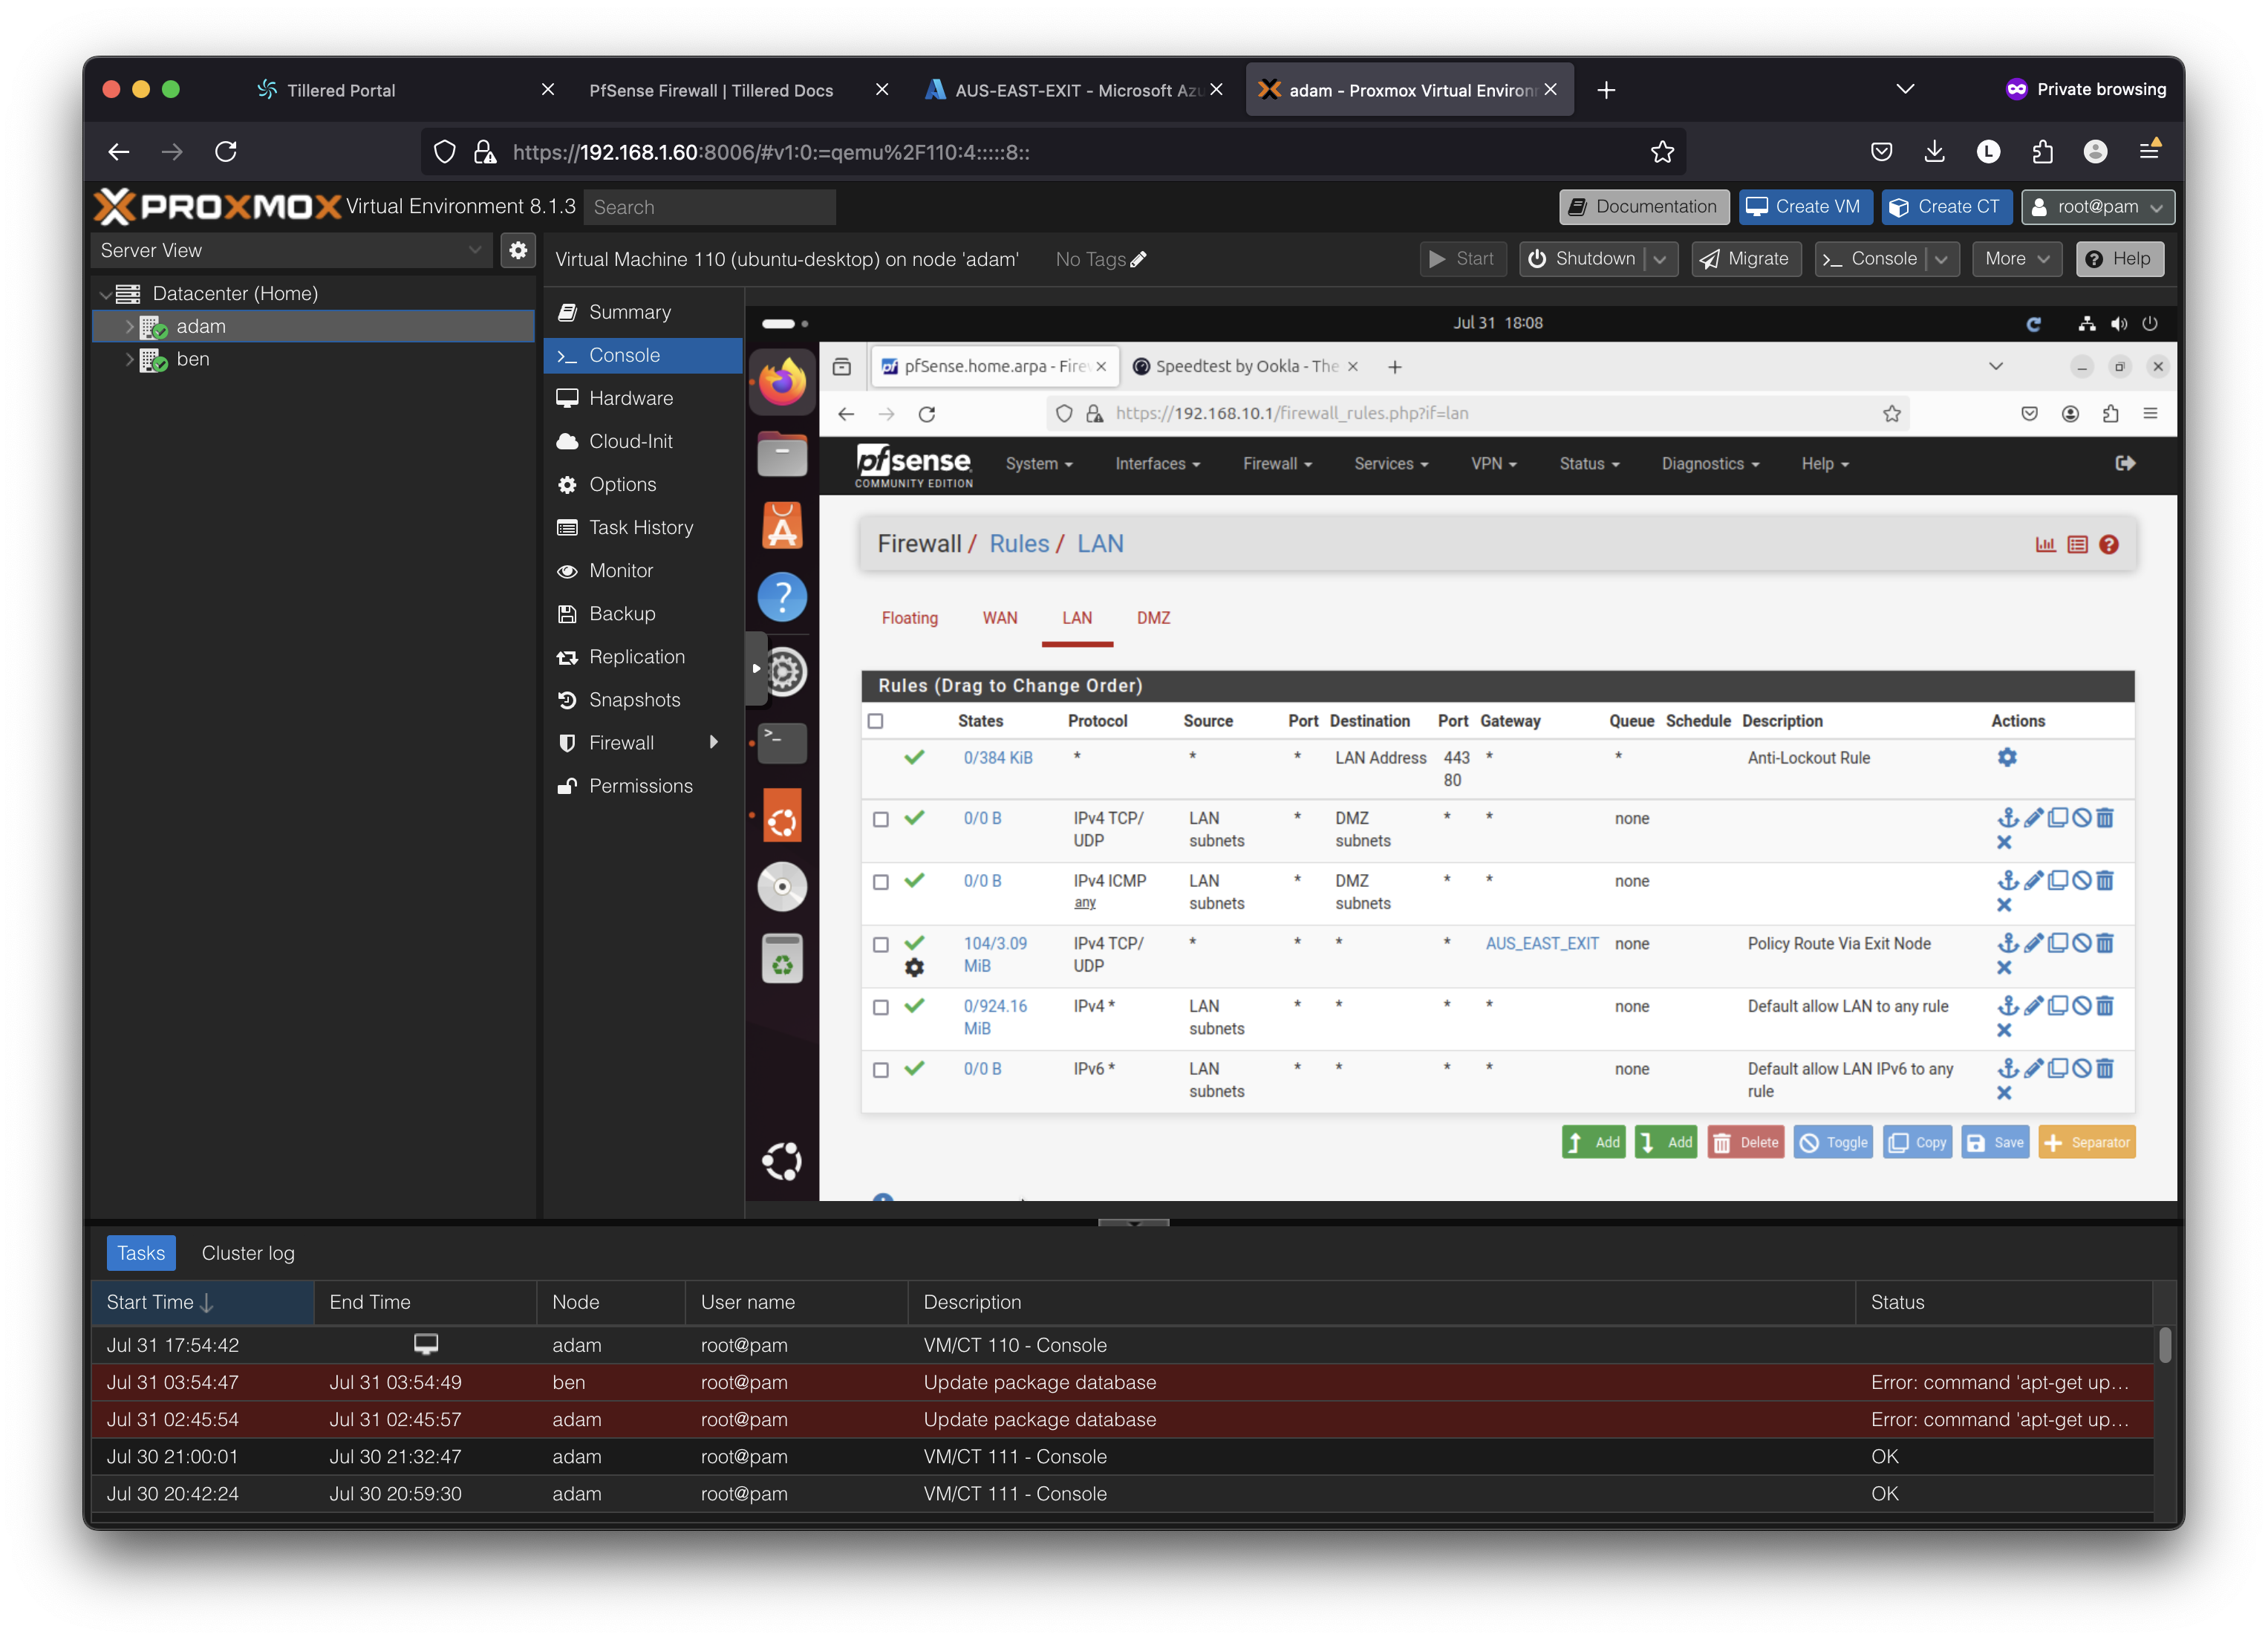
In this example, we route all LAN traffic through the Tillered Cloud Exit Node in Azure Southeast. Your use case may vary.
- Log into the pfSense Web Interface.
- Add New Gateway:
- Navigate to
System/Routing/Gateways. - Click Add.
- Fill in the details:
- Interface:
DMZor the interface where your Entry Node is. - Name: Name the gateway after the Exit Node.
- Gateway: The
Private IPof the interface for the Exit node in the Tillered Hub. - Create, Save, and Apply Settings.
- Interface:
- Navigate to
- Route Traffic:
- Naviate to
firewall/rules/LAN. - Add a new rule for
LAN - Set the details:
- Interface:
LAN - Address Family:
IPv4 - Protocol:
TCP/UDP - Source:
Any - Destination:
Any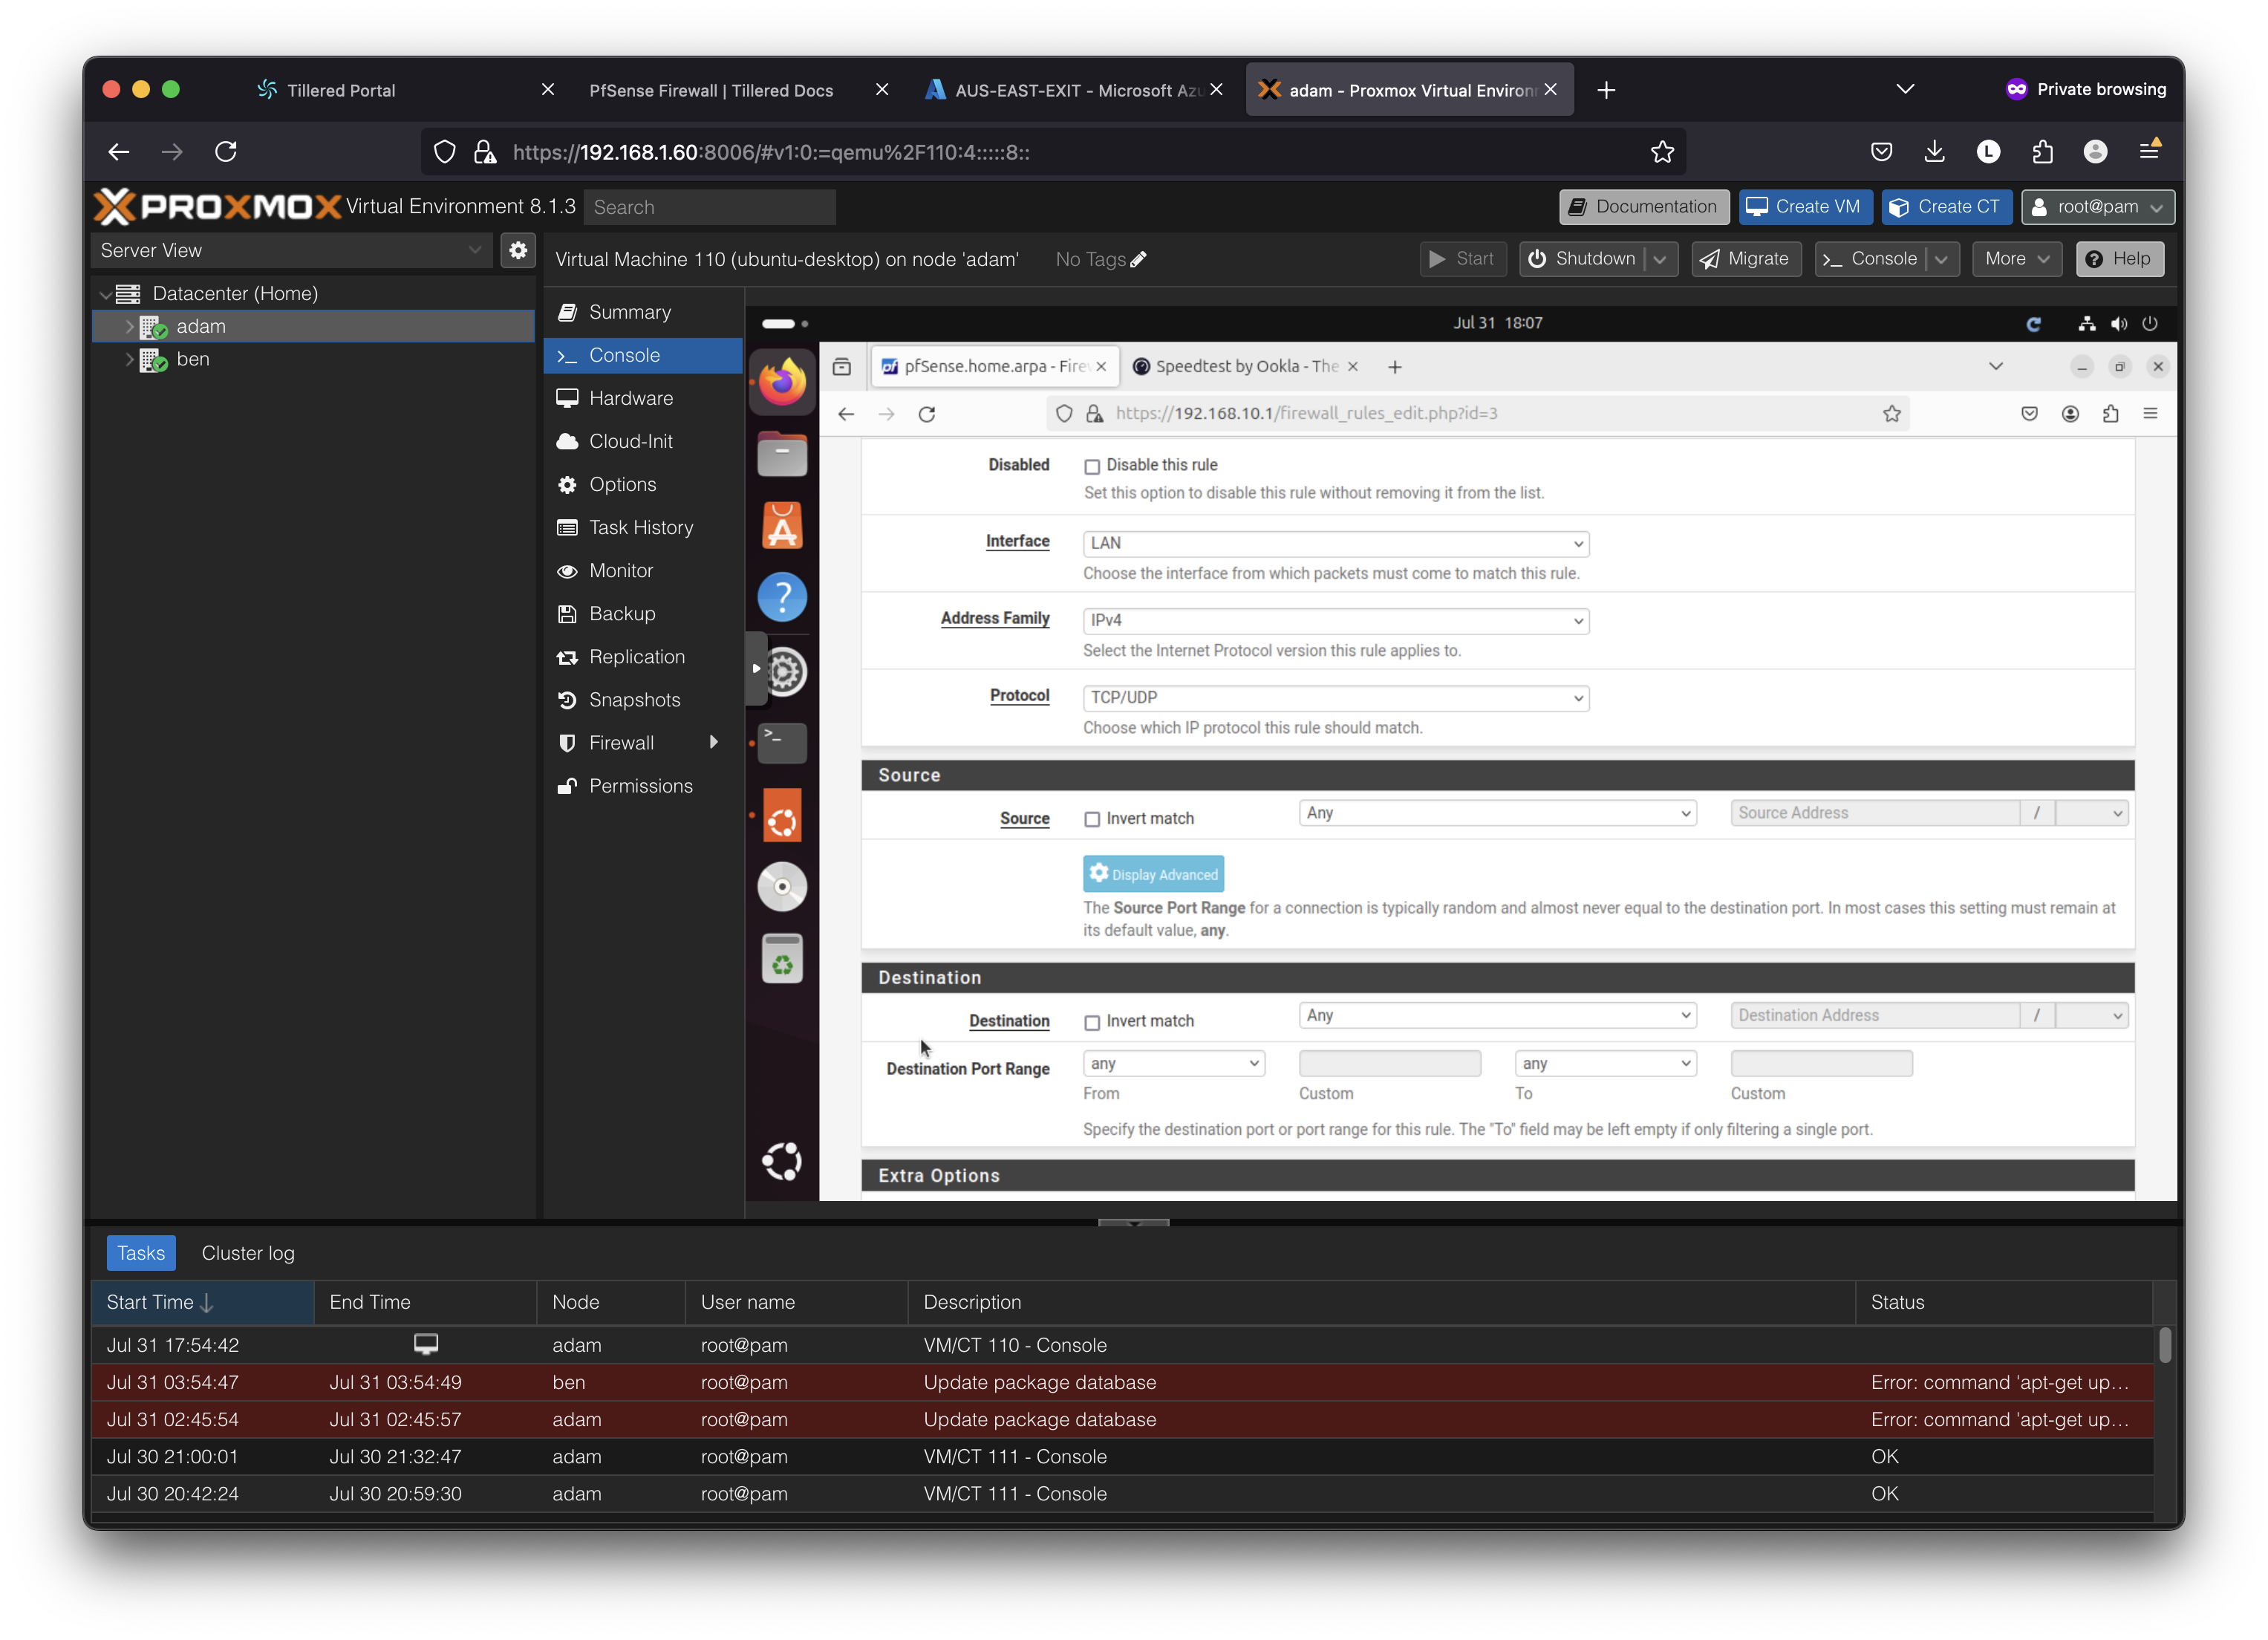
- Description: Describe the purpose of the route.
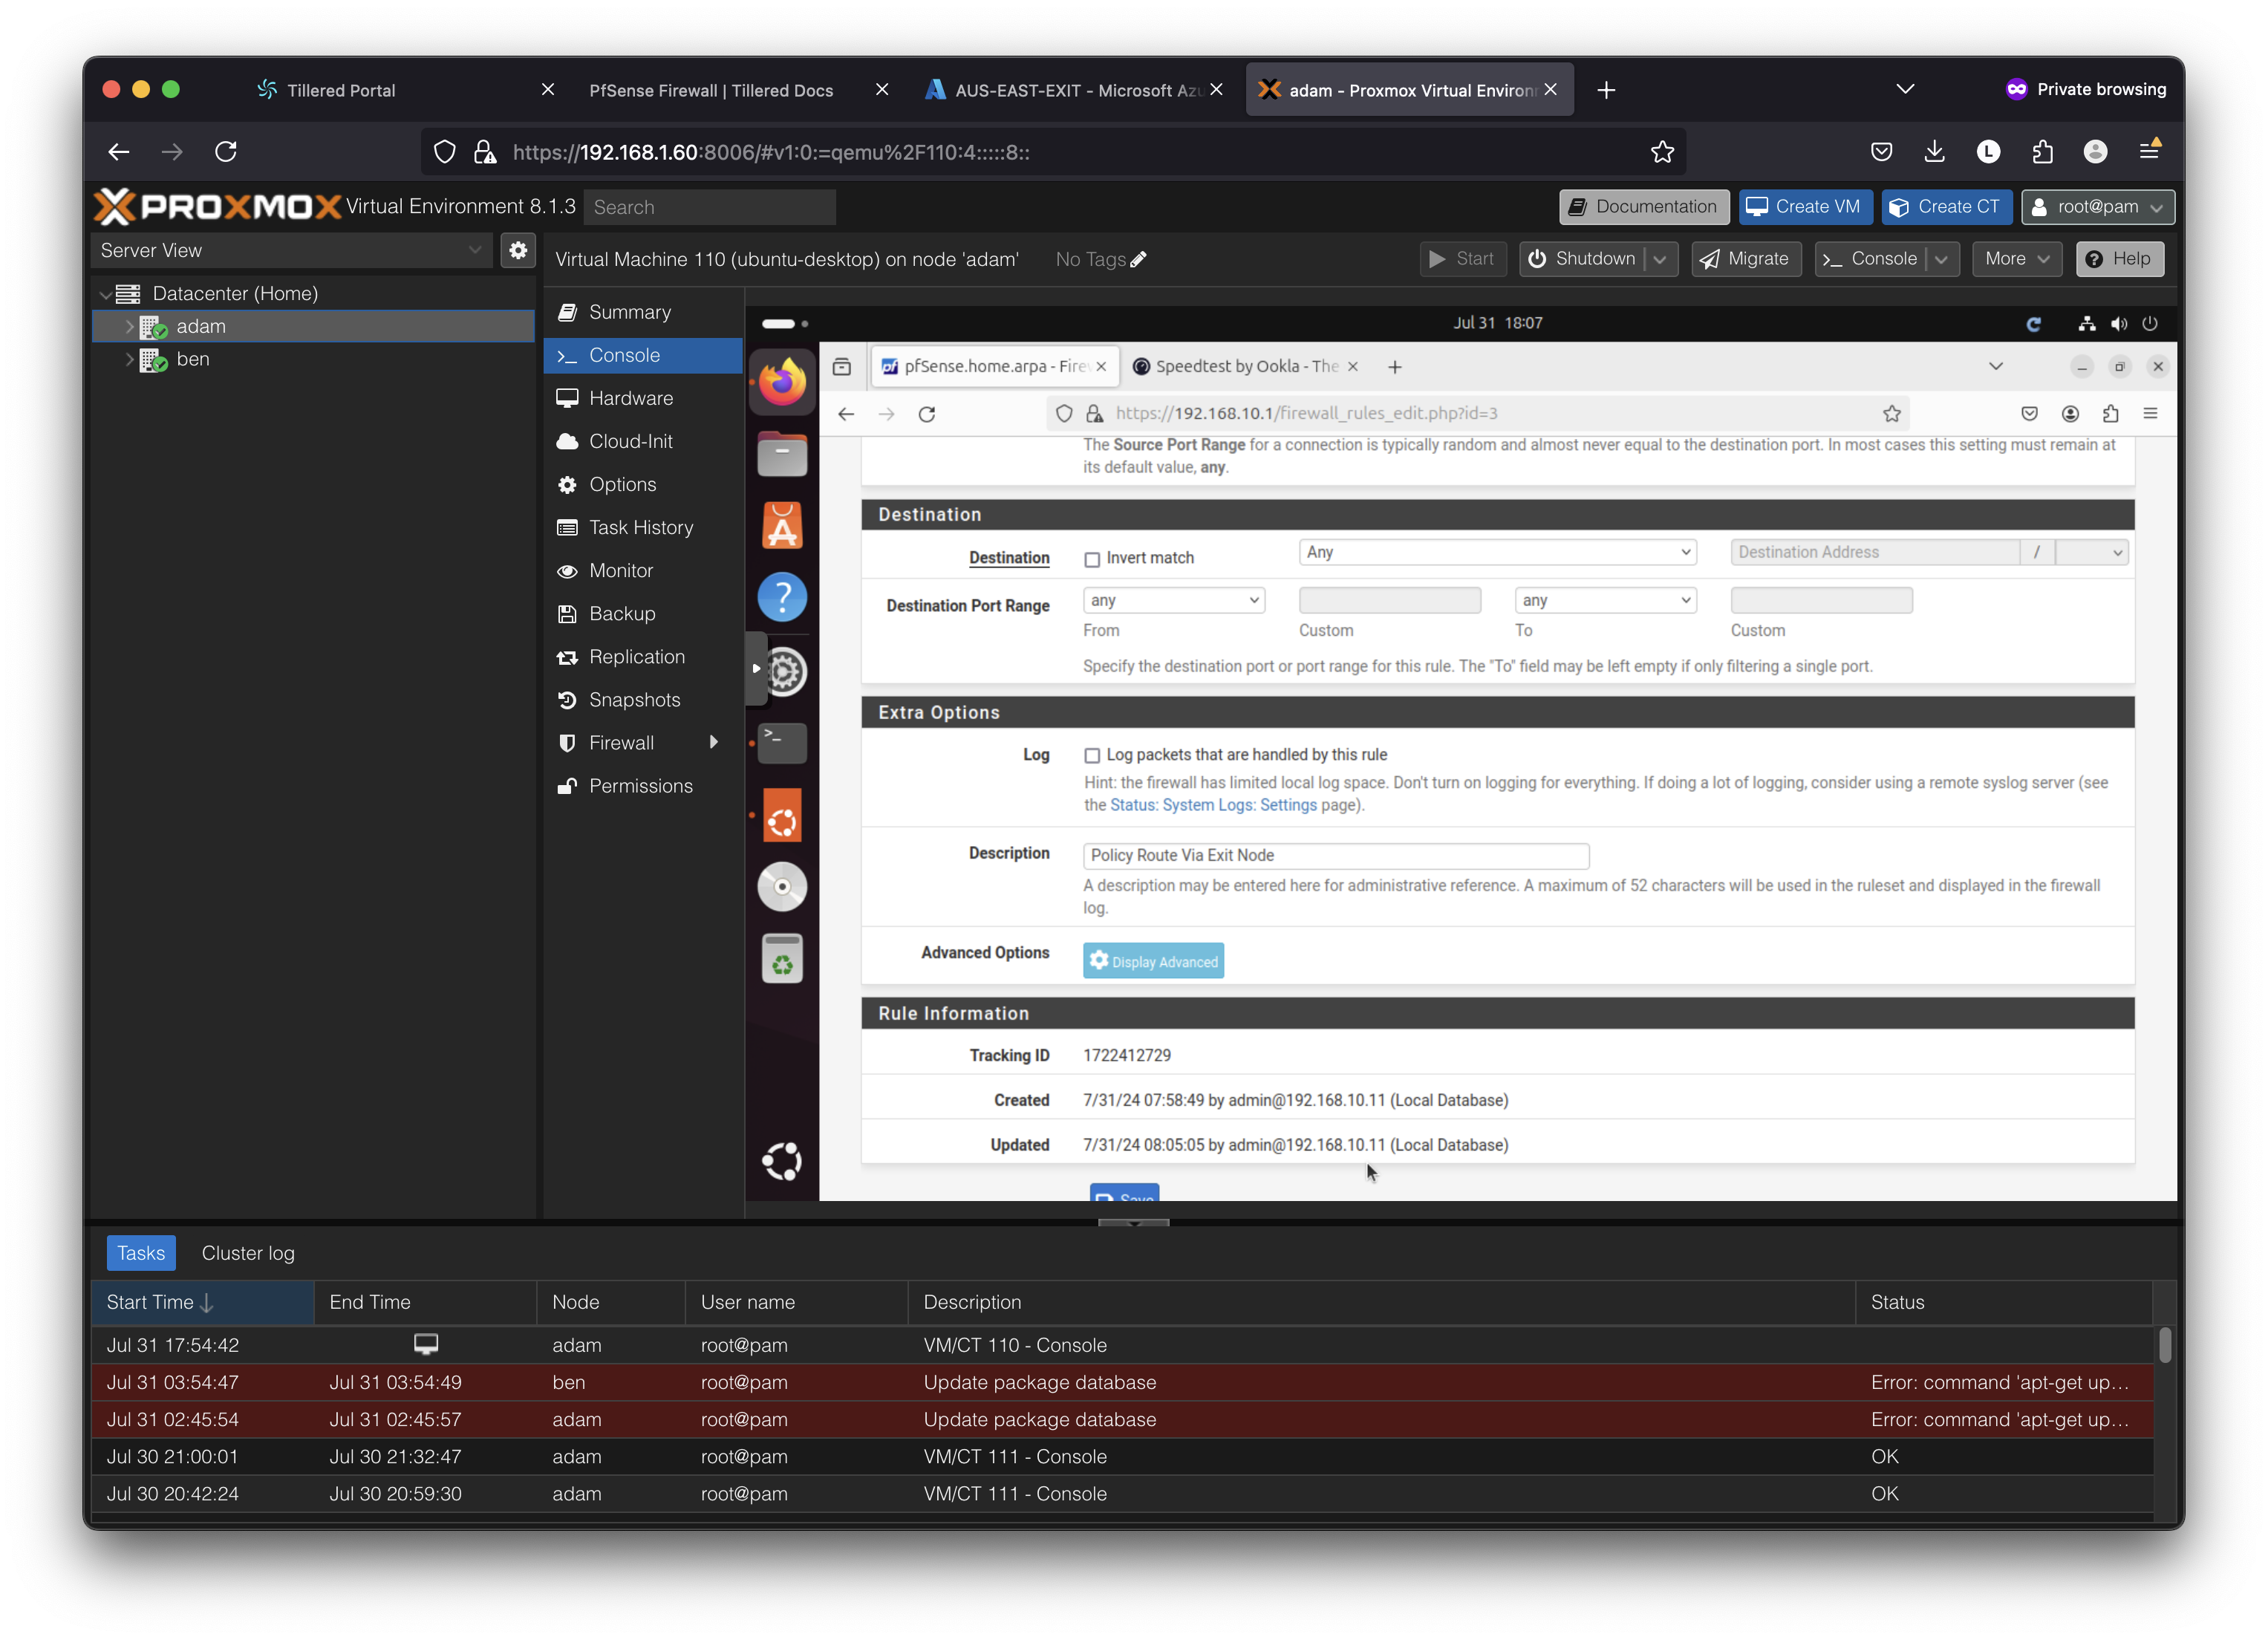
- Click
Display Advanced - Gateway: Select the gateway you created earlier.

- Interface:
- Naviate to
- Move Rule: Ensure the new rule is above the default LAN allow-all traffic rule so it takes precedence.
Conclusion
Congratulations! You've successfully set up a Tillered network, routing traffic through a Tillered Entry Node (TEN) on Proxmox and a Cloud Exit Node (CEN) on Azure, with a pfSense firewall managing the routing. This configuration will automatically optimises your network's data flow.
Next Steps:
- Expand Your Network: As your business grows, consider expanding your Tillered network. This could involve adding more Entry or Exit nodes, integrating new platforms, or optimising your current setup for higher traffic volumes.
- Stay Informed: Keep up with updates from Tillered, including new features as we are always trying to further improve our systems. Staying informed will help you maximize the benefits of your network setup.
By following this guide, you've laid the foundation for a highly efficient network infrastructure that can support your organisation's needs now and in the future. Whether you're optimising data transfers, ensuring secure communications, or preparing for scalable growth, Tillered provides the tools and flexibility necessary to succeed.
For further assistance or advanced configurations, don't hesitate to reach out to Tillered Support or consult the extensive Tillered documentation.