Appearance
Palo Alto Firewall
Palo Alto Networks' NextGen firewalls are renowned for their advanced threat prevention and granular application control capabilities. Integrating Palo Alto firewalls into your network infrastructure enables you to manage network traffic more securely and efficiently by applying precise policies to specific applications and users. This setup enhances network visibility, improves resource allocation, and strengthens overall network security. This guide will walk you through setting up traffic routing via a Tillered Entry Node on your network using Palo Alto.
Prerequisites
- Network Setup: Ensure that your Palo Alto firewall is properly connected to your network, with interfaces configured as needed (e.g.,
ethernet1/1,ethernet1/2, andethernet1/3). - Interface Configuration: Configure each interface as a Layer 3 interface and assign them to appropriate zones (e.g.,
lan,dmz).
Configuring Policy-Based Forwarding (PBF)
Policy-Based Forwarding (PBF) allows you to override the default routing table and direct traffic based on specific policies.
Step 1: Create a PBF Rule
Access the Firewall Interface: Log into your Palo Alto firewall and navigate to Policies > Policy Based Forwarding.
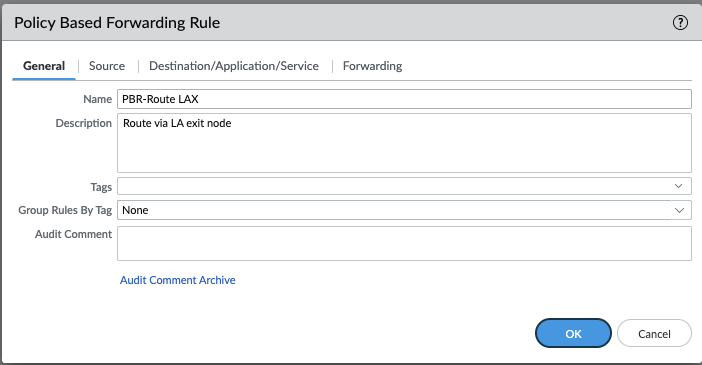
Add a PBF Rule: Click Add and define a descriptive name for your rule in the General tab.

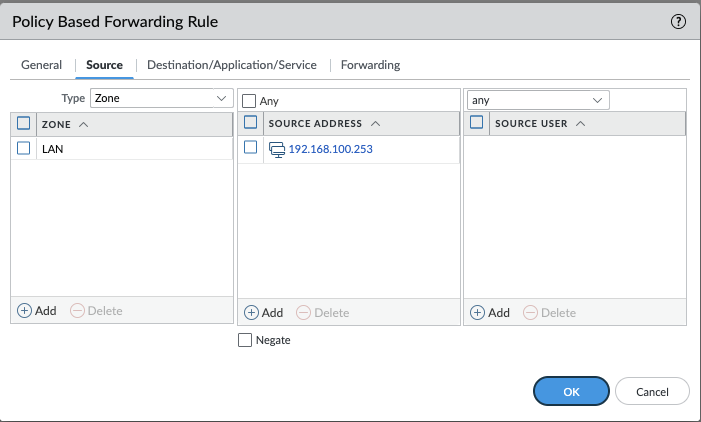
Configure Source:
- Select the Source tab.
- Choose the source zone or interface (e.g.,
lanzone). - Optionally, specify source addresses (e.g.,
192.168.100.253).

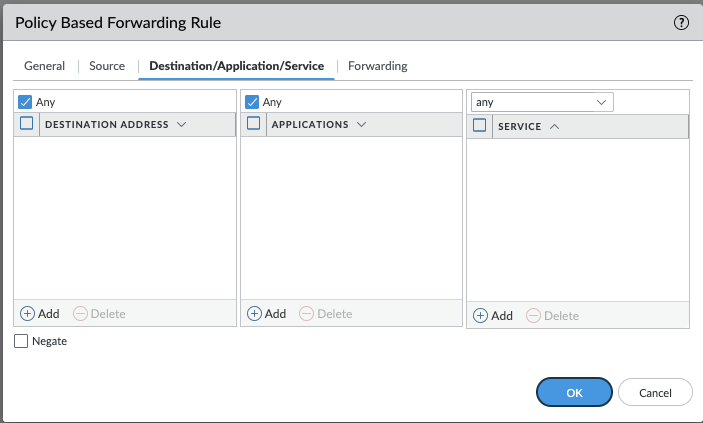
Define Destination, Application, and Service:
- Switch to the Destination/Application/Service tab to specify destination addresses, applications, and services.
- For simplicity, service objects (Layer 4 ports) are recommended over application-specific rules.

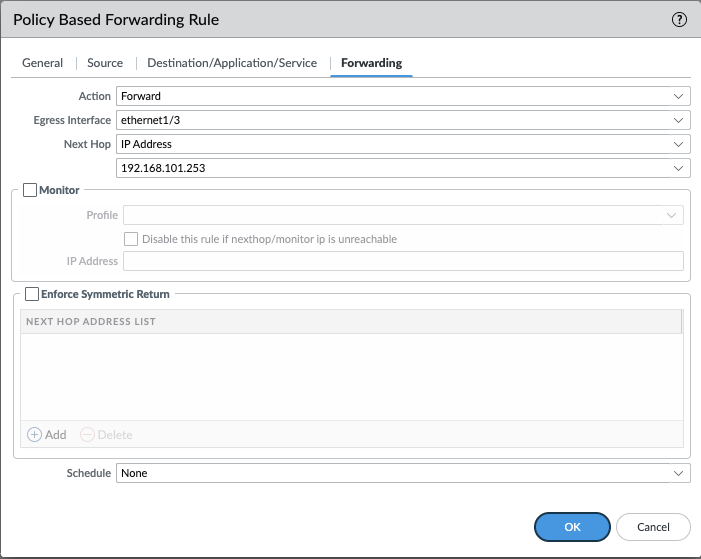
Set Forwarding Parameters:
- Under the Forwarding tab, set the Action to Forward.
- Choose the Egress Interface (for example,
ethernet1/3) and enter the Tillered Entry Node Tunnel Interface as the Next Hop IP Address (for example,192.168.101.253).

- Review the overall PBF rule settings:

Step 2: Configure Security and NAT Policies
- Create Security Policy: Navigate to Policies > Security and create a new security policy to allow traffic from the source to the destination zones.

- Create NAT Policy: Navigate to Policies > NAT and create a new NAT policy to translate private IP addresses to public IP addresses if necessary.

Step 3: Commit Changes
- Once all policies are configured, click Commit in the top right corner to apply and save your configuration.
Interface Configuration
Ensure that your interfaces are properly configured:
- ethernet1/1: Typically used for the WAN or untrusted zone.
- ethernet1/2: Often used for the LAN or trusted zone.
- ethernet1/3: Can be used for additional network segments or as needed.
Configure each interface as a Layer 3 interface and assign them to appropriate zones:
yaml
Interface: ethernet1/1
  Type: Layer3
  Zone: WAN (untrust)

Interface: ethernet1/2
  Type: Layer3
  Zone: LAN (trust)

Interface: ethernet1/3
  Type: Layer3
  Zone: DMZ (as required)
By following these steps, your Palo Alto and Tillered configuration will be both efficient and secure, ensuring optimal traffic management and enhanced network performance.