Appearance
Equinix Metal
Equinix Metal is a robust, on-demand bare metal cloud platform. This guide will help you set up a Tillered node using Equinix Metal, with specific instructions for choosing the appropriate server size and operating system.
NOTE
This setup is intended for use as a CEN (Cloud Exit Node).
Prerequisites
- Ensure you have an Equinix Metal account and access to the Equinix Metal Console.
- Create an account on the Tillered Hub.
Setting Up a Tillered Node
Log in to the Equinix Metal Console
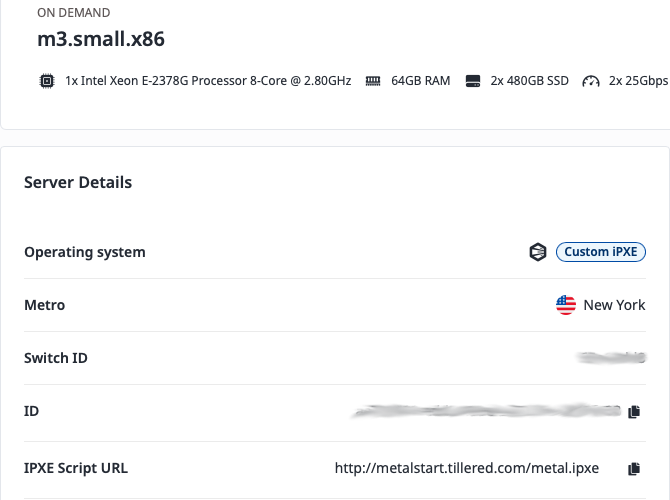
Choose a Server Size:
- We recommend selecting the
m3.small.x86size for the best price-to-performance ratio.
- We recommend selecting the
Choose Your Operating System:
- Select
custom_ipxefrom the operating system options. - In the iPXE script field, input the following URL:
- Select
http://metalstart.tillered.com/metal.ipxe1

IMPORTANT
Use http and not https due to a bug that causes iPXE to fail on long HTTPS signatures.
- Deploy the Server:
- Once the script is entered, click the Deploy button and wait for the node to be set up.
- It may take a few minutes for the node to become available.
Adding the Node to Your Tillered Account
Log in to the Equinix Metal Portal
- Navigate to the Manage Bare Metal Servers section.
- Select the newly deployed node.
Retrieve the Node Details:
- Locate the ID of the node; this will serve as the Instance ID in Tillered.
- Locate the IP Address of the node; this will be the Instance IP.

- Add the Node to Tillered Hub:
- Log in to the Tillered Hub.
- If you don't have a network set up, create a new network. Otherwise, click Add Node.
- Select CEN (Cloud Exit Node) as the Node Type.
- Configure the Node:
- Set the Instance Identifier to the UUID you retrieved from the Equinix Metal console.
- Set the Validation IP Address to the node's IP address.
- Click Add Node and confirm.
Your Equinix Metal Tillered node will configure itself to the virtual Tillered network. Once the node shows as "Provisioned" in the Tillered Hub, it is ready to be used.